Soft portraits on sharp modern cameras are frustrating, especially when you know your focus point was right on the eye. A tiny mix of motion blur, shutter vibration, and dull light can rob your images of bite even before you open them in Lightroom.
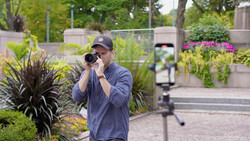
Coming to you from James Reader, this practical video starts with the most common culprit of soft images: using a shutter speed that is too slow for the situation. Reader walks through a simple baseline rule for static scenes, matching shutter speed to focal length, so with a 35mm prime, you try not to drop below 1/35 s. As soon as a person enters the frame, that rule goes away and he recommends treating 1/200 s as the bare minimum, then pushing to 1/1,000 s and beyond for action and wildlife. He does not just give numbers; he shows how to quickly review the back of the camera, look specifically for micro blur, and nudge the shutter faster until it disappears. You end up with a clear process instead of guessing every time you step into changing light.
Reader then tackles a problem many people with higher-resolution bodies bump into without realizing it: shutter shock. When he moved from the Canon EOS R6 to the Canon EOS R5, his first portrait session actually looked softer, not sharper, even with focus nailed. The video breaks down how the mechanical shutter can add a tiny vibration at certain speeds, which higher-megapixel sensors and dense pixels pick up more easily. Reader also points out that high-resolution APS-C bodies like the Canon EOS R7 can exaggerate the same issue because everything is squeezed into a smaller sensor area. His workaround is simple but not widely used: increase shutter speed more than you think you need, and switch to electronic first curtain shutter at moderate speeds, then back to fully mechanical at very fast speeds where vibration is no longer the weak link.
From there, the video moves into focus behavior and technique, where a lot of people rely on clever autofocus modes but still introduce softness with the way they handle the camera. Reader keeps his setup straightforward: continuous autofocus with subject detection set to people for moving subjects, eye detection over the whole frame, and back-button focus so the shutter press does not shake the camera. He contrasts that with a different setup for static work on a tripod, using single shot autofocus with a small focus area and focus priority so the camera will not fire until it is actually locked. There is also a practical reminder to use the viewfinder whenever you can, so the camera rests on your face with three contact points instead of floating in front of you at slow shutter speeds. The way he ties these settings to real situations like weddings, landscapes, and product shots makes it easy to map them onto your own work without copying every menu choice.
Light, exposure, and sharpening in post all come together later in the video, and that section is where you start to see why some portraits feel razor-sharp even before heavy editing. Reader shows how directional light and simple contrast in the scene create the impression of sharpness, why underexposed faces that are lifted in post look muddy even at low ISO, and how a small catchlight in the eye changes the way you read detail. He also demonstrates selective sharpening in Lightroom so you sharpen the subject instead of the background, then talks through a surprisingly effective trick inside Instagram’s own editing tools that many big accounts quietly rely on to restore bite after compression. Check out the video above for the full rundown from Reader.


Join the Fstoppers community for free
-
Post comments and join in the discussions
-
Browse the site ad-free
-
Share your work and get featured in the community
-
Compete in the photo contests for fun and prizes
1 Comment
"then pushing to 1/1,000 s and beyond for action and wildlife"
--- Now add inconsistent bar/venue lighting on top. 😅