High contrast can wreck an image fast, crushing shadows into black and burning highlights into paper white. The trick is holding onto detail at both ends while still keeping the punch that makes a sunset landscape feel dramatic.
Working through a warm sunset scene in Lightroom, Christian Möhrle shows how to raise contrast without introducing any new clipping. He starts by clearing distractions with the Remove tool set to generative AI mode, brushing over unwanted spots and letting Lightroom fill them in. From there, he reads the histogram carefully, noticing that the tonal range already stretches from near-black to near-white. Raising exposure pushes more tones into the midrange but triggers clipping warnings on both ends, so he pulls the highlights down until detail returns in the brightest patch and lifts the shadows and blacks to open the darker areas. The goal is a clean histogram with nothing clipped, which becomes the foundation for everything that follows.
Once the base exposure holds detail everywhere, Möhrle adds contrast back in deliberately. He nudges the whites slider up while holding the Alt key to watch exactly where clipping starts, then backs off slightly since later masking will add brightness of its own. He cools the white balance to bring blue into the top of the sky while keeping warmth lower in the frame, then lifts vibrance and saturation. Instead of raising clarity, which he demonstrates looks harsh on this image, he lowers both clarity and dehaze to introduce a soft glow that suits the warm light. It's a counterintuitive move, and seeing the before-and-after in the video makes the reasoning obvious.
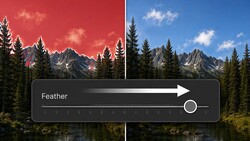
The masking stage is where the image gains real depth. He darkens the deep blues of the sky with a color range mask, subtracts a linear gradient so the foreground stays untouched, and cools the temperature for richer blues. A linear gradient darkens the near foreground to lead the eye inward, and a large radial gradient with its center placed outside the frame brightens the middle. To protect the shadowed tree from that brightening, he subtracts an object mask drawn as a simple rectangle. Each brightening move gets paired with a small highlights reduction so the sky never blows out, and a color range mask intersected with a brush lifts only the sunlit leaves.
The principle running underneath this whole edit is local control over global sliders. Every time Möhrle brightens one region, he compensates in another, which is how the picture ends up feeling high contrast overall while every individual area keeps its detail. That approach mirrors how film printers used to dodge and burn under an enlarger, holding back light from some zones and adding it to others until the print carried tone across its full range. Lightroom's masking panel gives you the same darkroom logic with far more precision, and it rewards restraint. Small exposure shifts stacked across several masks read as natural depth, while one aggressive global slider reads as an edit. If you shoot landscapes at golden hour, this pairing of a clean, detail-first base with targeted regional adjustments is a repeatable method you can apply to almost any scene with a bright sky and a darker foreground.
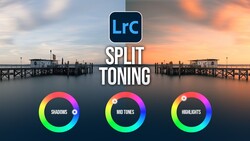
Color grading finishes the look. He shifts the orange hue toward red and pulls purple out of the blues, boosts warm saturation while lifting the cold blues, and uses the luminance tab to intensify the highlights carefully. The split toning gets pushed harder than usual, with a strong warm hue in the highlights and a more restrained warm tone in the midtones, before a final touch in the calibration tab and sky-masked sharpening in the details panel.
Watch the full edit above to see how far the shadows and highlights bend before they break.



Join the Fstoppers community for free
-
Post comments and join in the discussions
-
Browse the site ad-free
-
Share your work and get featured in the community
-
Compete in the photo contests for fun and prizes
No comments yet