Lighting is one of those skills that separates snapshots from professional-looking images. Whether you're working in a studio or improvising at home, understanding these four classic lighting patterns gives you a repeatable, reliable system for flattering almost any subject.
Coming to you from Jake Collins with Westcott Lighting, this practical video walks through the core concepts of portrait lighting from the ground up. Collins starts with something most beginners overlook: the difference between broad lighting and short lighting. Broad lighting, common in old paintings, works best on very symmetrical faces. Short lighting, where the subject's nose points toward the light source, is more universally flattering and is the dominant approach in modern portraiture. Before even touching a light modifier, understanding which direction your subject's face is angled relative to your light makes a measurable difference in your results. From there, the video moves into a direct comparison between a Westcott Rapid Box Octa S and a hard reflector, showing side-by-side how dramatically the quality of light shifts depending on your modifier choice.
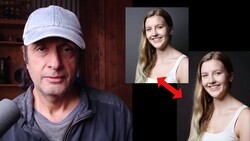
The softbox versus hard reflector comparison is worth paying close attention to. Soft light wraps around the face, reduces harsh shadows, and reads as polished and flattering in a studio setting. A hard reflector strips out all diffusion and produces contrast more like direct sunlight, which has its place on a beach shoot but tends to be unforgiving indoors. The general rule the video reinforces: the larger the softbox and the closer it is to your subject, the softer and more controlled the light. Pull it far away and crank the power, and you've essentially turned it into the same hard source you were trying to avoid.
The bulk of the video covers the four lighting patterns: butterfly, split, loop, and Rembrandt. Butterfly lighting, also called Paramount lighting, is the most accessible of the four. The light sits directly above and slightly in front of the subject, creating a small shadow beneath the nose. The rule is simple: that shadow should not reach the upper lip. Split lighting divides the face exactly in half, with light hitting only one side. It's a dramatic look that has a strong association with sports photography and cinematic portrayals. Loop lighting, likely the most widely used of the four, places the light at roughly a 45-degree angle and produces a subtle shadow that loops around the side of the nose. The catch light, ideally sitting at the 10 o'clock or 2 o'clock position in the eye, is something to check before every frame. Rembrandt lighting is the most technically demanding of the group. The goal is a small, distinct triangle of light on the shadowed cheek, but getting it right without losing the catch light or accidentally sliding into loop lighting requires careful, incremental adjustments. The video shows exactly where that balance breaks down and how to recover it. Check out the video above for the full breakdown and live demonstrations from Collins.

Join the Fstoppers community for free
-
Post comments and join in the discussions
-
Browse the site ad-free
-
Share your work and get featured in the community
-
Compete in the photo contests for fun and prizes
1 Comment
This was actually a very helpful read. I recently discovered something related to this topic that explained it in a much simpler way and honestly changed my understanding. Glad I found this discussion!카드깡