
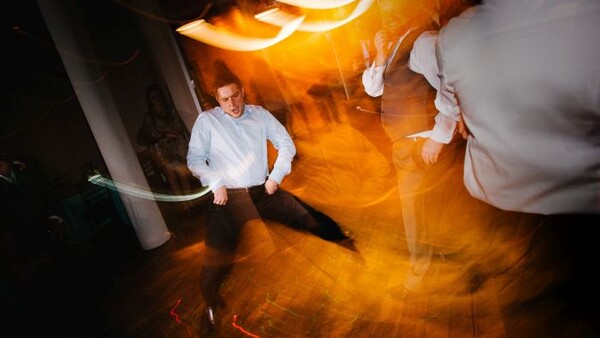
My favorite part of the wedding day is the reception. After the traditional first dances, and speeches are done, and the wedding party starts to let loose. The party is in full swing and the best man is giving “The Dougie” his best attempt in an effort to win a dance battle against the bride. While capturing these images I want the viewer to feel like they were in there, in the moment. My goal is to not light up the entire room like a Christmas tree. I want to see the light from the DJ and the motion on the dance floor. This is how I do just that.
The Basics
When dealing with flash photography it’s important to realize that there are 2 exposures happening at the same time. The first exposure is for the ambient light. This is like any other picture you take without flash and relies on your shutter speed, aperture, and ISO. The second exposure is your flash exposure and this relies on your aperture, ISO, and flash power. The way I get the motion blur from the lights is by taking the image with a slower shutter speed, and while the shutter is open, I swing or rotate the camera. In order to have the subject not blurred, I have an on camera flash that fires to freeze the motion of my subject. Therefore, the ambient exposure is for the blurred lights and the flash exposure is to light and freeze my subject.
How It’s Done
For this effect we need to have a slow shutter speed in order to create the motion blur from the lights, but we can’t let in so much light that the entire image is a blurry mess. The way we do this is to set the shutter speed to our chosen setting and then, use our aperture and ISO to dial in to the desired exposure. The shutter speed you choose is dependent on how long you want the streaks of light and how fast you are swinging your camera. I typically start at 1/10th of second and adjust up or down as needed.
Once we have our ambient light where we want it, we then introduce the flash exposure. The flash is what makes sure the subject is visible and sharp. For these shots I usually shoot with on camera TTL (Gasp!! On camera direct flash!! The horror!!) so the power of the flash will adjust automatically, no matter the subject distance or chosen aperture/ISO. The problem here is that the flash will also set the spread of light to match your focal length so that the entire frame is lit evenly. For this situation though, I only want my subject lit and the rest of the frame to be dark and blurred. To fix this, I manually set the zoom of my flash to be greater than my focal length. Most of my dance photos are at 20mm or 35mm so I zoom my flash to around 70mm or more depending on how close I am to the subject. The zoomed flash is how I achieve that spot light effect. I can then rotate the flash head as needed so that it’s pointing at my subject.
Why front curtain sync is better than rear curtain sync
When dealing with longer shutter speeds and flash, we need to tell the camera when to fire the flash. The 2 options we have are front curtain sync and rear curtain sync. For rear curtain sync when you press the shutter button, the shutter will open, the sensor will gather ambient light, and just before the shutter closes the flash will fire. For front curtain sync when you press the shutter button, the shutter will open and right as the shutter opens the flash will fire. The shutter then remains open and gathers light till the time is up and then shuts. Because I am taking images of dancing and want to capture moments, the best option is front curtain sync. It’s not ideal to have to time the subjects actions to line up with the end of my shutter. Instead, I want to press the shutter button and capture the moment as I see it, and then use the rest of the exposure time to create my light streaks.
How to Swing The Camera
The direction to swing the camera is the difficult part. The more lights you have in the background, the more streaks you have, and the more chances you have of those streaks covering up your subject. I have a ton of moments captured that are ruined by a bad swing of the camera. It’s simply a downside to the technique.
When swinging the camera, it’s important to know that whatever way you swing the camera, the light will streak in the opposite direction. So if I have a light on the left side of the frame and I swing the camera to the right, the light will streak across the frame to the left. Likewise, if I swing to the left, the light will streak to the right
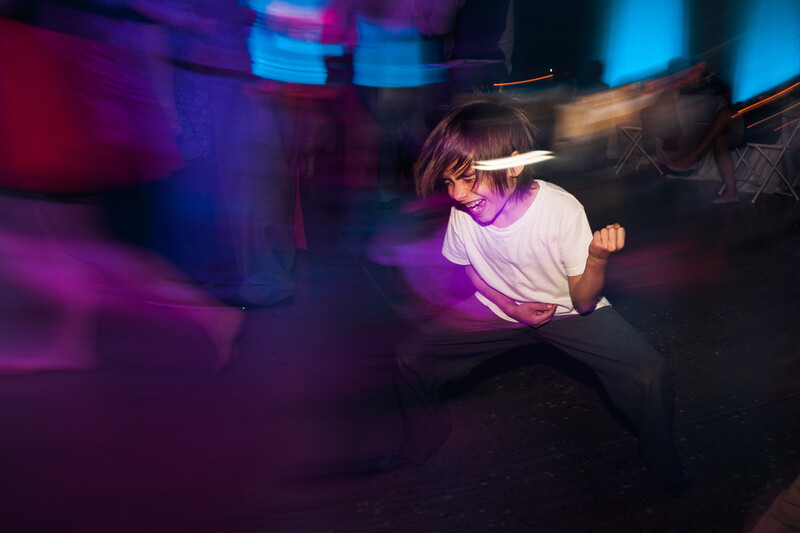
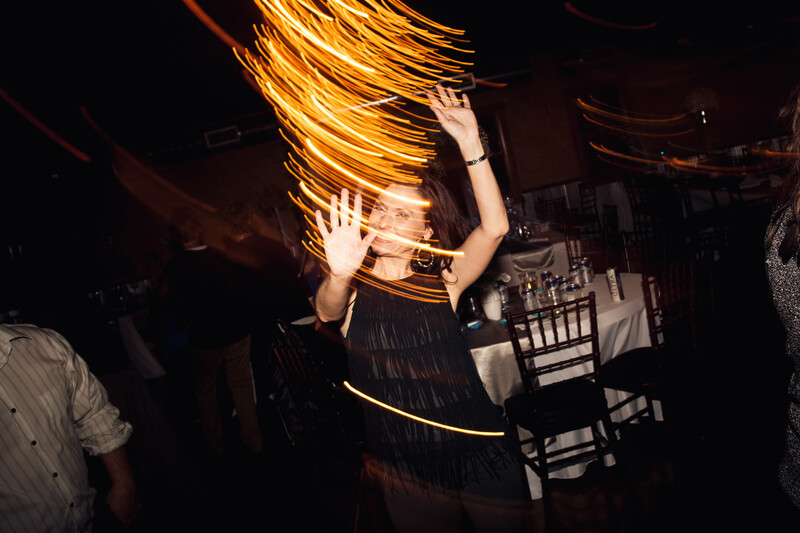
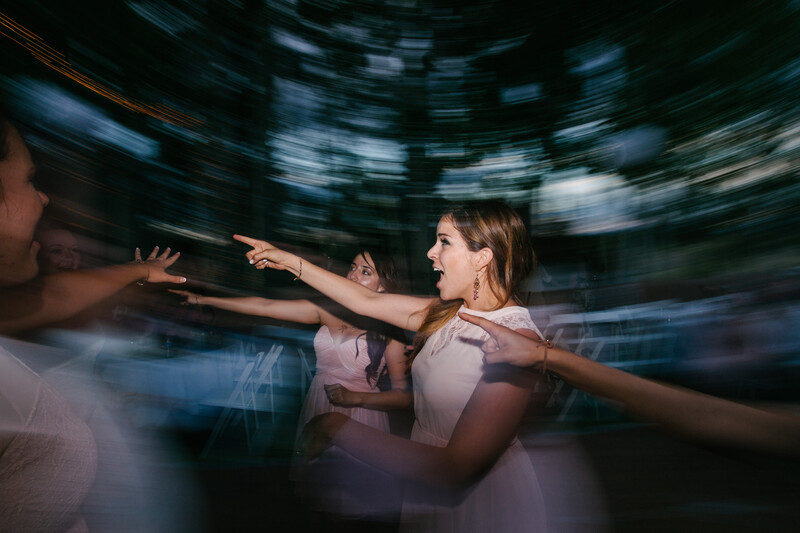
We can use this to our advantage by keeping an eye on where our subject is in the frame, in relation to the background lights. In the image below I could see that there was a ton of lights to the right of the subjects and not a lot of light to the left of them, so I knew that I should swing my camera to the left. In other words, we want to swing the camera toward the side of the frame with the least amount of lights.
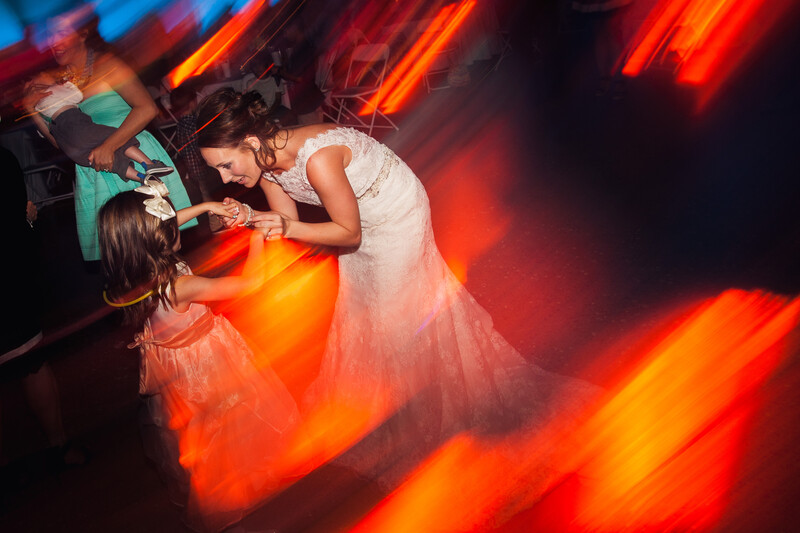
Most of the time, however, you are forced to just swing and hope that it tunes out. It’s not a “spray and pray” method though! You are still looking to capture interesting and emotional moments. The more you use this technique, the more comfortable you will be, and the more “keepers” you will have. Sometimes you have to try and capture a moment, and hope that the light streaks don’t mess it all up! Below are a few different examples of this technique along with how they were done.
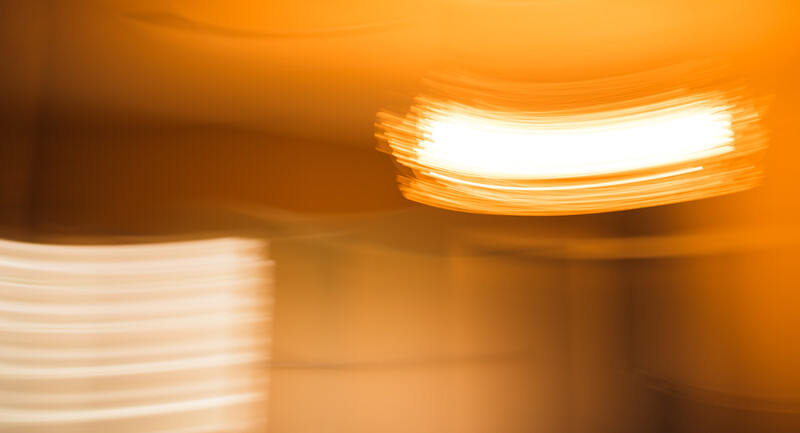
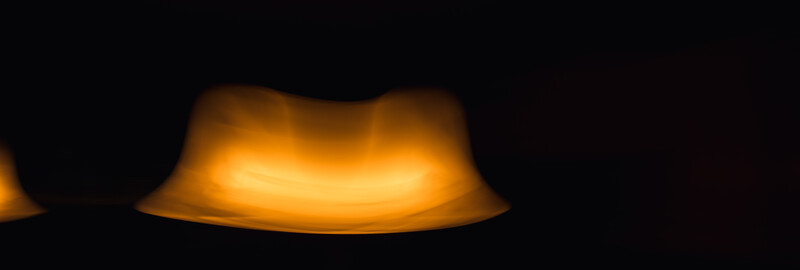
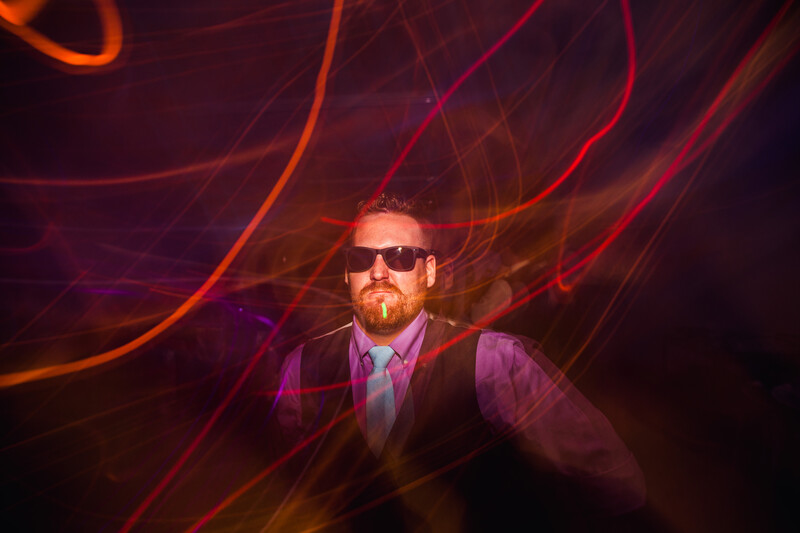
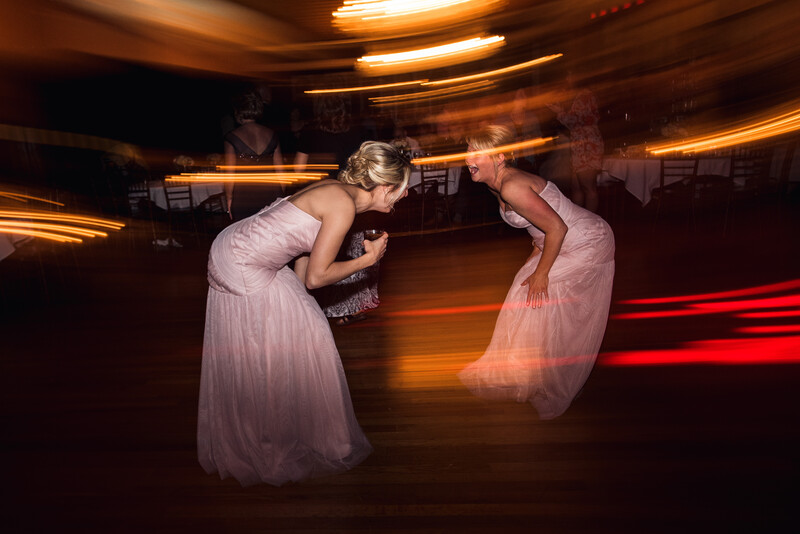
You can twist the camera to create a spinning effect

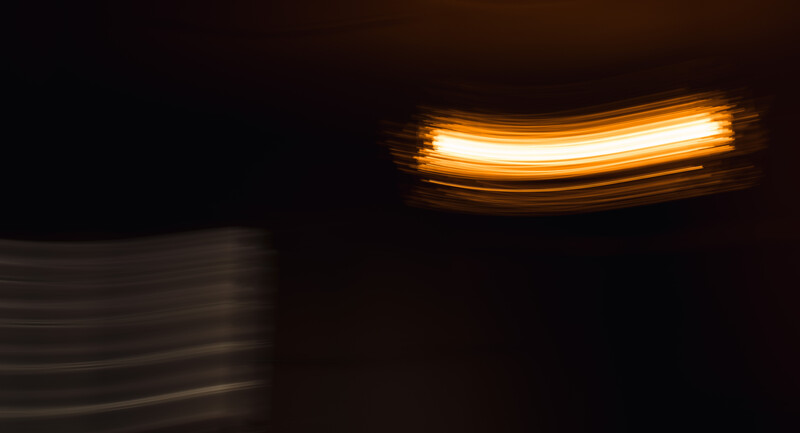
You can increase your shutter speed to 10 plus seconds and shake it all around.
You can even get this effect outside as long as it’s not crazy bright.
And you get an extra 10 points if you can make someone look like they have laser vision!
Who is going to give this a try? What do you currently use for reception lighting?

Join the Fstoppers community for free
-
Post comments and join in the discussions
-
Browse the site ad-free
-
Share your work and get featured in the community
-
Compete in the photo contests for fun and prizes
38 Comments
Especially great when you want to portray how your drunken subjects feel!
"The problem here is that the flash will also set the spread of light to match your focal length so that the entire frame is lit evenly. For this situation though, I only want my subject lit and the rest of the frame to be dark and blurred. To fix this, I manually set the zoom of my flash to be greater than my focal length. Most of my dance photos are at 20mm or 35mm so I zoom my flash to around 70mm or more depending on how close I am to the subject. "
I was curious if using a snoot or gridded modifier on your flash head would work better in this scenario? So that whether you're closer or further away from the dancing subject, you don't have to keep adjusting your flash's zoom (otherwise if you're too close and your flash is zoom all the way in, the exposure would most likely blast the skin or dress into oblivion)
TTL prevents that as it adjusts flash power.
I have never used a grid or a snoot for this and it would give a similar effect, but Jonas is correct, using TTL will adjust the power of the flash as needed. You can also adjust your flash compensation if the highlights start looking to hot.
thank you mate!
I've done this for wedding clients and They LOVED it. It's actually easier than getting a "technically sound" shot and a lot of fun.
Glowsticks give awesome results and with "light balls" you can make hearts if you make a V movement. This was made last weekend at a wedding party in Greece. Lots of fun ;)
I have been shooting partypictures long time ago before i started shooting weddings, i don't like that Overall blur over the People, for me the Picture Looks very amateurish if it is blurry like that.
I would rather enhance the ISO to 800 and shorten the shutter Speed to be between 1/4-1/20 seconds, depending on the ambient light. The People will be illuminated by the Flash.
I'm sure it's just a matter of taste, but that's the way I prefer the Images to look alike :-)
http://www.izedin.ch/wp-content/gallery/menschen/image125.jpg
http://www.izedin.ch/wp-content/gallery/menschen/image135.jpg
Nothing wrong with your photos and to each their own... but I think the idea, at least how I use it and interpret it, are that it showcases the movement. There blurry to allure that something was taking place and help tell the story. Kinda like racing photos sometimes you stop all motion for a shoot and sometimes you pan the image.
Agree. When shooting a reception, not all of the images i take are like this. Some are frozen and some have the blur. It depends on the situation. But in general i enjoy the blurred images more.
Man...on a wedding this is something cool to do! Specially when on a dance.
And this is something i'll do tomorrow!!! :D
share what you get!
Yeah i will :)
There it is! As promised!! I haven't touched it in Post. This is from camera with the EOS Connect App. I thought about giving it a touch with Snapseed on the iPad, but i'll do it on Camera RAW.
nice!
Thank you for the tip and great article!! :D
Nice article Jason. I found it interesting that you prefer front curtain as opposed to rear curtain, I feel like I never like my results UNLESS I have it on rear curtain! :) like this one.So funny how we can all have different ways of getting what we like! Nice pictures and explanation BTW. https://fstoppers.com/photo/55445
+1 Rear Curtain
Wow, that is a cool shot! I also concur with Rear Curtain sync... that way the subject is on "top" of the light streaks instead of light streaks through them
that's how things work when you have your camera on a tripod and the only motion you see is from moving subjects. When taking an image and swinging the camera, you will get light streaks over your subject no matter what curtain you sync with.
+1 Rear Curtain - just because every now and then I get a 'weird' looking shot. It's like taking photos of a race car - it'd look weird if you 'froze' the car then got a trail in front of the sharp image of the car: like it was going in super high speed reverse. Only happens to me like 1/250 shots (if that) so it's not really something to change your method for - plus dance shots hide it better anyway cos it's all random movements!
that's how things work when you have your camera on a tripod and the only motion you see is from moving subjects. When taking an image and swinging the camera, you will get light streaks in whatever direction you swing your camera regardless of what curtain you sync too. It's all dependent on the direction you swing the camera.
It's nice to see a cohesive explanation of this! I've used this technique a few times and people have always appreciated it. I figured out how to do it with a lot of trial and error though which is not always the best thing to attempt at a wedding (trial and error, that is)
I use Rear Curtain myself for images like these. I like to have my subjects layered ABOVE the light streaks. In the article sample images, the light streaks are layered over top of the subjects. With Rear Curtain, the light streaks are more appropriately designated to the background, instead of the foreground.
that's how things work when you have your camera on a tripod and the only motion you see is from moving subjects. When taking an image and swinging the camera, you will get light streaks over your subject no matter what curtain you sync with.
Great Article -- reminded me of one of my favorite shots. Good to understand the technical how to, for repetitions sake :)
Don't know if anyone has mentioned this but best to set your ISO at around 800 because it means the flash needs less power which means quicker recycle times / longer lasting batteries
since I'm using direct flash zoomed to 70mm plus and the suject is always pretty close, i never run into any issues with recycle times or battery life when shooting at ISO 100-200
Glad I read this. I usually do a similar technique, plus I add in a couple of strobes in the corners of the room. I really love the look I achieve, but find the recycle time when using TTL frustrating, and the potential for blown out shots when using manual unacceptable. I'll try zooming it to 70mm next time and see if that makes things better!
Photographing weddings in Alaska poses the unique situation of our midnight sun. Often, outdoor or tent receptions end up being in full daylight even when they are late in the evening. Sometimes I just go with it, other times I try and overpower the ambient light with my strobes to create a party-feel that wasn't really there.
ok I tried this at a wedding yesterday for the first time. I got maybe 2 keepers out of 50 shots or so. Am I expecting too much? (I was expecting tack sharp photos of the subject but got quite a soft look?)
Also I was unable to get the spinning effect, how do you turn the camera? I had a 3 second shutter set, turned the camera 180 and back again but didnt get any twist just straight lines
will post a few pics up later (when they finish copying from my camera!) 4000 pics via USB is sloooooooooow
my first attempt at Fridays Wedding ! would have liked the subjects sharper would appreciate help on how to expose them properly ? I sed direct flash at 1/1 and still didnt freeze them properly? I did manage to make some light Snakes in one picture though and also gave one dancer a nice head piece made of light :)
looks like you got the right idea, the issue is that you are using to long of a shutter speed. the longer shutter speed allows the ambient light to affect the subject more, which makes the subject softer. i usually stick around 1/10th of a second and use a much lower flash power, which will also freeze the subject better since the flash duration is lower for lower power settings.
thanks I will try a slightly faster shutter speed next time, i tried 1/10th but found I didnt have enough time to move the camera and get it pointing at the subject how I wanted before the shutter closed. Still struggling to get the spinning effect aswell, evening spinning the camera 180 degrees and back again. Maybe the lighting wasnt quite right in the room to get that effect?
set your camera to front curtain sync. the flash will fire right as you hit the shutter and then you can move the camera as needed. This also makes it so you catch certain moments as they happen instead of hoping a moment lines up with the end of your exposure.
for the spin effect, imagine there is a line going through the length of your lens. you rotate the camera around that line. You are getting straight lines because you are rotating around your body.
thanks for the tips, what aperture setting are you typically using?
i set my shutter speed to 1/10 then adjust my apeture till my ambient looks the way i want. then adjust flash power to match
Great article, very helpful!