
There's a new Mobile Sync app available for all three 2018 ACDSee Photo Studio products and it makes life much easier. ACDSee Mobile Sync lets you send all your images and videos wirelessly from any mobile device to any computer running a Photo Studio 2018 product.
As cellphone camera technology continues to improve, the images and videos taken with your phone become more eligible for professional use. Magazines regularly run cover photos taken with a camera phone. Entire short films have been filmed using only phones. Whether you use your phone for posting to social media or, like me, shoot a lot of behind-the-scenes images, having a mobile workflow and backing up the media on your mobile device is necessary.
This is where the Mobile Sync app comes in. Whether it was shot with your device, transferred to your device, or just saved onto your device, you can instantly send all your photos and videos to the assigned computer. I've found this most useful as a backup solution for both my daily camera phone images as well as images I take on my Canon G7 X that get posted to social media while traveling. Getting Mobile Sync up and running is super easy and even has features to remember what images you've already uploaded.
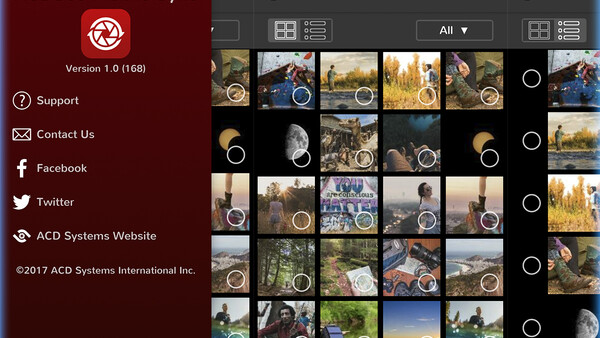
The app is available for both Android and Apple. Once installed, the app will first ask you to choose the desktop target you wish to send files too. If you use multiple computers like a laptop and a desktop you can switch between them later in the settings menu. From there you will be taken to the main screen which displays all the photos and videos on your device. Before we start uploading though, you should tweak the settings.
Settings
Within the settings menu, you have three options that make adjustments to how the files are handled in the transfer. The Filenames setting allows you to change how the files will be named on your desktop. I prefer to change this to YYYY-MM-DD Original so that I can easily organize my images into my existing archive which is organized entirely by date. Similarly, the Subfolders setting lets you change the name and create subfolders in the assigned folder location on your desktop.
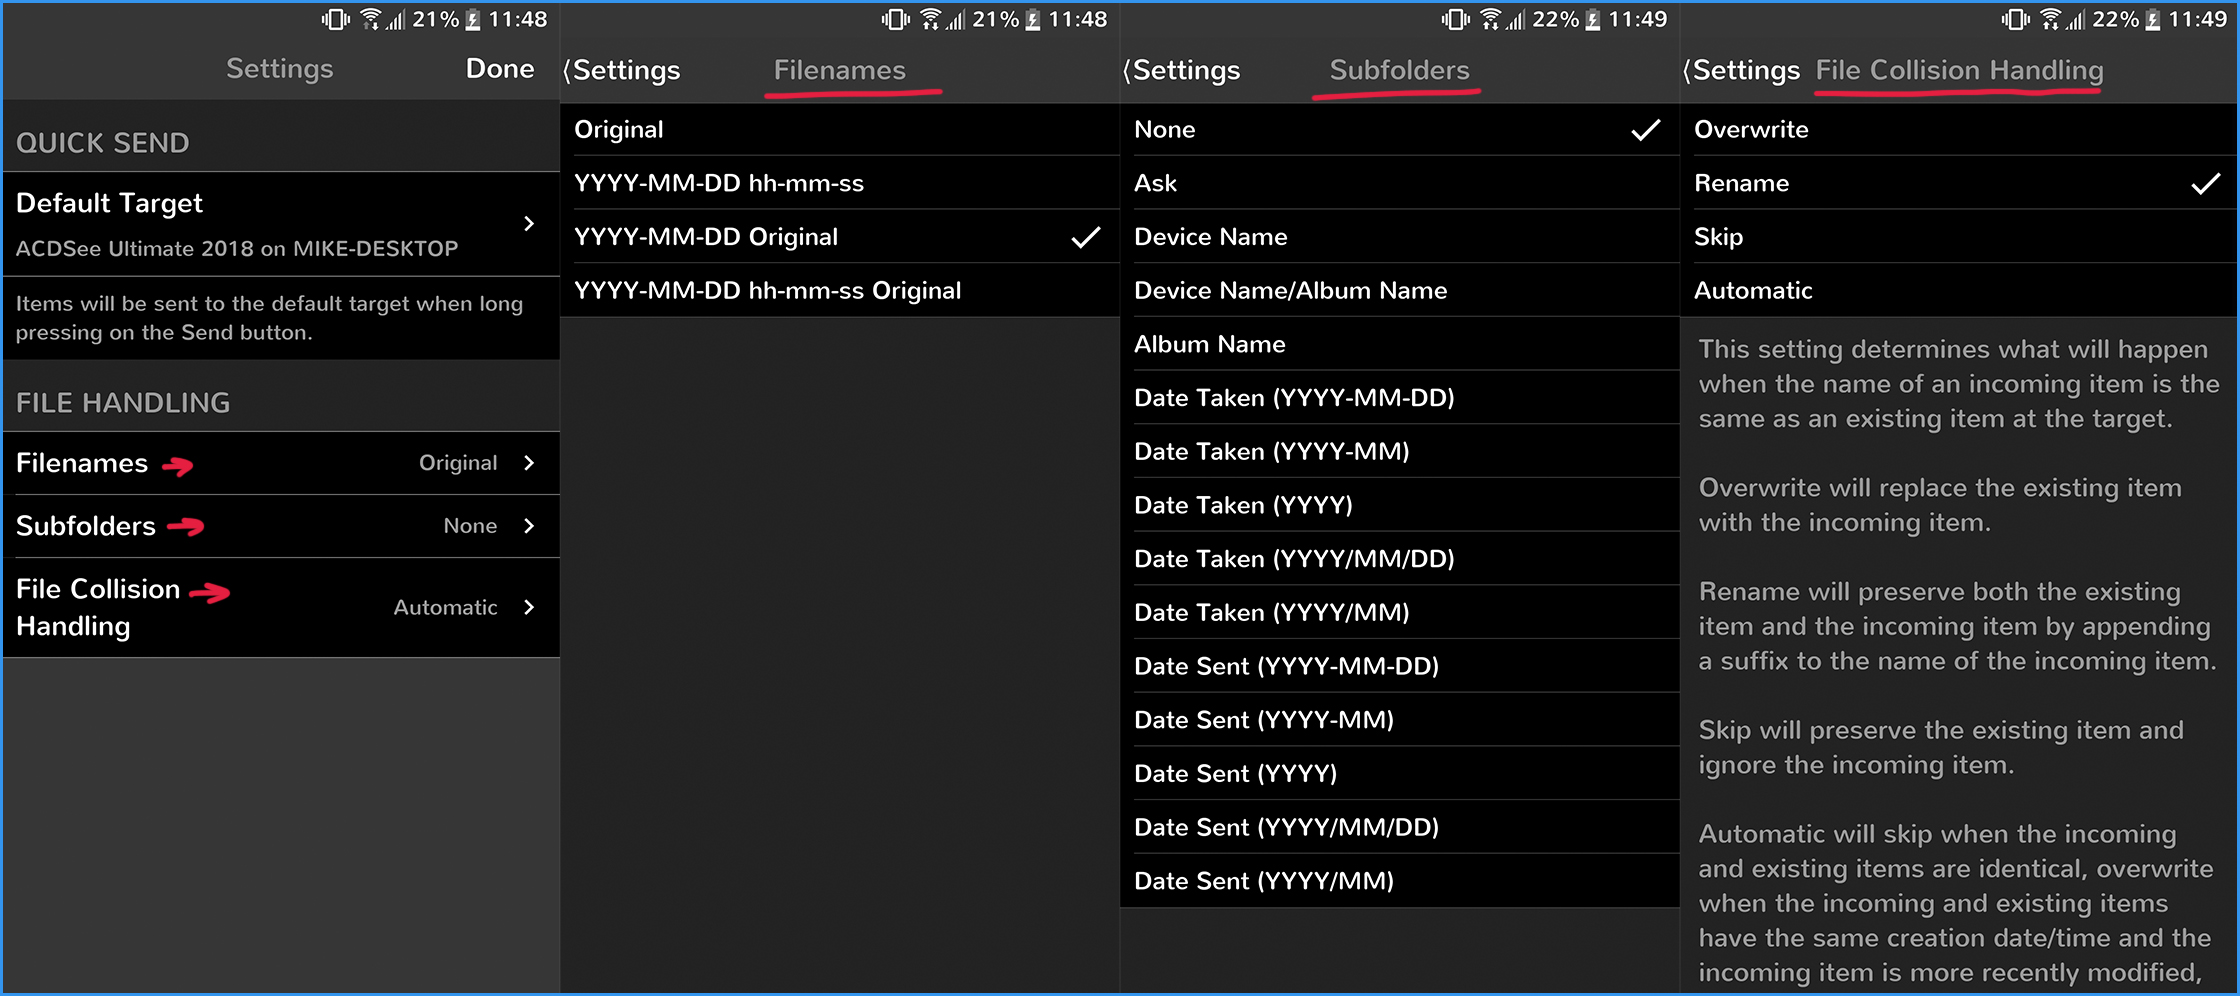
Since I re-organize all my images by date into my archive, I leave this set to none. However, this is a great feature if you want to organize your image by device or date. Finally, you have the File Collision Handling setting. This helps prevent you from uploading the same image multiple times, allowing you to choose what action is taken when this happens. You can choose from Overwrite, Rename, Skip, or Automatic letting the app decide based on its listed guidelines. Also within the settings menu, you can switch the Default Target location if you have it set up for multiple computers.
Home Screen
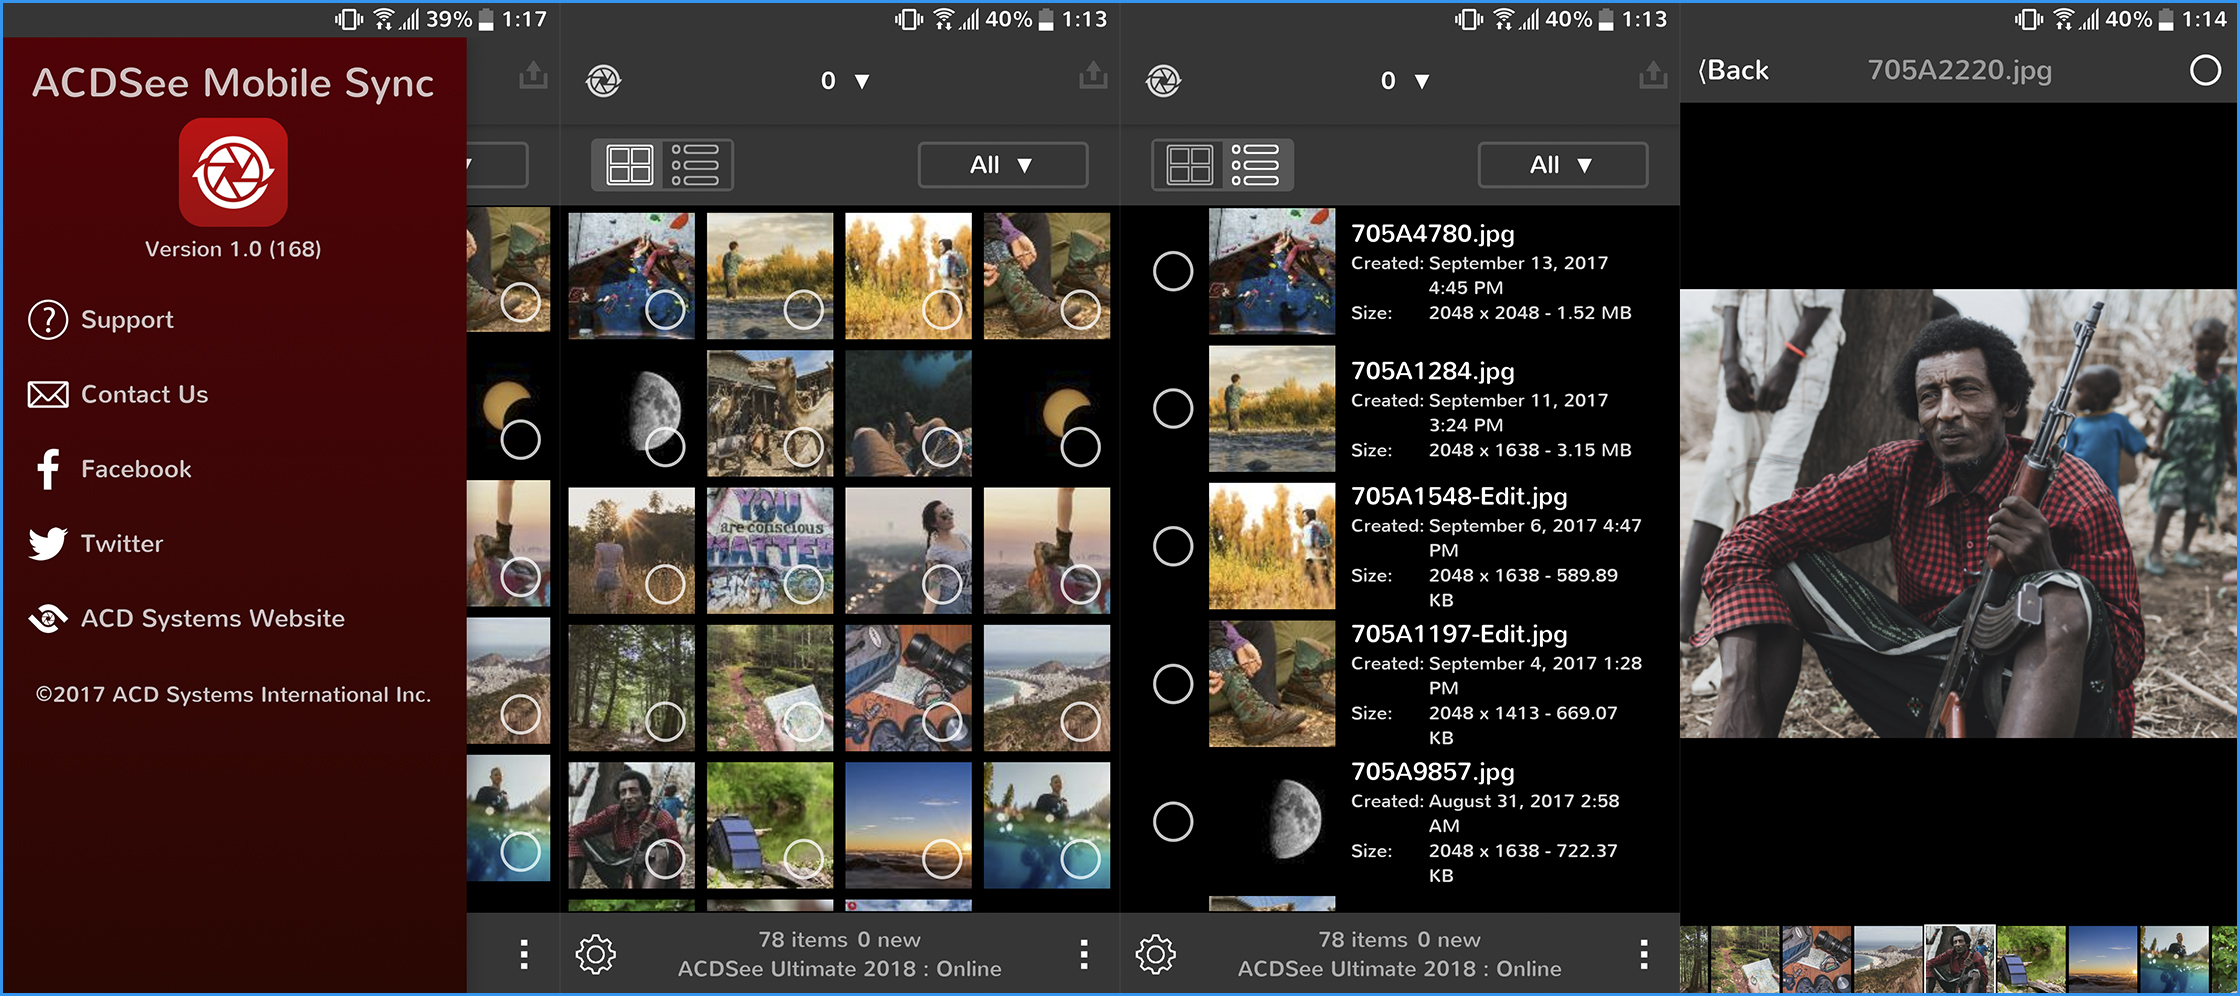
The home screen displays all of your files in one of three ways. You can choose between a grid view or a list view that includes file information like name, date, and file size. Additionally, you can select any of the images opening up a filmstrip view that allows you to view the images larger and quickly swipe through them.
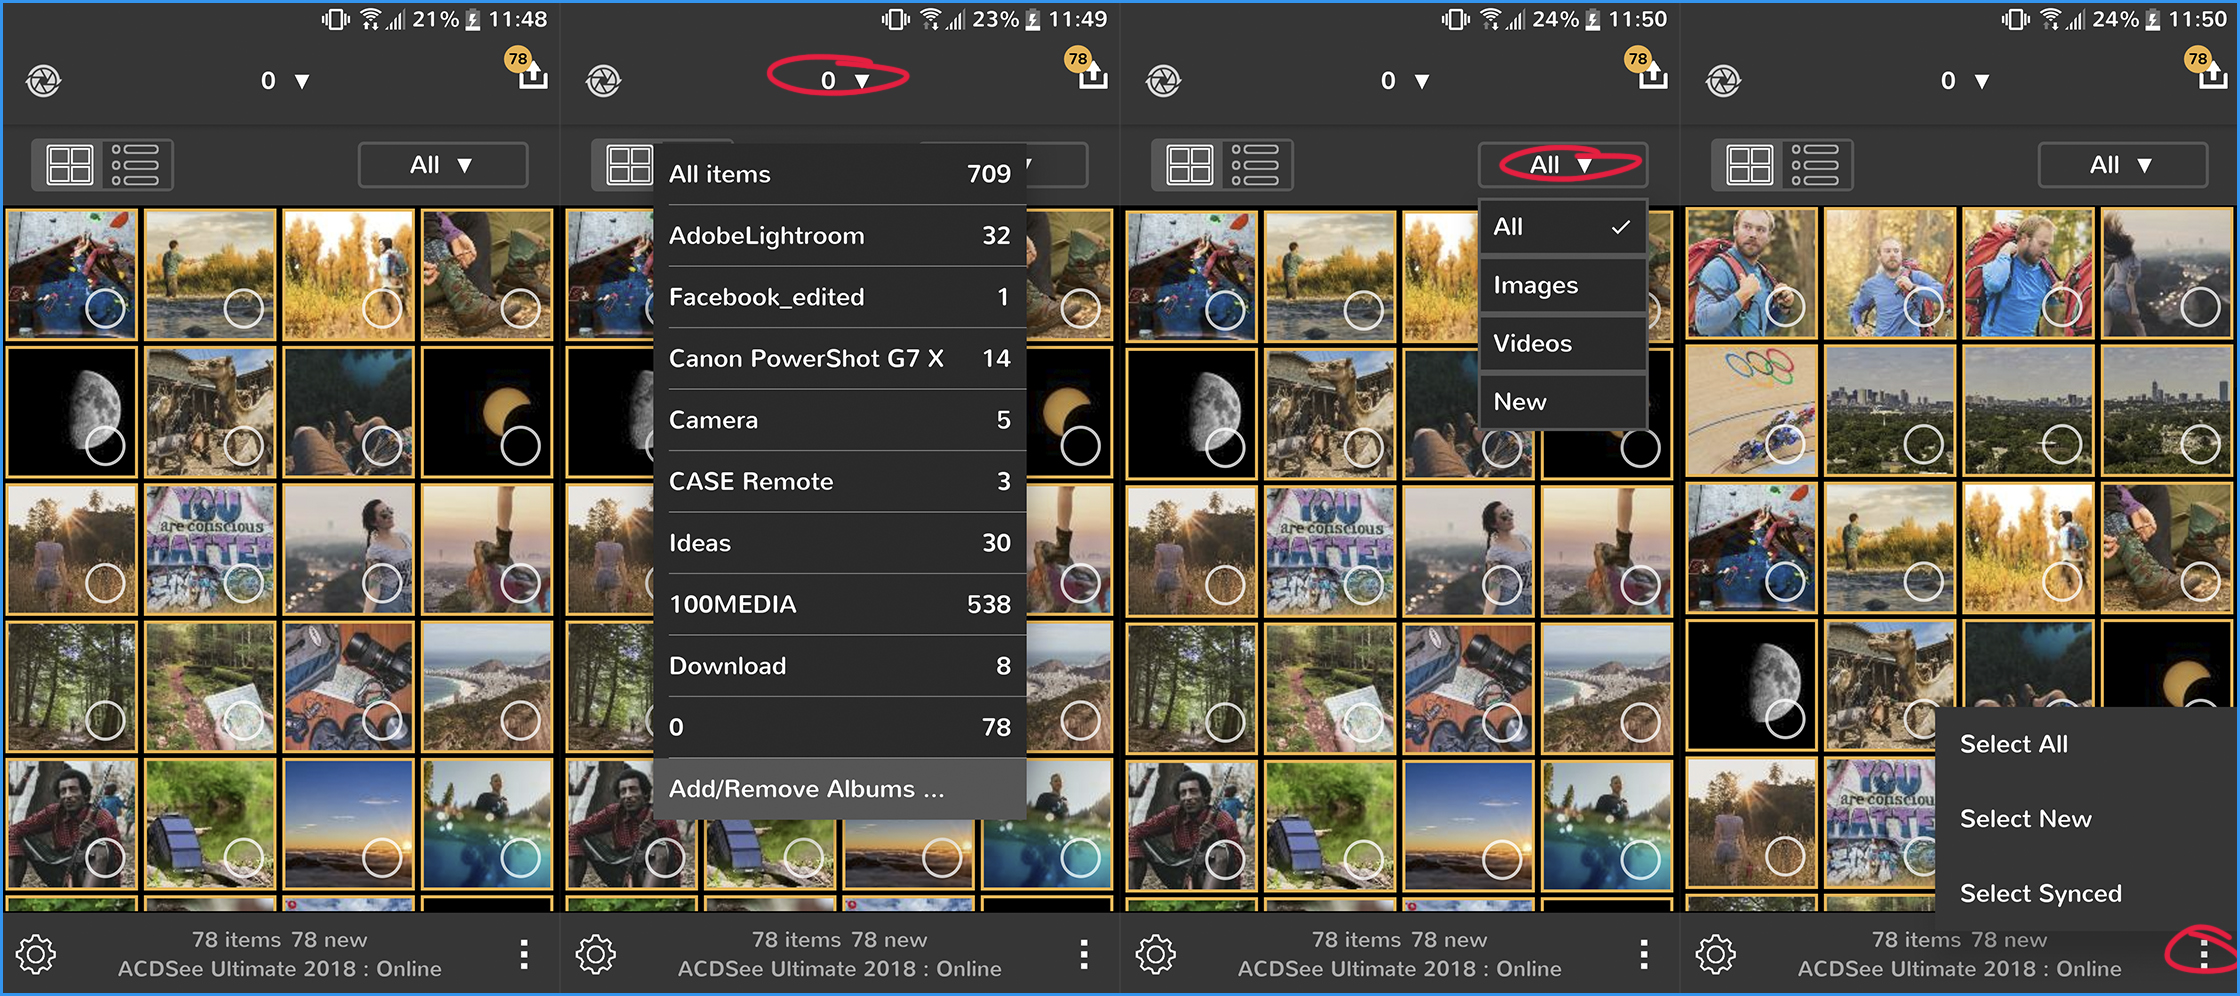
Located at the top there is a drop-down menu that lets you select from any specific albums you may have on your device. Also located towards the top is another drop-down menu that lets you filter what type of files are shown.
Each image has a small checkbox that allows you to select it in all three view types. Towards the bottom right there is an option that lets you choose between different selection and select modes. You can also press and hold any image activating it then tap another image selecting all the images between them.
Uploading
Once you've made your selections uploading is as easy as pressing the little upload icon located at the top right. It has a little blue circle on it that tells you how many images you have selected for uploading. Once pressed, a pop-up window asks you to confirm the default location or switch to a different computer then send. A progress bar will show you how much time is left but even sending a bunch of images all at once goes relatively quickly.
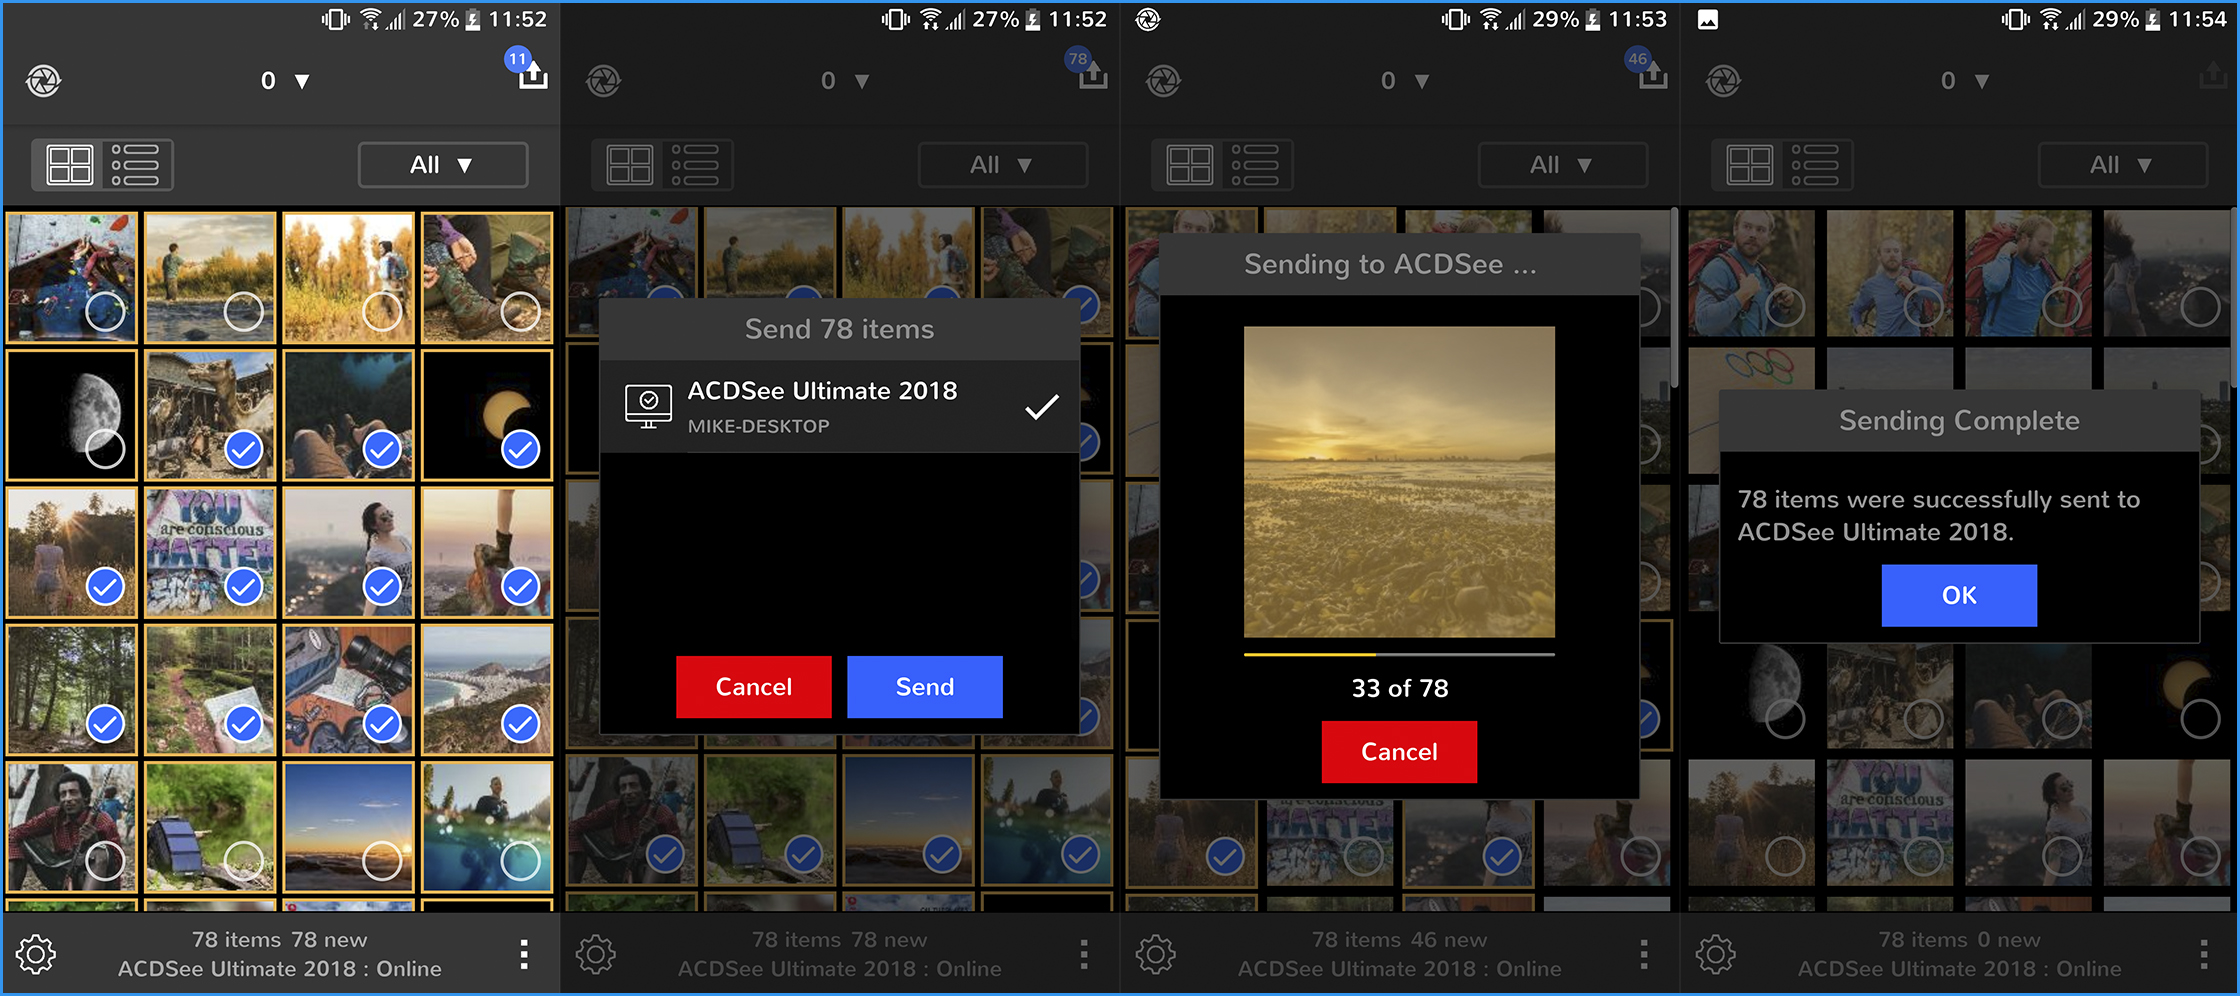
Once complete, a notification will show up on both the device and your desktop informing you of its success. From here you can find the images now located on your desktop in the appropriate folder location or subfolder if you assigned one. Now that the images are in Photo Studio 2018 you can use all the tools available to backup, edit, add metadata, or assign labels.
The mobile Sync app is a great free addition to any of the Photo Studio programs.
You can download the ACDSee Mobile Sync app at the Google Play store and Apple App Store.


Join the Fstoppers community for free
-
Post comments and join in the discussions
-
Browse the site ad-free
-
Share your work and get featured in the community
-
Compete in the photo contests for fun and prizes
3 Comments
I like the interface, it looks very professional. I'm basic and unorganized so I use google photos, but I cant hand my phone to someone and show them a portfolio like you ould with this, awesome
Note that Mobile Sync *does not* work with ACDSee Photo Studio 5 for Mac. Per the company on 1/28/19, there is no timetable for when they will support this feature for Mac.
To update, after using this application for a while, it suddenly begins to fail to recognize ACDSee Mobile Sync Server on the PC (Windows 10 Pro). No update to this application has occurred since June 12, 2019 (current version 2.0) and seems it is being neglected.In concept it's great, but in practice, it's unreliable. Unfortunately, there is not some other equivalent, more reliable application for this wireless synchronization. So, I am back to basics with what works. I connect the smartphone to my computer over USB and transfer reliably.
Here is one user's comment (among others) at the Goole Play Store:
"Thought this was an awesome app until it stopped working within 3 days. The app is no longer able to find the target. Tried restarting, reinstalling app, restarting PC & router etc. It did work briefly again when I restarted my router but then stopped working again the next day. It would be a great app..."