
Since Adobe released Photoshop CC 2015, retouchers and photographers have complained about the revamped healing brush. However, Adobe promised their users that CC 2015.1 would offer an alternative, making the tool as good if not better than the one found in CC 2014. Photoshop was updated a couple of days ago, and the said updated healing brush setting can be found in the form of a diffusion slider. However, is it as good as the previous healing brush?
In Adobe Photoshop CC 2015 we saw a redesigned healing brush appear. It offered a real-time preview of what the tool was actually doing and it also smudged more than what the previous version of the tool. Some people liked it, but most seemed to hate it. Many retouchers working on high-end fashion and beauty images complained about the tool smudging way to much and not working the way it should. Finally admitting that the tool was not perfect this way, Adobe announced on their forums that they would make it better with CC 2015.1.
Comparing the Current and the Legacy Healing Brush
Many of us were excited about this news, thinking the CC 2014 healing brush would make its way back. However, that is not the case. Instead, Adobe offers an alternative called the diffusion slider. It allows the user to choose the radius of diffusion. The diffusion slider will let you choose how well the healed area blends with its surroundings or, as Adobe says 'it controls how quickly the pasted region adapts to the surrounding image.' So the higher the setting, the more it will blend and create a smooth transition in terms of luminosity and color. This is all great and all, but does this fancy slider really do as well as the old healing brush?
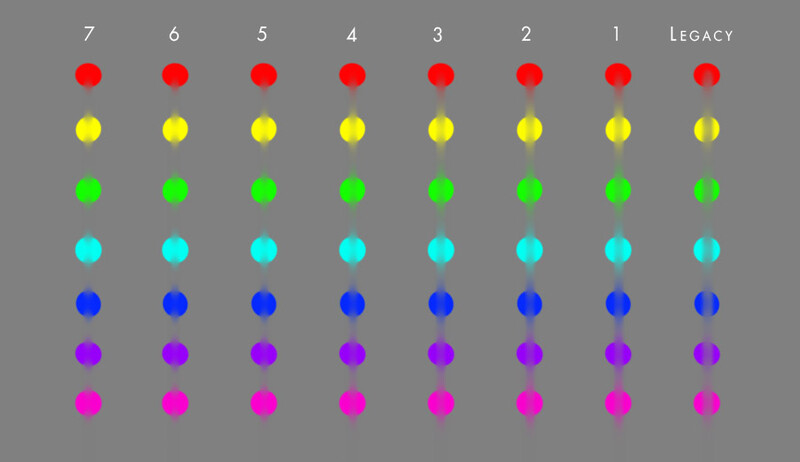
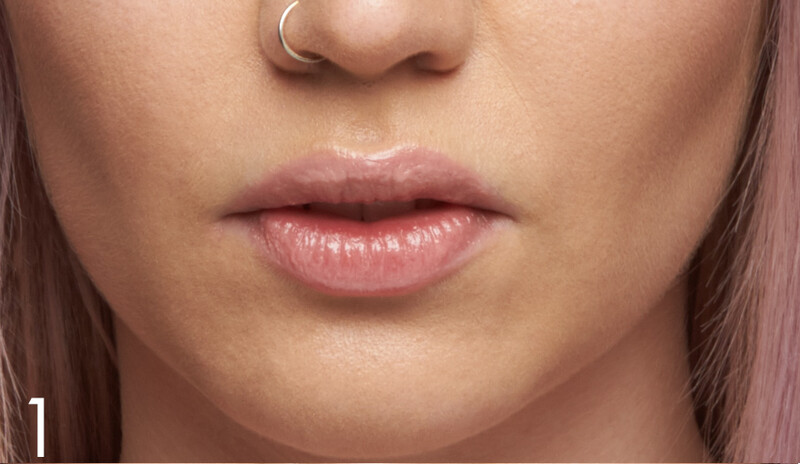
First I wanted to see if the new healing brush would treat every color the same way. I also wanted to see what was the real difference between the different settings. So I setup a file with a gray background and different colors. For each, I first started by healing with 50% gray over the points to see how each setting would affect the brush:
Then I did the same but healing with color over the 50% gray to see if each color was treated equally:
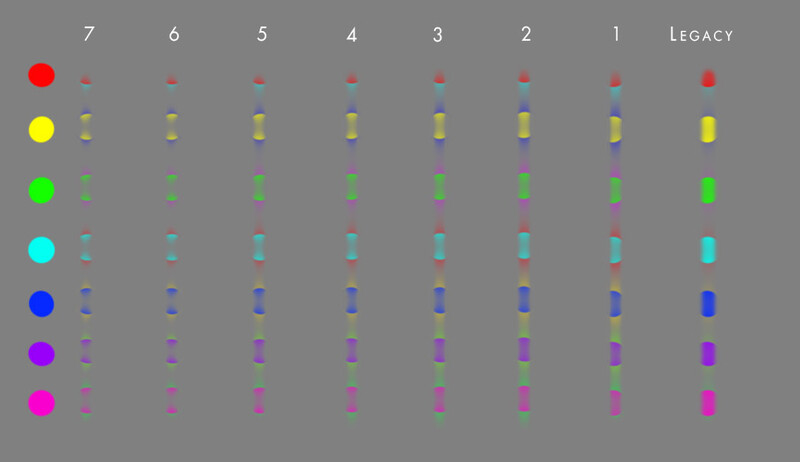
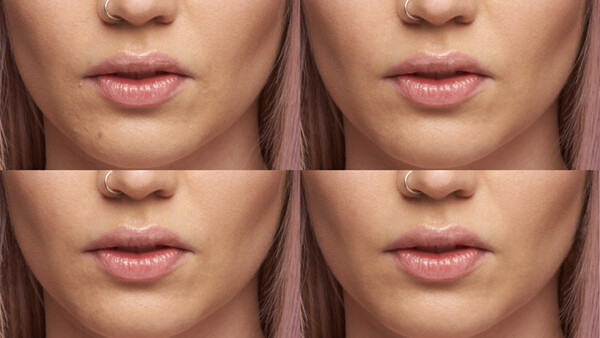
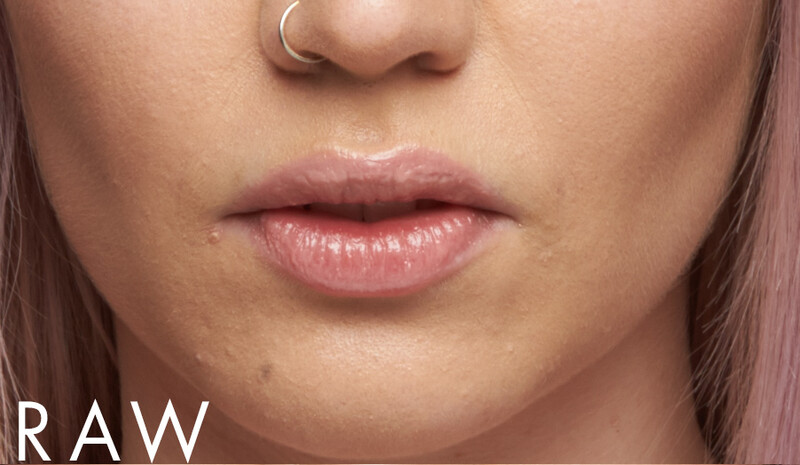
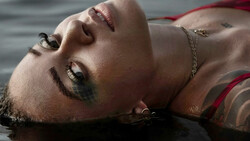
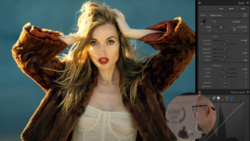
From these two tests, we can clearly see that the legacy healing brush cannot be compared to the current healing brush even with the diffusion setting adjusted. However, these tow tests are not real world tests. Who would spend their day healing color dots on a gray background? So I took a crop out of a recent photo shoot I did and started healing the skin. I used the current healing brush with a diffusion of 1, 4, and 7, and then the legacy brush. Let's compare the results (first one is the untouched file):
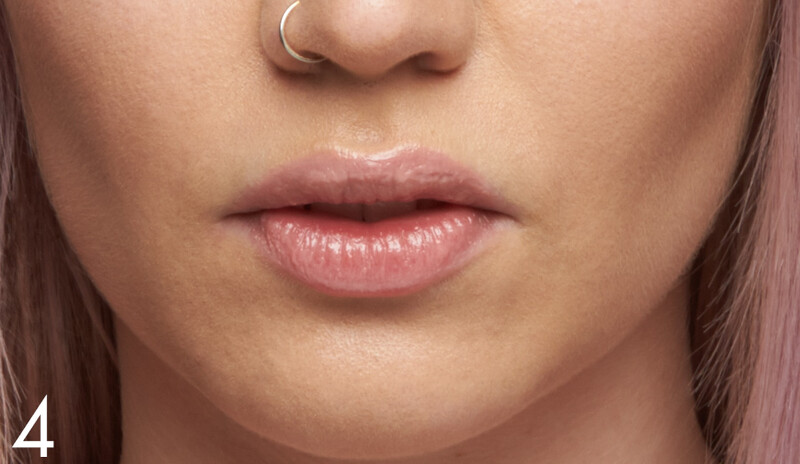

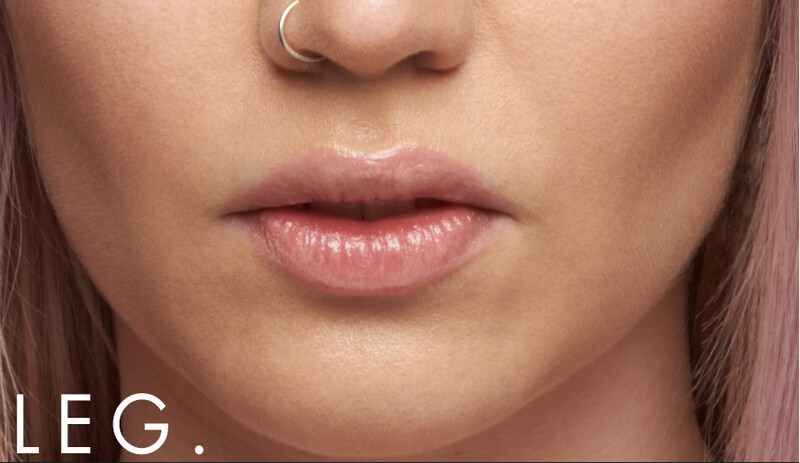
As you can see all of these offer different results. The difference might be minimal, but for a proper skin work, it does matter. Personally, I felt like the legacy healing brush did the best job of all the settings. For example, it's the one that gave me the best results when working with fine texture like hair or lips.
The problem with the diffusion setting is that you must adjust it depending on the area you are working on. If adjusted, I would almost argue it works better than the legacy brush. But there is no way to quickly change the setting with a shortcut. If Adobe had made the diffusion setting accessible by a shortcut like the flow and opacity are for the standard drawing brush, this could have been great. However, it is not the case.
Using the Legacy Brush in CC 2015.1
So if like me, you still prefer the legacy healing brush for now, there is a solution to using the latest version of Photoshop with the old trusty healing brush from CC 2014. Here is the workaround from Adobe:
- Close Photoshop CC 2015.1
- Open Notepad (Win) or TextEdit (Mac) to create a plain text file (not RTF)
- Type in LegacyHealingBrush161 followed by 0, 1 or 2:
- 0 for the current healing brush algorithm with real-time UI feedback;
- 1 for the legacy brush with no real-time UI feedback;
- 2 for the current healing brush algorithm with no real-time UI feedback;
- Save the file as PSUserConfig.txt in:
- Windows: [Installation Drive]:\Users\[User Name]\AppData\Roaming\Adobe\Adobe Photoshop CC 2015\Adobe Photoshop CC 2015 Settings\
- Mac OS: //Users/[User Name]/Library/Preferences/Adobe Photoshop CC 2015 Settings/
- Restart Photoshop and activate the healing brush to see if the changed
Let's hope the healing brush will either be back with the CC 2014 algorithm by default in the next versions, or that Adobe can fine tune even more their new algorithm. It is better than in CC 2015, but it is far from perfect. What is your take on this new updated healing brush? Do you find the diffusion setting to be of any use or would you rather go back to the legacy brush?


7 Comments
Aside from the new healing brush approach drove me nuts -it's great they've provided an option to fall back. What's even worse IMO is they changed how the tool selection works. It used to be that you hit J for the healing brush tools. Shift J to cycle through. I always used the healing brush, not the spot healing brush so a quick Shift J once and it was selected, for good. Now the spot healing brush is set as default and I have to Shift J each time I open a file. It's a pain in the ass.
If you go to Edit > Toolbar you can change the order of the tools and even customize what tools show up in the left toolbar.
I'm glad one of my machines was not updated. I'm going to be working on an old version of Photoshop until we see Adobe fix this. If it isn't broken, please don't fix it. The new healing brush is GARBAGE.
You can re-install older version of CC or even CS6 from the CC app/panel on the machines that you updated ;)
Photoshop CC is a mess on the workstation I'm freelancing on right now. I went to use liquify, and strange, unrelated alphas started showing up. Then later it started turning the image layer being worked on black. All black. I jump out of the liquify and the layer is black, but the layer icon is normal. I saved the file, closed CC and then thumbnail in the finder is black. I started CS5.5 (which happens t be on the workstation) and it comes up black. I shut down and restart the computer, image is back to normal.
Faux canvas areas were being created when I made the picture box larger than live area when pathing or selecting. Stray pen paths remained after pathing, removed from the actual pathed item. Could not flick pan, was a chore to use the hand tool, had to swipe multiple times to make the image pan. I worked with OpenGL on and off (restarting PShop each time), made no difference to any of this.
Royally bugged out. I finished the rest of the assignment on CS 5.5...
unfortunatelly it's not working now with the latest PS version... :-( damn
As of this date, the present healing brush still sucks, unless there is a setting to return it to the old style without having to lose real-time UI feedback. This is an incredible annoyance, it's really screwing up and SLOWING DOWN my glam/fashion work. I've had to resort to using the clone tool with dodge/burn, and I can work faster with that combo than this abomination.