
If you have shot outdoor portraits for any length of time, you already know that the session you planned and the session you got are never the same session. Something always goes sideways. The light shifts, the location changes, a variable you could not have predicted shows up and rearranges everything. The difference between a beginner and a working portrait photographer is not that the veteran avoids these problems. It is that the veteran has been ambushed by them so many times that the solutions are automatic.
Here are twelve things that will absolutely happen to you on location, along with what to do when they do.
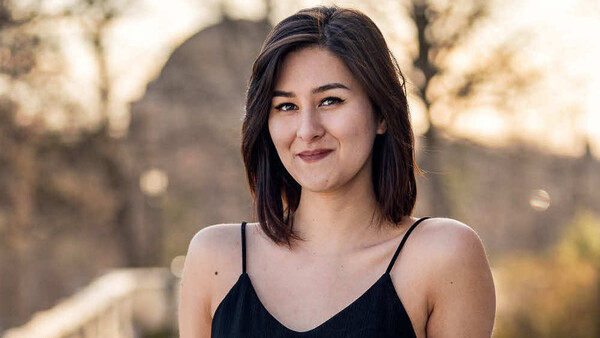
1. Wind Destroys the Hair the Moment You Get the Pose Right
You have spent three minutes getting the chin angle, the shoulder position, and the expression exactly where you want them. You raise the camera. A gust hits. Hair covers the face. The expression collapses into a squint. You start over.
What to do: Position your subject so the wind is blowing the hair away from the face, not across it. This usually means turning them so the wind comes from behind or from the side opposite the part in their hair. If the wind is unpredictable, switch to burst mode and shoot through it. Five frames in two seconds gives you at least one where the hair is manageable. In post, you can clone-stamp one or two stray strands, but you cannot fix a full wind curtain across the eyes. Get it as close as possible in camera.
2. Golden Hour Lasts Eight Minutes Instead of the Forty You Planned Around
You told the client to arrive at 6:30 for golden hour. The sun hits the horizon at 7:15. But the buildings, trees, or terrain on the western horizon block the direct light twenty minutes earlier than expected, and the warm, directional light you were counting on lasts about as long as a commercial break.
What to do: Scout the actual light, not the theoretical sunset time. Visit the location at the same time of day before the session and note when direct golden light actually reaches your shooting area. Build your session timeline backward from that moment: shoot the most light-dependent setups first, then move to open shade or backlit work as the direct sun disappears. And always schedule the client to arrive 30 minutes before you need the light, because clients are rarely early.
3. A Stranger Walks Directly Through Your Background Mid-Frame
You are on public property. So is everyone else. And "everyone else" includes the jogger who runs directly behind your subject during the one frame where the expression was perfect, the couple having a picnic right where your clean background was supposed to be, and the cyclist who appears from nowhere at the worst possible moment.
What to do: Shoot at wider apertures (f/1.8 to f/2.8) to blow the background into a soft blur where passing strangers become unrecognizable color blobs rather than distracting figures. If someone is standing in your background and not moving, shift your angle by three steps to the left or right. The background changes dramatically with small movements. And if someone walks through mid-burst, keep shooting. They will be in two frames out of ten. Delete those two.
4. The Location You Scouted Is Suddenly Packed With Other People
The quiet park, the empty alley, the secluded bench by the river. It was perfect at 2 PM on a Tuesday when you scouted it. It is a farmers market, a birthday party, and a dog park at 5 PM on a Saturday when you show up with your client.
What to do: Always have a backup location within a five-minute drive. Always. Your scout tells you what a location looks like under ideal conditions. The session will not be ideal conditions. When you arrive and the primary spot is unusable, you need to redirect the client immediately and confidently. "I actually found an even better spot nearby" buys you five minutes to drive to Plan B without the client sensing panic.
5. Your Subject's Outfit Has a Pattern That Moirés on Camera
They show up wearing a finely striped shirt, a herringbone blazer, or a dress with a tight geometric print. On your camera's sensor, those fine, repeating patterns interfere with the pixel grid and produce a shimmering, rainbow-colored distortion called moiré that is visible in every frame and extremely difficult to fix in post.
What to do: If you send a wardrobe guide before the session (and you should), include a note about avoiding tight patterns, thin stripes, and small checks. Solid colors, large patterns, and textured fabrics without repeating fine lines all photograph cleanly. If the client shows up in a moiré outfit and changing is not an option, shoot at a wider aperture to soften the pattern slightly, or frame tighter to avoid the worst of it. Lightroom and Photoshop have moiré reduction tools in their detail panels, but prevention is always easier than correction.
6. The Parking Lot You Planned to Use as a Clean Background Has a Dumpster in It
You scouted a location with a beautiful textured wall, a clean concrete surface, or a simple urban backdrop. You show up on session day and a dumpster, a portable toilet, a delivery truck, or a pile of construction materials is parked directly in front of it.
What to do: Change your angle. Move ten feet to the left and the dumpster disappears behind a pillar. Drop to a low angle and it falls below the frame. Shoot at f/1.8 from further back and it becomes an unidentifiable blur. The background you planned is rarely the only usable background at a location. Train yourself to see alternatives on the fly: a doorway, a patch of ivy, a section of fence, a tree trunk. The client does not know what you originally planned. They only see what you deliver.
7. The Shady Spot You Planned for Loses Its Shade
Shade moves. It seems obvious when you say it out loud, but when you scouted the location at 4 PM and the north side of the building was bathed in soft, open shade, you did not account for the fact that the session is at 5:30 and the earth has continued rotating. The shade is gone. The area is now in direct, harsh sunlight.
What to do: Understand which direction the shade is moving and plan your session sequence accordingly. Shoot the shaded setups first while the shade is still there. If the shade disappears mid-session, look for alternatives: doorways, overhangs, the shadow cast by your own body, or the shade under a large tree that holds longer than a building shadow. If nothing works, embrace the backlight. Turn your subject away from the sun, use it as a rim light, and expose for the face. You may need a reflector or fill flash to fill the shadows on the face, but backlit portraits are some of the most flattering light you can shoot in. For a deep dive into how to control and shape light on the face in exactly these kinds of changing conditions, Illuminating the Face: Lighting for Headshots and Portraits covers the full range of natural and artificial light scenarios.
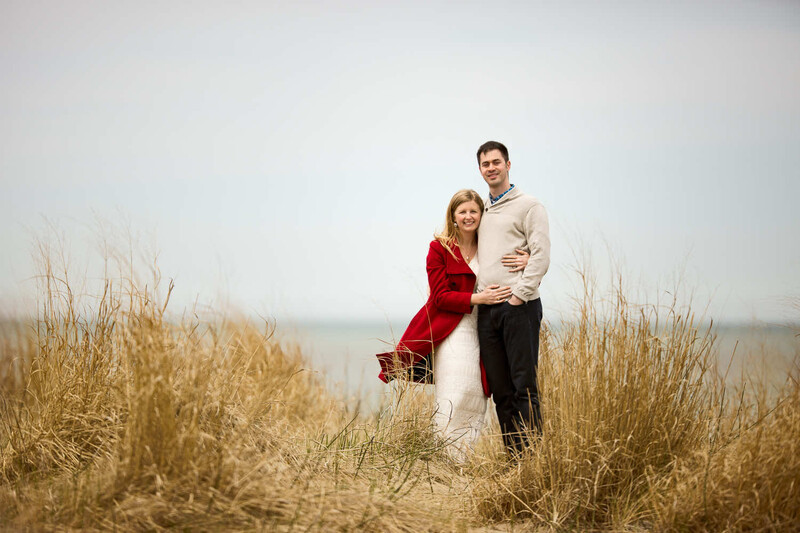
8. A Child in the Family Session Hits Full Meltdown at Minute Fifteen
The session is scheduled for 45 minutes. You are fifteen minutes in. The four-year-old is done. Not "a little fussy" done. Arched-back, screaming, inconsolable done. The parents are embarrassed. The other kids are confused. Your carefully planned shot list is now irrelevant.
What to do: Stop posing. Start playing. Get on the ground. Make the camera a toy. Let the parents comfort the child without the pressure of performing for a lens. Shoot candids of the interaction: the parent holding the child, the sibling patting their back, the quiet moment after the storm. Some of the strongest family images come from these unscripted recoveries. And tell the parents, calmly and sincerely, that this happens at every family session (because it does) and the images will still be great (because they will). Adapting to unpredictable subjects is one of the skills that separates genre-specific photographers from versatile ones, and The Well-Rounded Photographer covers the mindset and techniques for handling exactly these kinds of moments across eight different specialties.
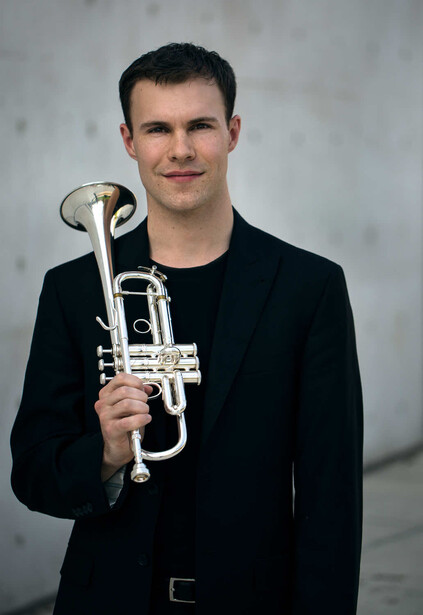
9. Your Subject's Glasses Produce Glare in Every Angle Except the One That Makes Their Face Look Weird
Glasses are a portrait photographer's recurring nemesis. The lenses catch every light source in the environment and throw reflections directly into the camera. You adjust the angle, and the glare moves to the other lens. You try another angle, and the glare is gone but the subject's face is in an unflattering three-quarter view that makes their nose look twice its size.
What to do: Have the subject tilt the arms of their glasses up very slightly (pushing the bottom of the lenses away from the face by a few millimeters). This small adjustment angles the lens surface downward, which redirects reflections toward the ground instead of into your camera. The tilt is invisible in the final image but eliminates most glare. If the problem is extreme, ask the subject if they are comfortable removing their glasses for a few frames, then put them back on for the rest. And if you are lighting with a flash or reflector, move the light source higher or further to the side so the reflection angle misses the lens surface entirely. Glasses management is one of the most common challenges in headshot and corporate portrait work, and Perfecting the Headshot covers the positioning and lighting techniques that handle it consistently.
10. The "Golden Field" From Instagram Turns Out to Be Someone's Private Property
You saw it on Instagram. A photographer standing in waist-high golden grass, backlit by a sunset, with the most beautiful natural backdrop you have ever seen. You found the location. You drove there. You walked up to it. And there is a fence, a "No Trespassing" sign, or a very unhappy landowner standing between you and the shot.
What to do: Do not trespass. Ever. The legal risk, the reputational damage, and the basic disrespect to the property owner are not worth any photo. Instead, look for public alternatives: county parks, nature preserves, state land, and public right-of-way areas often have similar landscapes without the access problem. When you find a private location that would be perfect for sessions, contact the owner and ask permission. Many landowners will say yes, especially if you offer a few images of their property in return. Some will even let you use the space regularly for a small seasonal fee. Build a location list of confirmed-accessible spots so you never have to improvise on session day.
11. Your Client Brings a "Support Person" Who Directs the Entire Session
The client mentioned they were bringing a friend for moral support. What arrived is an unofficial creative director who offers posing suggestions, critiques angles, requests specific setups, and generally inserts themselves into every decision you are trying to make. The client defers to them because they are uncomfortable and their friend is confident. You are now taking direction from someone who did not hire you and does not understand what you are doing.
What to do: Address it early and gently. Before the session starts, say something like: "I love that you brought support. I'm going to be directing the posing and angles so everything stays consistent with the look we discussed. [Friend's name], I might ask you to help with something specific if I need it." This sets the boundary without conflict. You have acknowledged their presence, given them a potential role, and made it clear that creative direction flows from you. If the friend continues to interject during the shoot, redirect with warmth: "That's a great idea, let me try something similar from this angle." Then shoot what you know works. Confident direction is a skill that improves with practice, and it is rooted in understanding light and posing well enough that you do not second-guess yourself when someone in the room challenges your choices. Fundamentals of Lighting builds that foundation so your creative decisions come from knowledge, not guesswork.
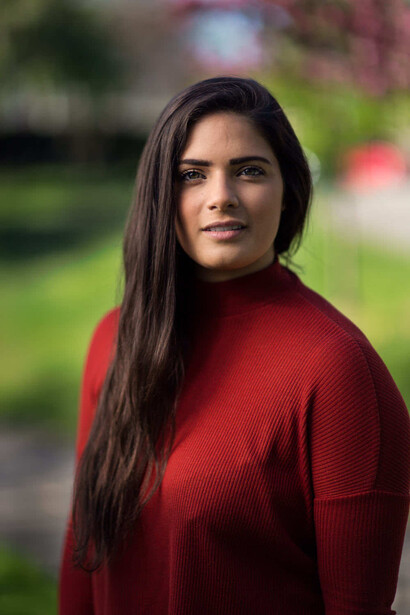
12. You Nail the Perfect Expression but the Autofocus Grabbed the Tree Behind Them
The moment was perfect. The laugh was real. The eyes were alive. And when you zoom in, the subject's face is soft and the bark of the oak tree six feet behind them is in razor-sharp focus. The camera chose the wrong target, and the moment is gone.
What to do: Use Single Point or Small Zone AF and place it on the near eye. Do not trust Wide Area or Auto Area to choose the right subject in a busy outdoor scene, because it will, eventually, choose wrong. If your camera has Eye AF, use it, but verify that it is tracking the correct person (in group shots, it may lock onto the wrong face). Shoot in bursts during expressive moments so you have multiple frames to choose from. And check critical focus on the back of the camera during the session, not just at home. Zoom in to 100% on the subject's eye. If it is soft, reshoot before the moment is completely gone. You cannot recreate a genuine expression, but you can reshoot a posed one.
Every one of these problems is solvable. The outdoor portrait session that goes perfectly according to plan rarely exists, and the sooner you accept that, the better you get at adapting in real time, which is the actual skill that separates the photographer who panics from the one who delivers.
If you want to build the lighting instincts that let you adapt when the sun disappears, the shade shifts, or the location changes, Illuminating the Face: Lighting for Headshots and Portraits is a deep dive into reading and controlling light on the face in every condition. And if you are still building the camera fundamentals that make these field adjustments possible, Photography 101 covers the complete path from your first settings through post-processing. The problems will never stop. Your ability to solve them on the spot is what gets better.


Join the Fstoppers community for free
-
Post comments and join in the discussions
-
Browse the site ad-free
-
Share your work and get featured in the community
-
Compete in the photo contests for fun and prizes
5 Comments
All helpful tips!
I only did outdoor portraits for 20+ years with my Hasselblad. Retouching back in film days was rudimentary. You hit on several of the tough ones. Glasses and wind! Another one you didn't mention was shiney forehead. I kept a neutral powder in my camera bag. I kept bobby pins for hidden side of their head if wind was a problem. Big clips or clothes pins for sweaters or wraps that didn't fall right over their shoulders. If you've ever witnessed a news program from behind the news anchors, quite often, clothes pins or clips are used to arrange their jacket or blouse to make it more attractive from the front. Reflectors can also reduce the effects of wind on hair! I'm saving this article in my how-to portrait folder! Thanks Alex!
Same.
I feel #4 in the very depths of my soul....
Always provide clothing guidelines when scheduling a shoot and ask your clients to bring multiple options. If they insist on the pinstripes and tweed, crop to head and shoulders.