
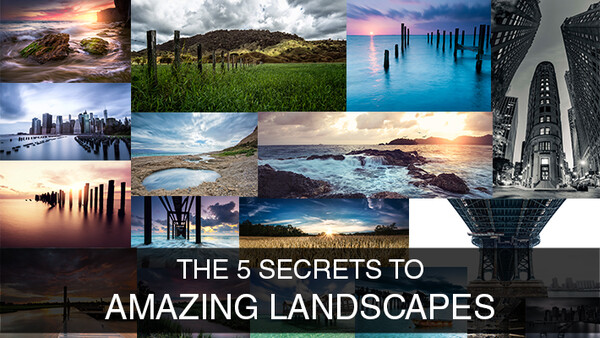
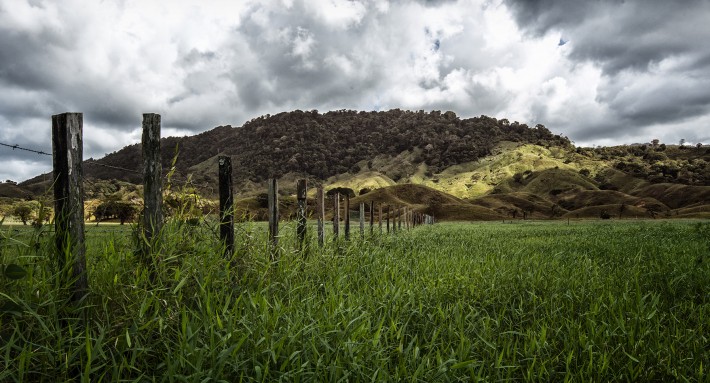
In an instant, one can feel as though they are in another world. As a landscape photographer you have the power to transport someone in the blink of an eye and send them on a journey into your photography to see the incredible world we live in. Creating amazing landscapes goes far beyond just snapping photos using the HDR setting on an iPhone. Landscape photography can seem daunting, but after reading these secrets to landscape photography, there will be no excuse to why you can’t take mesmerizing landscapes yourself!
Unlike weddings and senior portraits, landscapes will not come knocking on your door to pay you for your work. To succeed in getting the results you want you need two things: motivation and drive. Once you have that, you need to rely on location and time by play a pivotal role in a successful landscape.
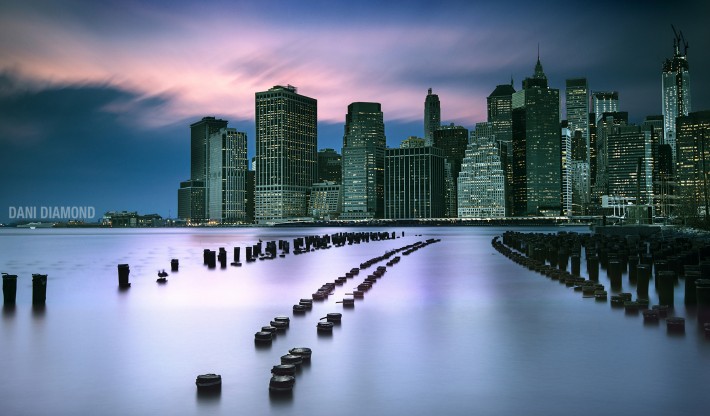
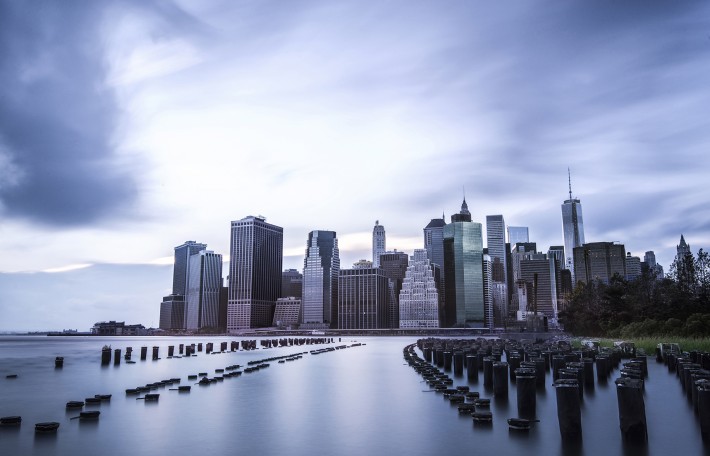
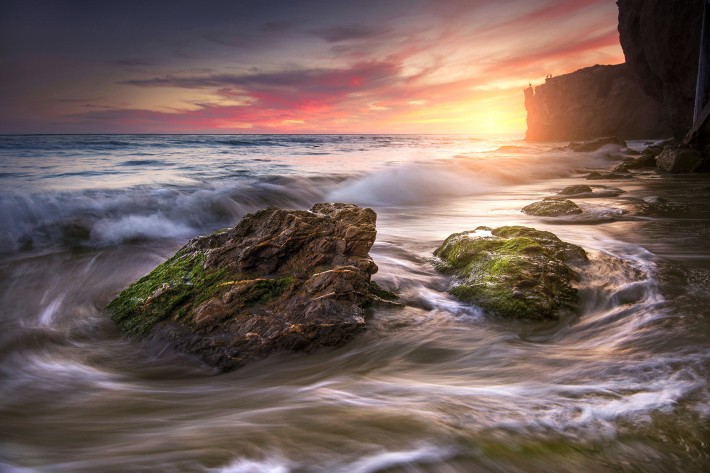
Creation takes hard work. For this photo I had to go back to the location 3 nights in a row: The tide had to be perfect and the sunset desirable. I was ready to walk away after the second night with a mediocre image I had captured, but thankfully I pushed myself to go back one last time to fulfill my still unmet vision. The hard work paid off! I won contest after contest, but more importantly I was ecstatic with the cityscape I created.. Additionally this image alone paid for all my landscape gear.
Two exposures were combined for this shot of NYC. You can see the shots I used HERE (Feel free to follow my FB Page, I post before/after's pretty often).
1. LOCATION, LOCATION, LOCATION.
Chances are, your backyard is NOT the place to take landscapes. You will have to drive, search and scout. Luckily, 500px made finding locations easier. Start off by searching a city, then narrow the search by choosing "Landscape" or "Fine Arts,” and finally skim through the results till you find photos of locations that interest you. Click on the photos and chose "Location." 80% of the time people tag the location they took the photos at. Remember, finding interesting elements, and locations to shoot should be at the top of your priority list.

2. TIME
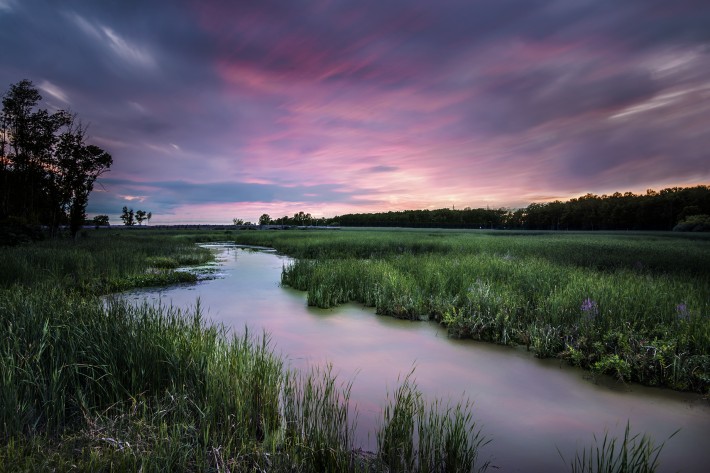
Since mother nature will not work with your schedule, you will have to bend over backwards for her! For me, this is the hardest step, especially when I'm traveling and on vacation. For the most part you will need to shoot at either sunset or sunrise – the golden hours. Midday harsh sun light is not recommended. You will have to set your alarm for ridiculous hours of day and night and even hike in the dark. Sunset is a better option of the two, but living on the East coast makes it almost impossible to capture sunsets over the ocean (because sunrises in the East and sets in the West). However, on the West coast you can run into crowded beaches at sunset. Make sure you always plan ahead to avoid any potential issues that may arise. Knowing exactly where the sunsets and rises is essential. The best app I've found for this on my phone and computer is TPE.
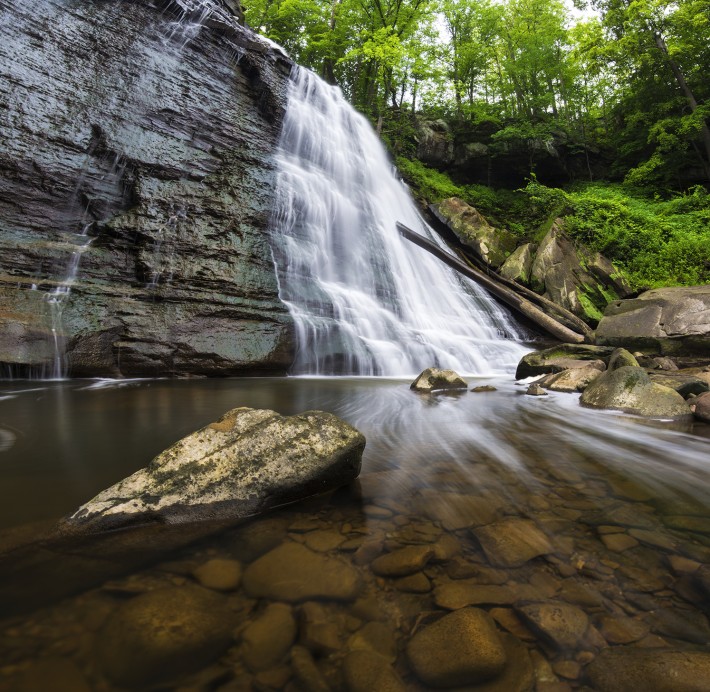
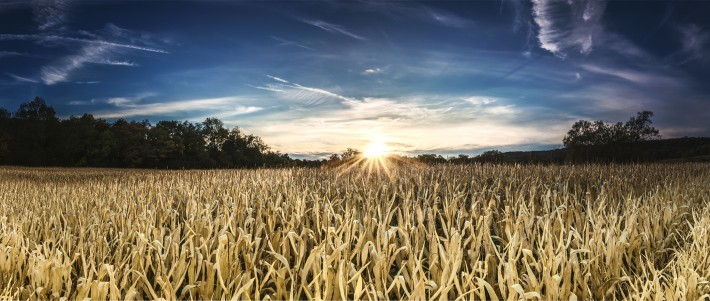
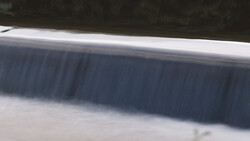
For this long exposure I used the averaging technique 10 images @8 seconds each. D800 16-35
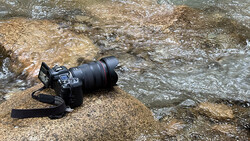
3. GEAR
TRIPOD - If you plan on being serious about landscapes, investing in a solid tripod is an absolute must. Without it, you will end up spending double the money and find yourself getting frustrated one too many times. I use a Vanguard tripod and Manfrotto ball head, which is only a $300 combo. It's travelled everywhere me, through thick and thin. It's not the most expensive option, but not the cheapest either. They key is to wash it and dry it as soon as you get home. I love shooting seascapes and the salt/sand each away at any tripod you'll buy. Another important is an L-bracket. If you've ever tried to shoot on a tripod in vertical mode, you will find that the balance on your tripod will be off and wonky. Additionally, most ball heads don't have good flexibility when used in portrait mode. The L-bracket simply puts a second tripod plate on the side of the camera so you can place the camera in vertical position right on top of the tripod.
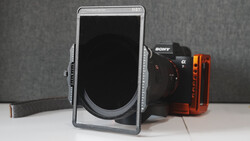
FILTER - Filters will be your best friend and a worthy investment. If you've ever taken a photo of sunset without any filters you will quickly notice that either the sky looks beautiful and the foreground turned into a silhouette -- or the foreground is perfectly exposed and the sky is completely white. This is when filters kick in. The sky is much brighter then your foreground so you need to compensate the exposure by physically putting a "shade of darkness" at the top half of your photo. In this situation you would use a neutral density grad. Basically imagine putting sunglasses on the top half or third of your composition. Here is a video explaining ND grad filters. When it comes to filters there are 2 different directions you can go: round and square. The round are screw on filters, like the UV filter BH recommends you buy with every lens. The square filters slide into a mount on the front of the camera. I don't recommend going the round screw on route since you can't use an ND grad. If you are serious about shooting landscapes, getting a foundation system such as the “Lee” is the way to go. You will be able to stack filters by properly adjusting the ND grad filters to your horizon line and easily remove ND filters such the Big Stopper to compose and focus. The Lee filter system will allow you to add circular polarizer's as well using this add on. Physical filters are needed to capture things which are otherwise not easily able to be mimicked with post processing. I mainly use 2 filters. A reverse ND grad and Big Stopper. A rev ND grad is used when the sun is setting in the horizon. It basically puts the darks part of the filter in the center and tapers off towards the top. A Big Stopper is a 10 stop ND filter it can be used during the day time to give water a smooth or milky look. You can read up more on the different filters and when to use them HERE.
LENS & DEPTH - In most cases using a wide lens is the best option for landscape. Wide lenses help objects in the foreground stand out and give the photo dimension. A telephoto lens, besides for not giving you the ability to capture a wide angle , also compress all the elements in a photo. Using a wide lens will give you a much larger depth of field. To create depth one must stay conscious of the composition. Look for the point of interest (POI), use the rule of thirds and place leading lines to your POI.
That being said, gear is gear. At the end of the day, don't let it stop you from fulfilling your own dreams and creations. Having the tools to get the right results is helpful but not required.

4. SETTINGS
As is with every genre in photography, landscapes have a completely different set of rules when it comes to settings. To prevent any possible noise in your image it is recommended to shoot at the lowest ISO (ISO 100). In most cases you want your entire image to be in focus. Every lens is sharpest at a different aperture. To stay safe try to stick around F7.1 and F11. Anything above F16 will actually soften your entire image on a lot of lenses. Anything below f7.1 most likely will not give you the greatest DOF.
5. POST PROCESS
Post Process is strictly personal preference and each person has their own style. Personally I stay far away from any kind of HDR software such as Photomatix. I find it very hard not to go over board when using such software. Just like retouching portraits, there is no one preset or action that will give you amazing results. You need to take your time in post. Jimmy McIntyre has a great set of free tutorials which you should check out. Zach Schepf also has a tutorial on how blend multiple RAW images which costs $40 and well worth it. his method is tedious and long but if you use an ND grad filter you can basically cut his process in half -- which is exactly what I do.
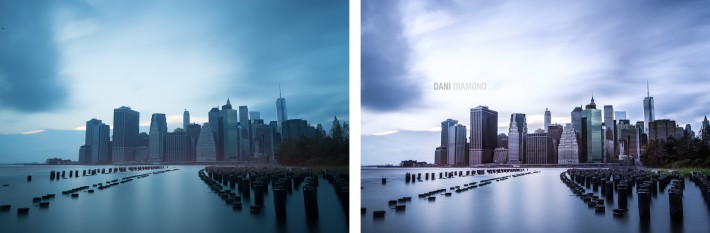
Here is a before/after post processed image. As you can see there isn't any one or steps involved. I manually sat there dodging and burning the buildings to give it dimension.
If you are inspired by a photographer or photo... go out and mimic it! Any composition you come up with on your own, has probably been used and will be used a dozen times in the future. You have the ability to put your own creative touch and vision into your work. Plan ahead and practice. The world is full of magnificent images ready for you to capture. Imitation is the biggest form of flattery. Now you have the knowledge, the rest is up to you.
Dani Diamond | Facebook | Facebook Page | 500px | Instagram

Join the Fstoppers community for free
-
Post comments and join in the discussions
-
Browse the site ad-free
-
Share your work and get featured in the community
-
Compete in the photo contests for fun and prizes
9 Comments
Inspired to go take landscapes! Thanks for the post!
I wouldn't call these secrets, as anyone who has done landscape for even a little knows all the rules. However, this is a great post for beginners looking to get into landscape photography. Might want to think about changing the name of the post, it reeks of clickbait. With the proper name, this is a five star post.
There are more noobs and casual photographers out there who don't know these tips and may have been wondering how to improve their landscape photos. These tips may not be secrets to you but may have been to them.
Some might think it to be a little basic, but very well written and comprehensive. Only one more piece of gear that I use - three tennis balls with small holes to put on my tripod feet. Adds significant stability when on sand or soft ground!
Nice article. Sometimes it's good to be reminded of the basics. Hopefully beginners will learn from this and the more experienced photographer will get refreshed by it.
Great advise, I'm not a landscape photographer, but think I'd like to try my hand at it for fun. Thanks.
If you don't have a graduated ND filter, you can dodge in camera by waving a black card in front of your lens.
Landscapes are the next venture I think, thanks!
I'm not a landscape photographer, but this kind of articles really inspire me to be one.