Many times when shooting objects in an uneven light (usually outside), we have to choose if we want to expose for the darker areas, or for the brighter areas. This means part of the image will be exposed 'correctly' while the other parts will be overexposed (or underexposed). There are few solutions that can help us avoid these issues like shooting HDR or adding artificial light. But these solutions are not always handy and not always something that can be done. This great tutorial shows you how to fix overexposed highlights in only few minutes.
This technique can easily be used for fixing underexposed areas and not just the overexposed ones - Just reverse the masked areas and of course change the exposure in the raw conversion. For those of you who don't have Photoshop CS6 or CC, this can be done in any other version of Photoshop as well. Just create 2 copies of the image, edit each one separately, and than combine.

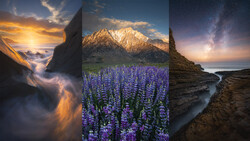
[via ISO1200 via Shawn Kent].

10 Comments
It's a joke ? The result is very bad taste..
The photo itself is not the point - it's just here to help teach this technique. To show what's possible.
Of course when/if you use that method, you will use it moderately and you wont over do it.
Let's take it professionally. I guess hardly anyone uses this ancient technique anymore. Modern RAW sw like Lightroom has become so powerful that it can easily handle these sorts of issues on it's own. You get better results effortlessly and in a fraction of time. Since LR 4 has emerged I've never resorted to this arduous manual method again.
"This great tutorial shows you how to fix overexposed highlights in only few minutes."
This is impossible. If something is overexposed, there is - by definition - no usable data there (solid white). Unless you create new data (content-aware fill, or similar), then there is no way to "fix" or "rescue" blown highlights.
This technique ONLY works if the DR of your scene is smaller than the exposure range of your camera->processing->personal tolerance for noise. This is why I shoot HDR: very wide exposure range with little to no noise even at high resolution.
Also, this is just a cumbersome and tedious way of rediscovering Enfuse. And Enfuse is now a part of Lightroom as well. Just multiprocess a file into several 8 or 16-bit tiffs, and combine with Enfuse. Or use tone-mapping, but only if you actually know how to do tone-mapping.
If you blow out hightlights ...even if you shoot RAW (because the lost of the data), the recovery is almost impossible! ...
(I shoot RAW by the way, and it happens many times)
The point is ... Fstoppers are giving us a nice technique to deal with that ... and nothing more! ... From there, we could manage to keep an image, and not taken it for lost!
Nice tips guys! ... as usual!
Regards from Uruguay to all! ...
I see that first histogram (before Bridge screen) matched with exposure +1,2 and contrast +0,5.
When he sets Reset camera default is already much better, without luminance mask.
I've never understood this luminosity mask trend with landscape photographers. It's a pain to do and can't you just adjust curves for the same effect? That's what I always do. The only advantage to creating a luminosity mask I can see is to mask out the shadows to do a noise reduction on that targeted area.
No, you can't create this effect with only curves. You're separating the image into two parts (high luminosity and low luminosity), and then editing each of these separately (colour tweaks, noise reduction in shadows (as you mentioned), local contrast (NOT global contrast, which is what curves does)).
It's more similar to Luma/Colour separation, where the two parts are Luminance (holds texture detail) and Colour (A/B).
On the other hand, this only holds true as long as you don't overdo the feathering (the step where you add blur to the mask).
You should try it out (just to see the difference in processing technique, if nothing else), but I think it's more obvious if you take Luminance->Mask->Increase Contrast, then use this mask between two copies of the source image to let one copy "overlay" on the other. Too bad photoshop has literally no way of doing this in a sensible way, because there's no routing matrix... So here's the stupidly unintuitive way:
Try Channels->RGB->Ctrl-click(don't ask why)->back to Layers->New mask icon(you should now have a mask that is a grayscale version of the source image)
->Menu bar->Image->Adjustments->Curve/Levels(whatever you prefer)->Adjust contrast to choose what to mask. From here, work with duplicates of the source image, maybe blur your mask, etc.
Hey Anders, Thanks for the reply. That is interesting. I was using a technique I found online and I ended up making actions of it. It was able to divide the image into 4 separate luminosity masks and tweak each one individually. I just never saw any advantage. But doing some more contrast and sat on each channel especially in the shadows could be interesting. Lately I've been just using multiple layers and blending with underlying layers found in the layer style blending options. It's much easier, but possibly less refined. It's a really fast way to quickly and globally adjust just the highlights, or shadows.
I hadn't used the luminosity mask for a while, but when I did finally learn it, wowwy wow did I regret not learning it earlier. Now, I don't know how exactly he uses it in the video, as I refuse to watch a video when I already know how and when they refuse to put it as a post for those of us who don't want to waste our bandwidth. However, they are very useful when you want to apply adjustments to only certain areas of brightness/luminosity. Instead of using an adjustment layer and then carefully drawing in a mask, you can use a luminosity mask based on the luminosity you want to show through, and then mask that itself also into a general area of your photo. Very quick and easy, saves a lot of time over the traditional method, and works better a majority of the time. It's also very useful if you're doing a burn/dodge layer, since you can color in a certain area on the actual layer, and then with a luminosity mask only certain luminosities in that area will show through.
It has saved much editing time and made it more of a pleasure to work with complex images.