
Every time a piece of software catches attention, a question many photographers ask is how useful it is in a professional workflow. This is exactly what this article is aimed to answer about Zoner Photo Studio X. I used it in a professional photography workflow and saw how it could be integrated.
For many photographers, editing can be a very tiring and never-ending job. While editing is important and is often crucial to the final result, it is good to spend as little time at the screen and as much time as possible shooting. As a professional photographer, I value good post-production workflow a lot. Some factors I pay attention to are price, cloud storage, non-destructive editing capability, advanced color processing, as well as easy to navigate interface. As much as I love new and exciting tech, I hate trying to figure out the software for a month. To be quite frank, the last thing I want to happen is a piece of software malfunctioning.
What Is My Professional Photography Workflow?
I take a lot of pictures. When I can, I shoot tethered and have a fairly standard workflow. But, there are a few quirks of my current software that I am not too happy with when I’m working with memory cards. It is not often I can bring a huge team to some remote location, have enough power for eight hours of heavy laptop usage to run backups, drives, and a whole lot of other things. Besides, there are times when working tethered isn’t practical for speed reasons. Most equipment I work with produces huge 30-60 MB files; memory cards fill up fast. Moreover, they take forever to import, organize, and process.
Even when I am tethered in the studio, I am doing a BTS time-lapse for social media that is going to a memory card. As you can tell, memory cards are an integral part of my professional photography workflow.
When Zoner Photo Studio X caught my attention, I got interested and saw an opportunity for a piece of software to change my workflow forever. To see how good it is, I’ve been putting it to hard use in the past month to see how it performs in my data-heavy workflow. Long story short, Zoner Photo Studio X is a very viable option in a professional workflow. Here’s why:
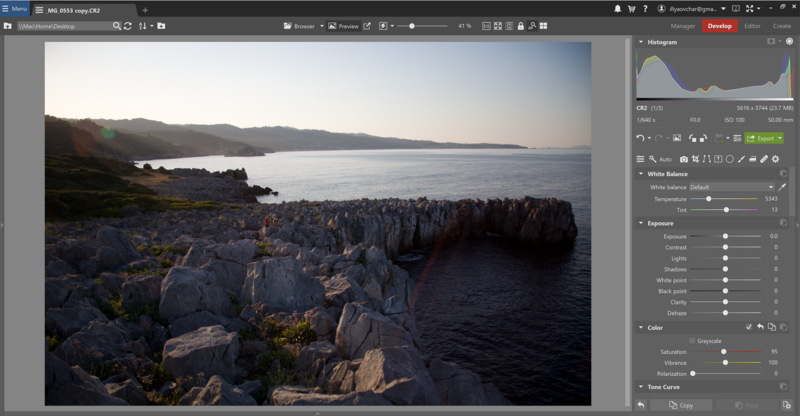
Getting to Grips With Zoner Photo Studio X
Although I am all for new technology, I don’t like software that is annoying or hard to figure out. Truth be told, not too many people, including me, can be bothered to figure something out for too long.
ZPS X has an easy-to-understand interface that makes it easy to add to your existing workflow. The controls are very intuitive, making this a very viable and easy-to-integrate option. Whether you’re looking for photo-editing software or trying to find an easy alternative, ZPS X has a place in most professional workflows.
The simplicity of the interface made ZPS X easy to integrate into my current professional fashion photography workflow. It is very similar to other UIs on the market, and therefore, it is a very easy transition and a gentle learning curve.
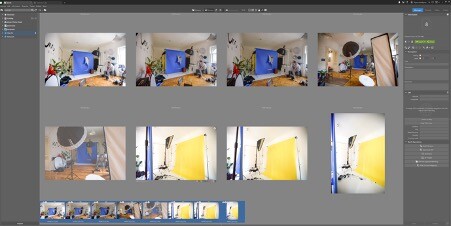
In my workflow, I am looking for fast and efficient RAW development. All I shoot is in raw format, and therefore, I need that ability to quickly make adjustments, sometimes to one photo, but at times to a batch of hundreds. ZPS X’s batch processing impressed me quite a bit, and I ended up using it as my go-to batch processing for some footage.
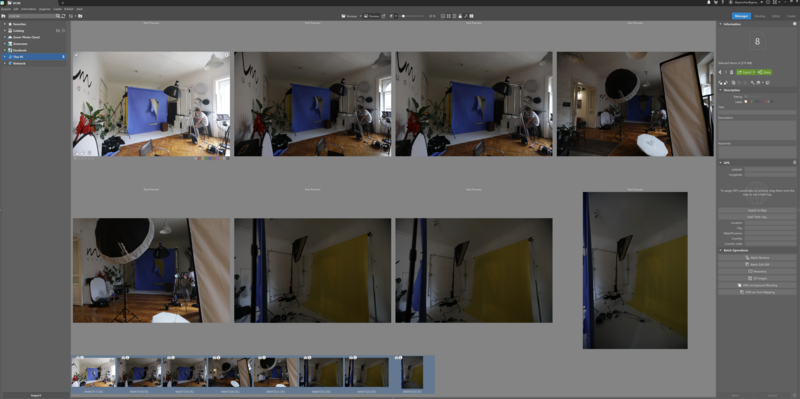
Batch Processing That Is Fast — Really Fast
In my workflow, I often need to edit a batch of behind-the-scenes footage that my assistants make. As with anything, I try to go for a specific and consistent look for that. Editing a batch of images is often quite slow; however, with ZPS X, it is quite the opposite. I enjoyed the speed and efficiency with which ZPS X batch-processed images from a recent shoot.
The export tool works quite well with my batch-heavy workflow. It allowed me to export a few variants of the same image. Should I need to export one for the web and one for print, I can get that done easily. The export tool has a few presets where you can modify them to your liking. I did mine to export a few versions of the same photo for the web and social media.
Another great feature I was using quite a lot is being able to customize the presets to my exact specification. I like to sharpen my images quite a bit before they go to web publishing, as most screens tend to show sharpened photos a bit better. Renaming the files was also quite helpful, as my filing system dictates very specific filenames that I use to be able to efficiently identify the right photo by entering just a few bits of data.
Time Savings
No one likes a slow workflow. I am no exception. Often, an agency needs BTS footage right after the shoot to post about it on social media or elsewhere. Thinking back to my days as an event photographer, I had to deliver a lot of images to someone right away, often within hours of the event. While that lets me charge more, it is also very demanding of the software to be that efficient and fast. A drawback I saw with Lightroom is the need to import photos before I could do anything to them. While it works in slower workflows, it was a pain in the neck for me. Being able to shave off some time by skipping importing with ZPS X made my workflow much faster and efficient. The reason ZPS X can do this is because it doesn’t need to copy photos to a catalog. Instead, it will keep the photos in the original location, while still giving the benefit of caching and fast previews. If I was doing event photography only, I would use ZPS X for everything, as it is a very time-efficient piece of post-processing software.
Processing Capabilities on Par With Lightroom and Capture One
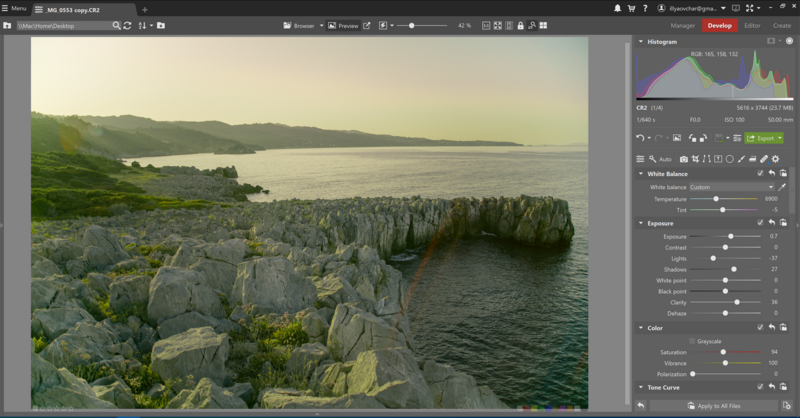
As with any post-processing software, I want it to be very advanced when it comes to processing. From day one. my workflow was very color-heavy, meaning I wanted specific looks for each photo and would go out of my way to achieve them. Naturally, I wanted to be able to make fine adjustments like selective color editing and very small changes in split toning.
The color shift tool deserves attention, as it is one of the most used things in all of my workflows. I love fine adjustments, and I found both the basic and advanced modes to be very effective when it came to color adjustments. A professional workflow demands a lot of options in color. Having used ZPS X as part of my daily workflow, I didn’t see anything that was lacking.
Price
I am not made of money, just like many other photographers. Although we don’t like talking about money too much, it is important to say that ZPS X is a very affordable option at only $49 a year or $4.99 a month. Had I just started photography, I would've picked up ZPS X straight away just because of the cost.
Closing Thoughts
In conclusion, ZPS X is a great software that I integrated with ease into my professional workflow. There is a small caveat: it is only available for Windows, which leaves out quite a few photographers using Mac. Fortunately, I have to use both Windows and Mac, so that is not a problem for me. All in all, ZPS X offers the same high-standard professional capabilities and more to photographers looking for a fast, easy, and affordable workflow. Going forward, ZPS X will remain in my workflow as the software used whenever I am shooting on a memory card.


5 Comments
You buried the lede, Windows only.
I have been using Zoner Photo for many years and get incredible editing results. It is my "go-to" editor. I have never had Photoshop or Lightroom due to the cost and complexity. Zoner Photo is powerful and cost effective and they are constantly improving it. I do own 2 other editors, but I rarely use them since Zoner Photo covers all the bases.