Are Traditional Presets Dead? Why Radiant Photo Created Assistive AI for Photographers
An open letter from Elia Locardi and Team Radiant Photo to the photography community.
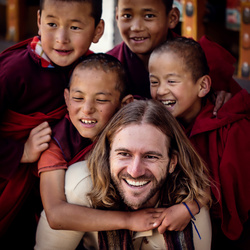
Elia Locardi is an internationally acclaimed professional travel photographer, Fujifilm Global Ambassador, writer, public speaker and highly experienced educator who spends his life shooting some of the most beautiful locations in the world. Since he began traveling full-time in 2009, he has visited more than 65 countries, flown nearly 2 million miles, and collaborated with major companies, brands, countries, NGOs, and tourism agencies on nearly every continent.
An open letter from Elia Locardi and Team Radiant Photo to the photography community.
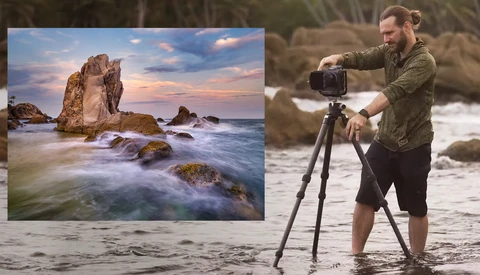
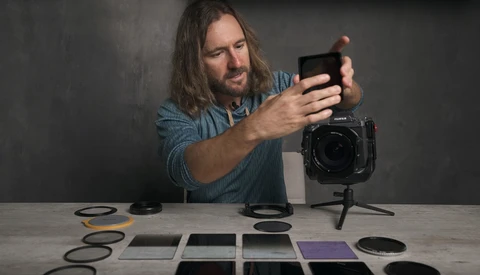
Welcome to the next—and 6th—episode of our 8-part video tutorial series about long exposure photography and how different filters can produce dramatic results. As a reminder, each time we drop a new video, you have the chance to win some awesome prizes. Follow the instructions included in this post to enter this week's contest.
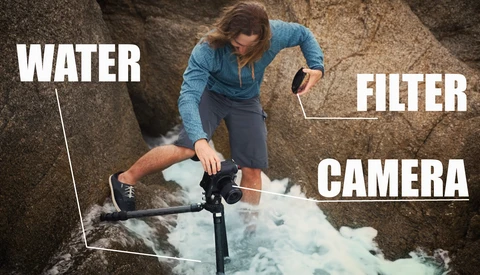
Welcome to the next, and 5th episode of our 8-part video tutorial series about long exposure photography, and how different filters can produce dramatic results. As a reminder, every time we release a new video, we give away some great prizes. Make sure to follow the instructions in this post to enter this week's contest.
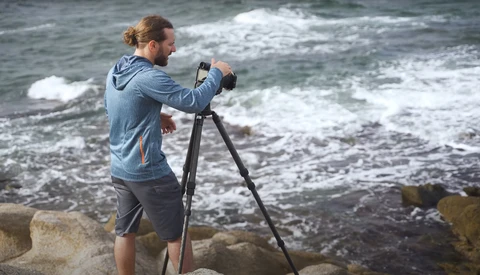
It's time to release the fourth episode of our 8-part video tutorial series about long exposure photography, and how different filters can produce dramatic results. Remember, each time we release a new video, we also give away some awesome prizes. Read through this post to find out how to enter this week's contest.
Hello again everyone! It's time to release the third episode of our 8-part video tutorial series about long exposure photography, and how different filters can produce dramatic results. Remember, each time we release a new video, we also give away some awesome prizes. Read through this post to find out how to enter this week's contest.
Hello again everyone! Elia Locardi here and it's time to release the second episode of our 8-part video tutorial series about long exposure photography and how to use different types of filters to create unique results. Remember, we are also giving away awesome prizes with each new video release. Read through the post to find out how to enter each contest.
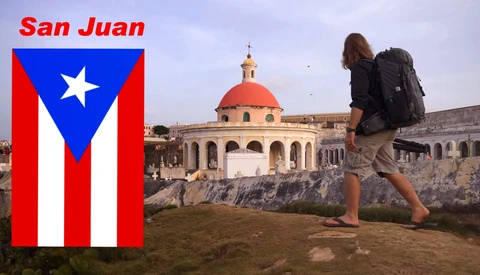
Today, Fstoppers has teamed up with NiSi filters to launch a brand new, free tutorial series with landscape photographer Elia Locardi. Not only are we releasing new video lessons every week, but we are also giving away over $600 worth of free gear with every video. Welcome to our long exposure adventure in Puerto Rico!
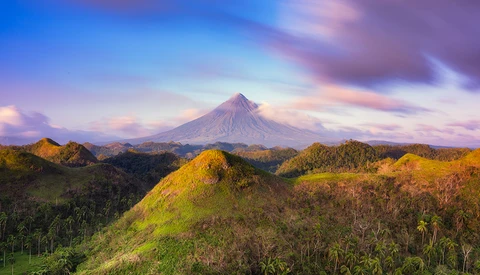
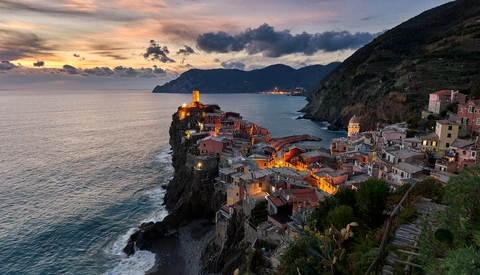
In the latest episode of "Moments in Time" in the Philippines, I traveled to Legazpi along with Win Magsino to capture images of Mt. Mayon, a very beautiful and iconic volcano on the island of Luzon. In this post, I will take a more in-depth look at the post-processing that went into creating the final image.
Before I get into the meat of this article, I have to admit, I was initially very against the idea of Snapchat because I couldn’t wrap my head around the concept of disposable content that disappears after 24 hours. For quite a long time, I didn’t understand how it made any sense at all compared to other social media platforms.
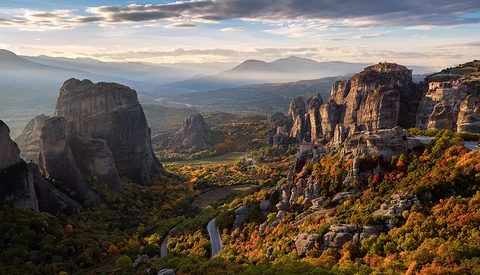
I recently had the pleasure of picking up one of the first final production models of the Inspire Pro and X5 Micro 4/3 Camera, and immediately took it to one of the most beautiful photography destinations in the world to test it out: Meteora Greece.
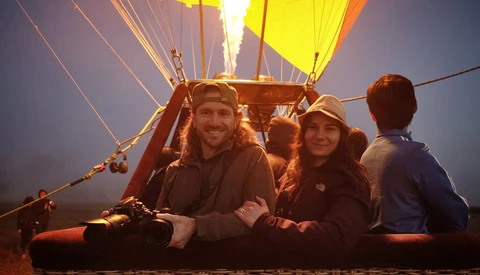
Naomi and I just celebrated our 40th month of being on the road full-time and living a 100% location independent lifestyle. Looking back, it seems like a lifetime ago when we made that crazy decision to sell nearly everything we owned and adopt a life filled with travel photography. In a way, it really was a lifetime ago because we were completely different people back then living very different lives; two people with a dream of what could be, teeming with optimism, but with no real idea of how it would all work out in the end.
While I was flying my DJI Phantom 3 from Ponte Santa Trinita—one of the beautiful bridges of Florence—during our recent Italy Dream Photo Tour a wonderful thing happened.
A friendly Italian woman, probably in her mid-fifties, looked over my shoulder at the live feed from my mobile device and stopped dead in her tracks. Her transfixed gaze slowly lifted from the screen to meet my eyes and she said, “I was born in Florence and I’ve lived here all of my life, but I’ve never seen my city look as beautiful as this.” It was then that I noticed that her eyes were filled with tears. Smiling, wrapped up in the emotional moment and honestly becoming a bit teary eyed myself, I didn’t know what to say except, “thank you.”
This encounter was a turning point for me. I was already a huge fan and avid user of DJI Quadcopter / Drone technology, but these few simple words from a complete stranger solidified my perception of the sheer potential of personal aerial photography and videography devices. This statement may seem strange to some, but let’s dive into together as I share my perspective as photographer integrating these new tools for capturing the world.
Since I started traveling full-time as a photographer in 2009, I’ve consistently gone out of my way to find the most awesome vantage points possible for my photography. I’ve literally climbed mountains, paddled kayaks, ridden pack mules, contracted helicopters, you name it and I’ve done it. Whether it’s a 50 hour airline travel itinerary, a simple 25 meter rocky climb, or even multiple days sleeping in a car, or any number of other uncomfortable conditions for that matter, whatever it’s taken to get the shot I have considered well worth the effort. I often feel like most of my job is working to arrive in the best possible place to take a photo, because the location and framing of my subjects are the core of my unique style of travel photography.
Now, a fair bit of those climbs, offshore boat excursions, or costly helicopter hires can be solved with a small, affordable DJI Quadcopter that fits comfortably into my backpack. Don’t get me wrong, there’s nothing wrong with good old fashioned hard work and strategic positioning, quite the contrary. I’d just say that after adding a DJI Phantom 3 to my workflow, my perspective on travel photography has been forever changed. Welcome to a brand new world of possibilities, all controlled in the palm of your hands.
An edit of some of the drone footage I captured with 7 days in Italy during my 2015 Italy Dream Photo Tour. It was filmed entirely with a DJI Phantom 3 Professional Quadcopter at 4k resolution and edited with Adobe Premiere Pro. Additional color correction was applied using Adobe After Effects and Photoshop.
The Integration of DJI Drones Into My WorkflowWhile I said that the friendly encounter in Florence was a turning point for me, it wasn’t my first time working with DJI Phantom technology. In fact, I managed to start this story from the middle rather than the beginning, which doesn’t speak too highly of my organizational skills. In my defense, I do retain a high level of perpetual jet lag since I traverse international time zones more often than I change my clothes, which I guess doesn’t speak too highly of my personal hygiene either… But that’s a different story entirely. ;)
My fascination with DJI technology started early in 2014 when my Social Media feeds began to fill up with amazing photos and videos people were capturing with the Phantom 2 Vision+. Moreover, from the moment I had the chance to first fly one during Photo Plus Expo (PPE) in October 2014, I knew that I had to get my hands on one and fly it out in the field. If not for the amazing photographic potential, then just to help appease my childlike wonder and desire to fly my own quadcopter. In a way I could say that my initial investment in learning DJI technology was all based on a total geek out session. Soon after that though, it became much much more.
My first try flying a drone... So much for beginner's luck. ;)At the time of PPE, I was already working to finalize plans with Lee Morris and Patrick Hall from Fstoppers to shoot our massive video tutorial series on Landscape, Cityscape, and Astro Photography. Lee, already a moderate DJI Phantom flyer, decided to bring along a Phantom 2 with an Zenmuse H3-3D Gimbal in order to capture aerial footage in 6 countries over the 80 day project including: Iceland, Italy, Singapore, Hong Kong, Cambodia, and New Zealand. We chose to bring the Phantom 2, Gimbal and GoPro option instead of the Vision+ mainly due to the ability to capture high quality 4k and 2.7k high frame rate video with the GoPro Hero 4. At the time, the Phantom 2 Vision+ only offered standard quality HD video at 1080p.
You can read the full post post I wrote about shooting around the world in 80 days with The Fstoppers team over on my blog.After only a few short days of filming in Iceland, Lee cut together our first promotional video “A Drone in Iceland.” By the time we left Iceland, Lee was already an expert Phantom pilot and I was completely hooked on self-controlled aerial photography and videography, and well on the way to mastering the art of flying myself.
While the Phantom 2 / H3-3D flown with a GoPro Hero4 Silver was extremely powerful, it had one major drawback. We were all flying 100% blind with no first person view. Each flight, we’d send out the drone, never let it get out of eyesight, and review the video on the tiny GoPro LCD screen when it returned. Having zero visual feedback was definitely frustrating in the beginning and it required a great deal of trial and error, but that same challenge also turned out to be a great way to truly learn how to fly a drone.
After wrapping up shooting with Lee and Patrick in New Zealand, I traveled on to Japan for the 2015 Sakura season. Since Lee took his Phantom 2 home, I arranged shipment of a new Phantom 2 version 2 and H4-3D from B&H Photo to use with my GoPro Hero 4 and take along for the ride. I had a lot of flight time in Japan and it was there where I learned how to overcome the second biggest challenge of flying a visionless system. Objects always seem to be much farther away from the drone than they appear to be.
At first this seems great. It means that you’re always a safe distance away, right? No, not exactly, because eventually you test the limits in order to get the perfect shot...
Let’s just say that learning to judge and compensate this optical depth perception issue is not without its casualties and flying in complex environments can be costly when you make a mistake. With my case in particular, a run-in with a tree, the cost of learning on the job was a new Gimbal and GoPro 4 Black. Thankfully the Phantom 2 itself came out with just a few minor scratches and still functions perfectly. Considering how mangled everything else was, that really speaks highly of the Phantom 2’s durability.
If you’re still considering the differences between the Phantom 2 and H4-3D Zenmuse Gimbal with GoPro vs. the Phantom 2 Vision+, or new Phantom 3 here’s some basic pros and cons to consider.
Pros of Phantom 2 and H4-3D Gimbal + GoPro Hero 4 ComboUpgradable camera system since GoPro makes regular model updates
Ability to use ProTune function to capture a higher bitrate for more control in post-processing
The GoPro can be removed and used in other environments
Flying blind can teach you a solid foundation of flying skills based on fully understanding your environment and real-time spatial relationships.
The remote is smaller, more lightweight, and doesn't have the bulky smart device attachment.
You can add Lightbridge and have the same visual feedback as the Phantom 2 Vision+ with the GoPro but it’s a costly upgrade
Cons of Phantom 2 and H4-3D Gimbal + GoPro ComboFlying without a first person view can be very difficult when you’re a beginner to cinematography techniques.
GoPro Wifi upsets the flight controls and is only suitable for very short distances. This makes the built in GoPro video transmission useless when flying.
Registering true depth can be very difficult without live visual feedback
GoPro camera distortion which can be intense when shooting at ultra wide and wide settings. (Note that this can be corrected fairly easily in most editing packages)
Cannot remotely trigger recording, still / video capture, or change settings during flight without returning the drone home.