Articles written by Michael Woloszynowicz
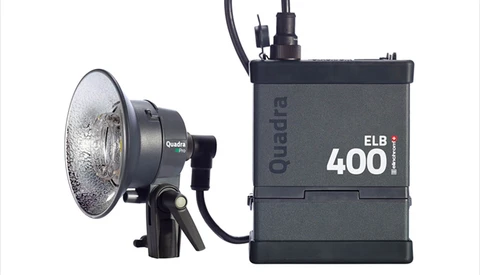
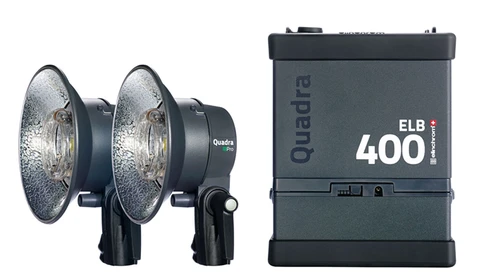
A few weeks ago I introduced you to Elinchrom’s latest offering, the ELB portable strobe kit. Now that I’ve spent a few weeks shooting with it both on location and in the studio, I can finally tell you if it’s actually any good and whether it can compete with the newly released Profoto B2.
With the recent announcement of the Profoto B2, Elinchrom's position in the ultra-portrable strobe pack market was somewhat overshadowed as the former exceeded the Elinchrom Quadra Hybrid in many aspects. Not to be outdone, Elinchrom has now announced the release of its next generation on-location pack and head kit known as the ELB 400.
With companies like Profoto and Elinchrom offering an increasingly broad range of self-contained strobes, Broncolor was no doubt feeling left out with its predominantly pack and head oriented lineup. That’s all changing now with the release of the new Siros strobe; a compact, wall powered, feature rich and wallet friendly flash unit.
As the old adage goes, it’s not the gear, it’s the photographer that takes a good photo. While this is generally true, is there something to be said about $20,000 worth of Broncolor lighting gear? I mean a flash of light is a flash of light, right? Or is it?
If you've been longing to make your photos a lot more interactive, there's a new app launching today that’s set to cure your itch. The mad scientists at Fyuse have come up with some incredibly cool spatial technology that blends photography and video to create a unique and interactive experience, all from your iOS or Android device.
There's little debate that Iceland remains one of the most sought after locations for landscape photography and this new video from Lytro further emphasizes why that is. Although created as a promotional piece for the Illum camera, Lytro have done a wonderful job on the film by focusing more on photography, story telling and the beauty of the landscape, and simply letting the advantages of the camera shine through on their own.
Although we’re often reminded of the importance of constantly shooting and developing our skills as photographers, is there a point where too often shooting actually becomes detrimental? Through observation and personal experience I’ve come to the conclusion that there is indeed a case to be made for shooting less if you’re hoping to properly develop your photography business.
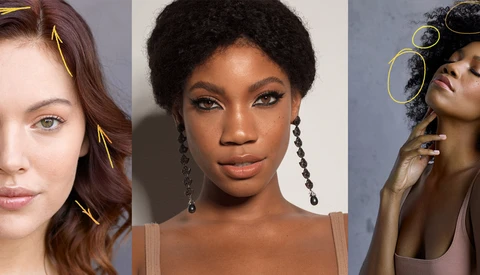
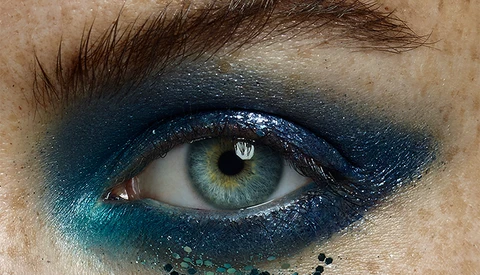
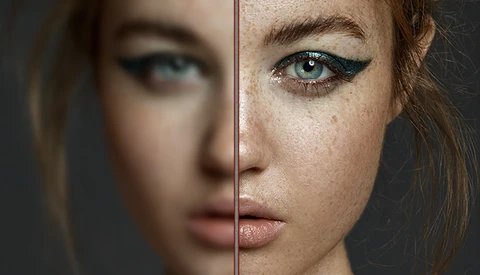
When we hear about eye whitening our thoughts immediately turn to disturbing cases of retouching gone bad where subjects look more like dolls than humans. While YouTube is littered with videos on the subject, a good chunk of them take a brute force approach to the problem. They either crank up the luminosity or reduce the saturation; both of which will produce unnatural and sometimes frightening results.
Although there have been countless articles written on the subject of Frequency Separation - including several here on Fstoppers - the current state of retouching has me somewhat concerned about its use. Its widespread adoption, use and overuse has brought us to the point where frequency separation is fast becoming the number one culprit for poorly retouched and cringe worthy work. While I’m not convinced that we need to ban it outright, I do feel that the way we approach it needs to fundamentally change.
Chicago based photographer and timelapser Eric Hines returns with a brilliant follow-up to his acclaimed Cityscape Chicago timelapse released over a year ago with the debut of Cityscape Chicago II. His first timelapse won him a Vimeo Staff Pick along with nearly 1 million views and part 2 surely doesn't disappoint.
No one is more critical of my work than me and I know a lot of photographers share the same sentiment. I took some time this week to reflect on this ongoing frustration and negativity, and really think about what’s behind it and why we do this to ourselves.
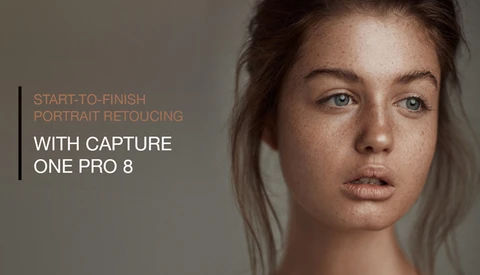
As you may already know, I spend a good deal of time polishing my photos in post production and have taught retouching in Photoshop for some time. A few months ago I made the move from Lightroom to Capture One and haven't looked back. To test out it's power, I decided to see just how close I could get to my portrait retouching style using only Capture One Pro 8 and forgoing Photoshop entirely.
Retouching problems start well before we sit down in front of the computer and begin pushing pixels around. I know this because as I reflect on my past work, I realize that I’m as guilty of making countless mistakes as much as anyone else. Rather than talk about techniques like dodging and burning, frequency separation, etc. let’s focus on more high level problems that might be leading you in the wrong direction.
When it comes to the quantity of lights that one needs, opinions are often heavily polarized and a hotly contested debate often rages. There are those that are staunch supporters of one light while others claim that a handful of lights are needed before anything meaningful can be done. Ultimately neither group is right as there is no definable minimum or maximum number of lights that one should use.
Phase One has officially announced the release of Capture One Pro version 8 with a host of new features and a new purchasing model option. More than just minor enhancements, version 8 brings with it truly useful features that allow you to perform more of your work within it and not have to turn to Photoshop or additional plug-ins.
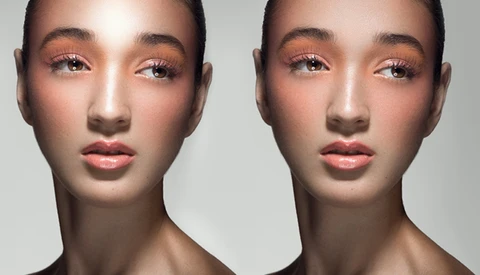
A common issue that we're often faced with when using hard light modifiers such as a beauty dish or open reflector, is that of over-exposed highlights on our subject's forehead, nose and under eye areas, which also results in lost skin texture in those regions. While raw processors offer up the ability to recover highlight detail, this rarely leads to satisfactory results. In this tutorial I'll show you how to recover the texture while leaving the overall luminosity in-tact to produce a well-balanced result.
Whether it's photography or videography, we're always of the belief that we need that extra piece of gear to produce high quality and professional looking content. Be it a high-resolution camera to showcase detail, a rig for steady frames, or filters to deal with challenging light conditions, we're convinced that our vision can't be conveyed without a bag full of gear. While that may sometimes be true, this touching slow motion video shows just how much can be achieved with only a phone and a strong vision.
So it goes without saying that there are a ton of different ways to match skin tones across your subject or between images in Photoshop so it's often just a matter of picking the option that is most convenient or intuitive. Despite the wide array of choices, I seldom see people use the selective color adjustment layer for this task. The beauty of selective color is that it allows us to go off the numbers rather than intuition and achieve an accurate result in little time.
For the longest time I viewed tethered capture as a nice-to-have reserved for high budget shoots and simply shyed away from it. I tried it a few times and after constantly being plagued with technical problems, I decided I'm better off sticking to my camera's LCD screen and didn't give it a second thought. Through my ignorance, little did I know how much I was actually losing out on and how much time I wasted in the process.
If you’re a professional photographer, being pulled in a million directions probably feels like a daily occurrence. There seems to be a never ending stream of tasks that we should be completing, some of which are paid, some of which aren’t. Our trade-off often involves balancing paid work - be it desirable or not - with unpaid tasks that we hope will provide business in the future. The question is, how do we know what’s going to be helpful and what’s going to turn out to be a waste of time?
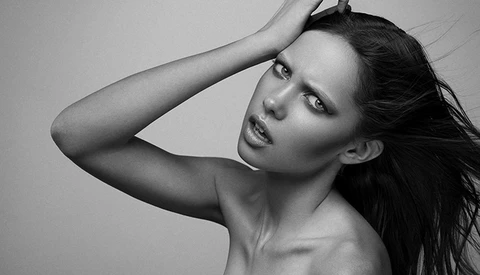
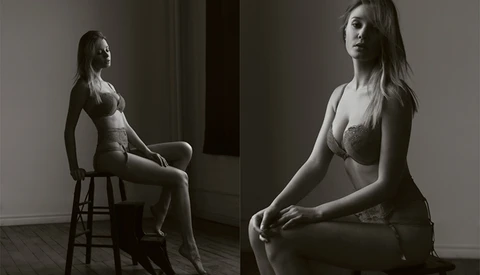
Too often people view lingerie or nude photography superficially and fail to see the photographic beauty behind it. While this stereotype is unjust, it’s also understandable. Too many photos of this genre forego the beauty and focus solely on tasteless sensuality. By sticking to the basics of what makes a compelling image, fellow Toronto based photographer Billie Chiasson reminds us just how tasteful and beautiful lingerie photography can be.
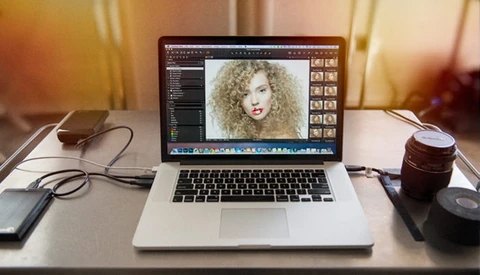
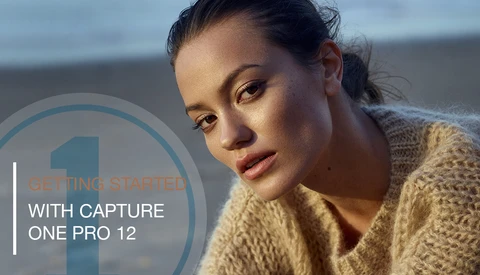
Over the years, Capture One has evolved tremendously in its feature set, and has steadily become one of - or arguably the best - raw processor available. Despite all it's advantages and praises, many remain hesitant to adopt it, largely due to its seeming complexity and the intimidation factor associated with a truly professional tool. In this tutorial I'll be guiding you through the key aspects of Capture One version 12, and demonstrating that it's actually quite intuitive and straightforward to use.
If you’re on Facebook, you’ve no doubt seen some occasional teaser images from various artists announcing their addition to the August network. While the team has been relatively mum about the details behind August, their vision is simple yet ambitious. If they are successful, it could prove to be one of the most powerful and beneficial platforms for artists to date.
When it comes to raw converters and photo library managers, our choice of products has recently become more limited with the demise of Apple’s Aperture. My impression in the past was that one’s choice is largely based on features and ease of use with little difference in image quality between them. That opinion was quickly changed when I started digging into Phase One’s Capture One Pro 7.
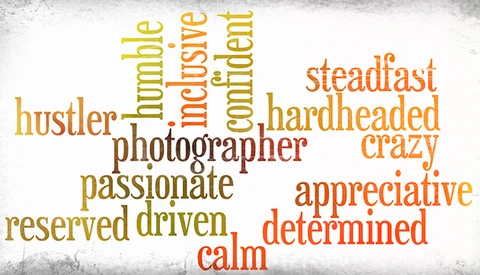
Over my years as a fashion photographer and retoucher I’ve made contact and had conversations with countless other photographers. I’ve watched some of them flourish and some of them flounder. Those that rise above the competition and make their mark in the industry seem to embody a certain set of traits or characteristics that help in their success.
Whether you’re traveling around or venturing out beyond your own backyard, cities offer an endless supply of interesting locations and moments for photographers. To take advantage of their potential you’ll have to not only identify the best compositions but also execute them well. Here are some tips that will help to take your city and cityscape photography to the next level.
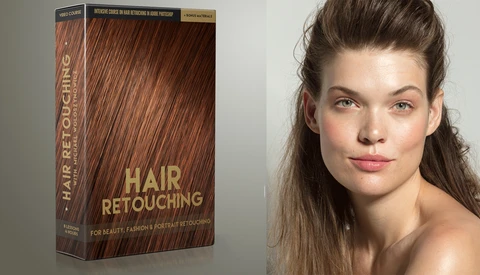
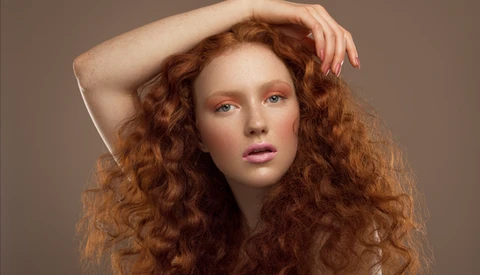
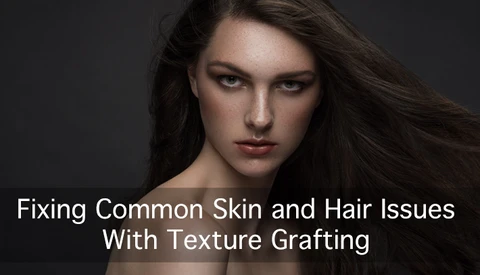
From a retouching standpoint, there are few things more unpleasant or challenging than dealing with chunks of hair on the face, missing patches of skin texture and large folds of skin. Generally the existing tools in photoshop such as the healing brush or patch tool fail in these situations and we often end up with unnatural or unpolished results. When all else fails I often turn to a technique called texture grafting to deal with a multitude of issues.
Those that know me know that Los Angeles is one of my favourite cities in the world. The city just feels like home for a number of reasons and this timelapse from Chris Pritchard absolutely embodies everything I love about it. The ever changing conditions and light, the mixture of urban and landscape and the way the city just feels alive.
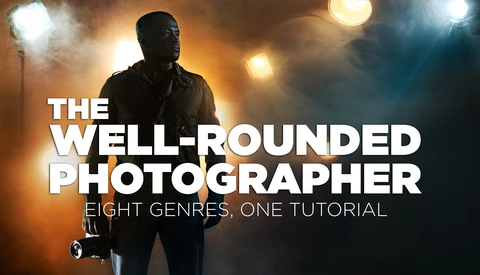
We’re often told that we need to focus our photographic efforts on one genre and that you shouldn't try to be an expert at everything. While I agree that you need to target your marketing at a specific photographic field, many people take this advice far too literally. They disregard other genres and miss out on a tremendous amount of valuable knowledge that can be obtained through the exploration of genres outside of our comfort zone.
As a photographer, your average day most likely includes at least one blog, social media, or image post. Piggybacking on these posts with additional links is a great way to sell a product, promote a service or grow your following, but as with anything, there is a good, better and best way of doing things. Here are some tips that will help you to maximize the return on your daily posting efforts and generate more business.
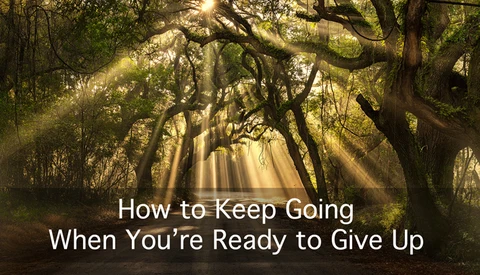
If you’ve made the transition, or are planning on making the transition from photography as a hobby to photography as a job, you’ll invariably come to a point where you’ll just want to throw your hands in the air and give up. These bouts of self-doubt and frustration will likely occur many times and seem to appear not only during your lows but even at the highs. These feelings are normal, and it is those that rise above them time and again that end up successful.
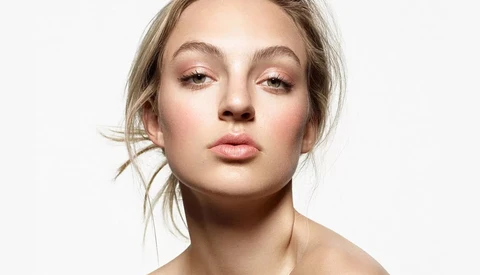
In beauty and portrait retouching, one of the most important goals is to retain skin texture and keep the image from looking soft. We often however face a situation where the existing texture is unflattering and harsh. While we could heal out each pore or patch manually, this often leads to sub-par results and takes a long time. In this video I'll show you a unique, precise and fast way to target a particular texture frequency and offset it in a largely automated way.
Martin Heck from Timestorm films kicked off a series of timelapse videos through New Zealand with the release of Awakening earlier this month. While Awakening took the viewer across New Zealand's grand landscapes, his latest film Amplitude explores its details. Taking you on a journey through its caves, waterfalls and lush greenery, the details and colors are sure to excite your senses and have you putting New Zealand on your bucket list.
The evolution of a photographer is rarely a linear one. We get better, we get worse, we think we’re improving but we’re not, and then with some luck and a lot of patience and practice, we actually start to produce great images. For some that last point is never reached and it’s usually due to a few common mistakes.