
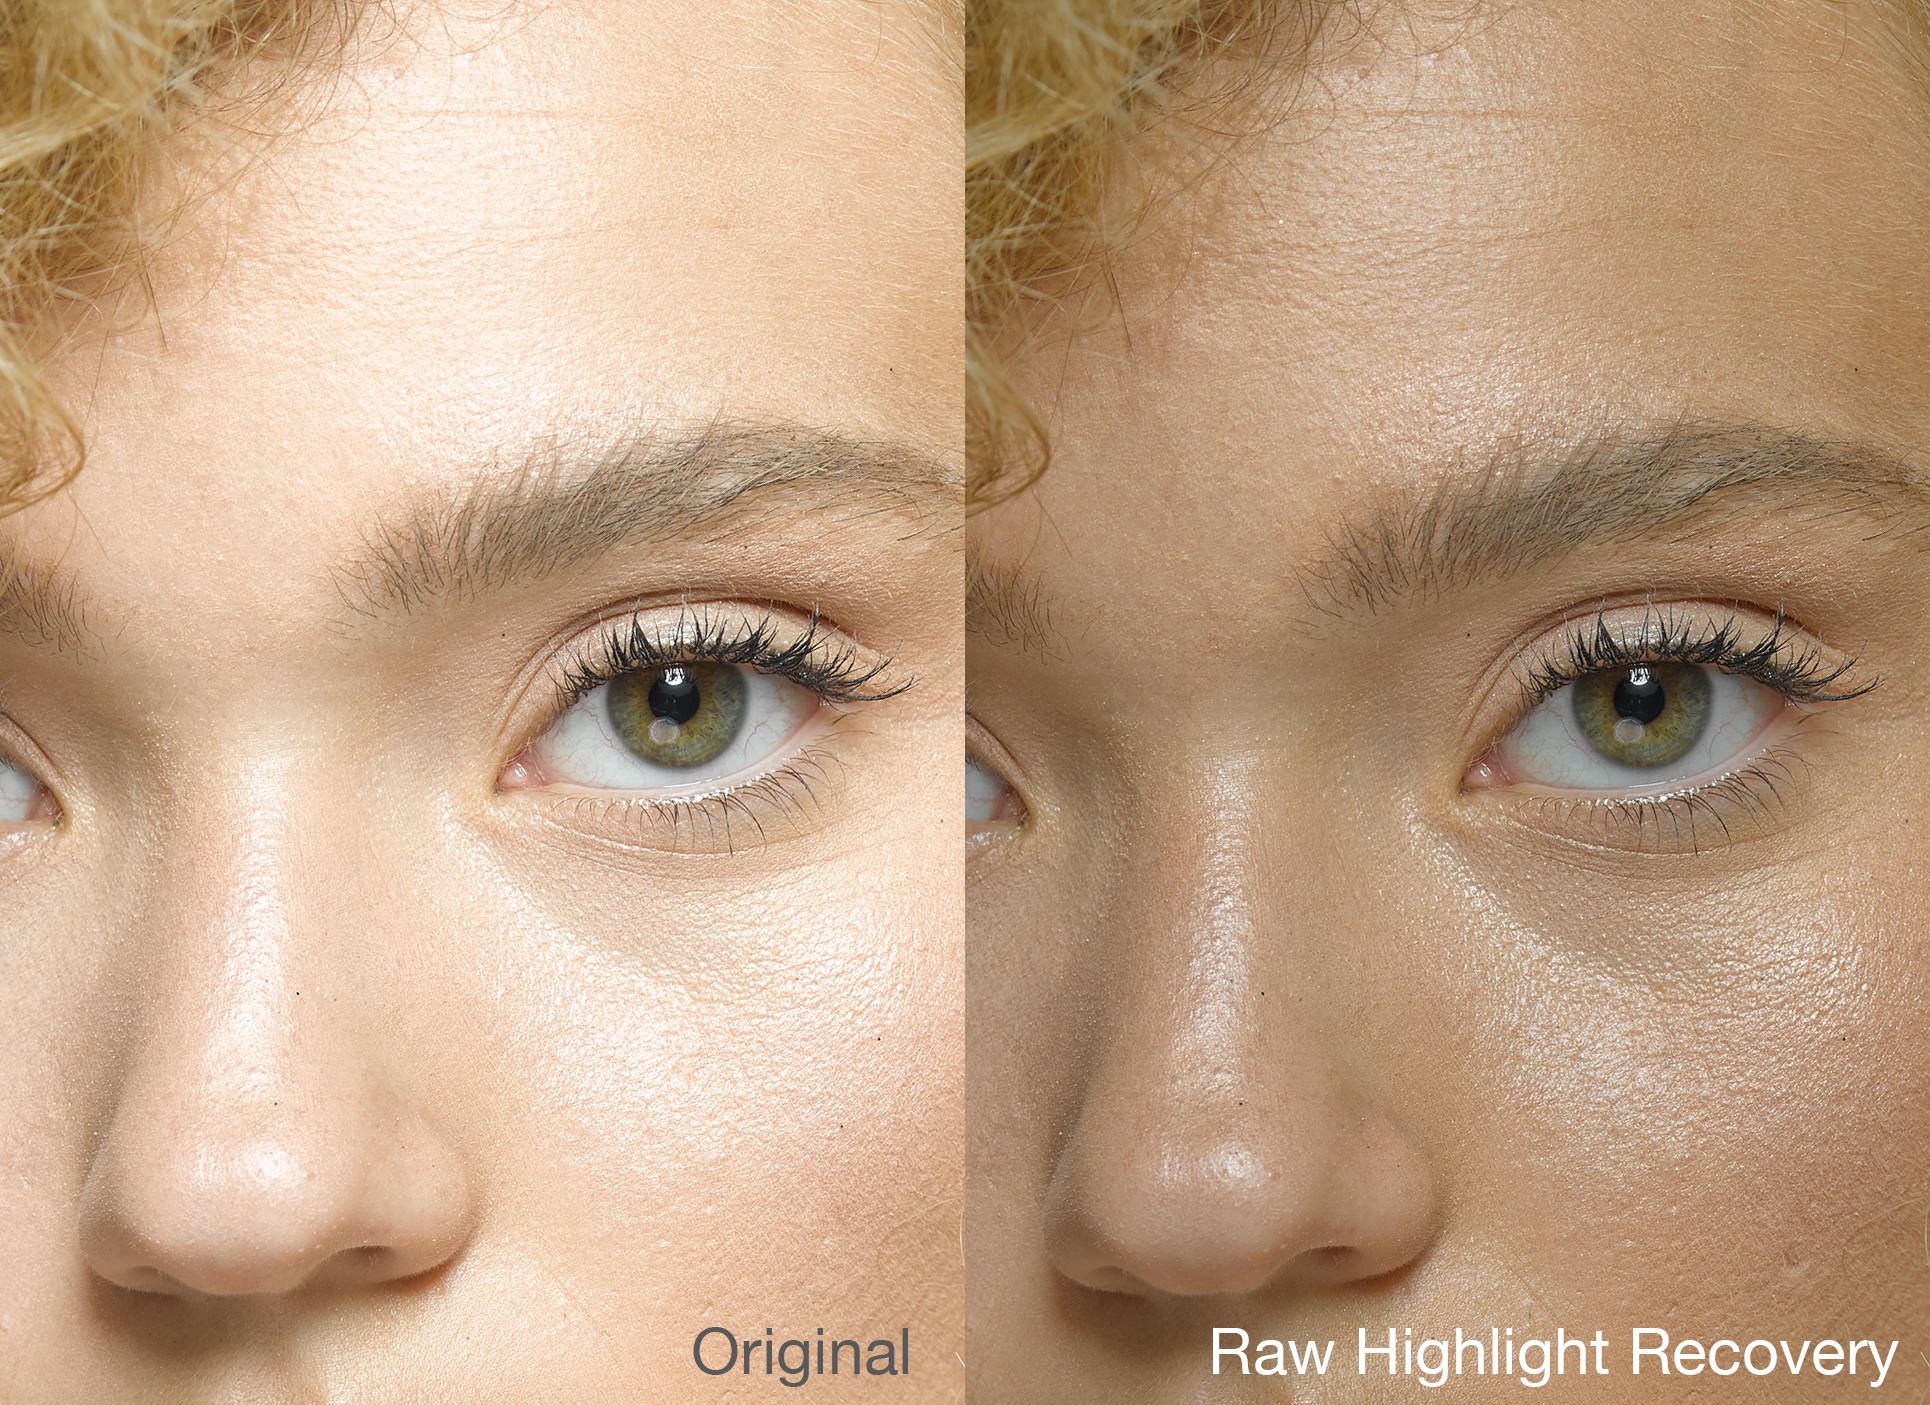
A common issue that we're often faced with when using hard light modifiers such as a beauty dish or open reflector, is that of over-exposed highlights on our subject's forehead, nose and under eye areas, which also results in lost skin texture in those regions. While raw processors offer up the ability to recover highlight detail, this rarely leads to satisfactory results. In this tutorial I'll show you how to recover the texture while leaving the overall luminosity in-tact to produce a well-balanced result.
If you're a portrait or beauty photographer, you've no doubt been confronted with the scenario of blown out highlights on your subjects face. While we should do our best to mitigate these problems in-camera through the use of ND gels, light position and makeup, sometimes we're left to work with what we've got. While the traditional raw recovery tools for highlights and exposure work well in most cases, they let us down under this scenario as they end up flattening down our subjects features and making the image look ugly overall (see below).
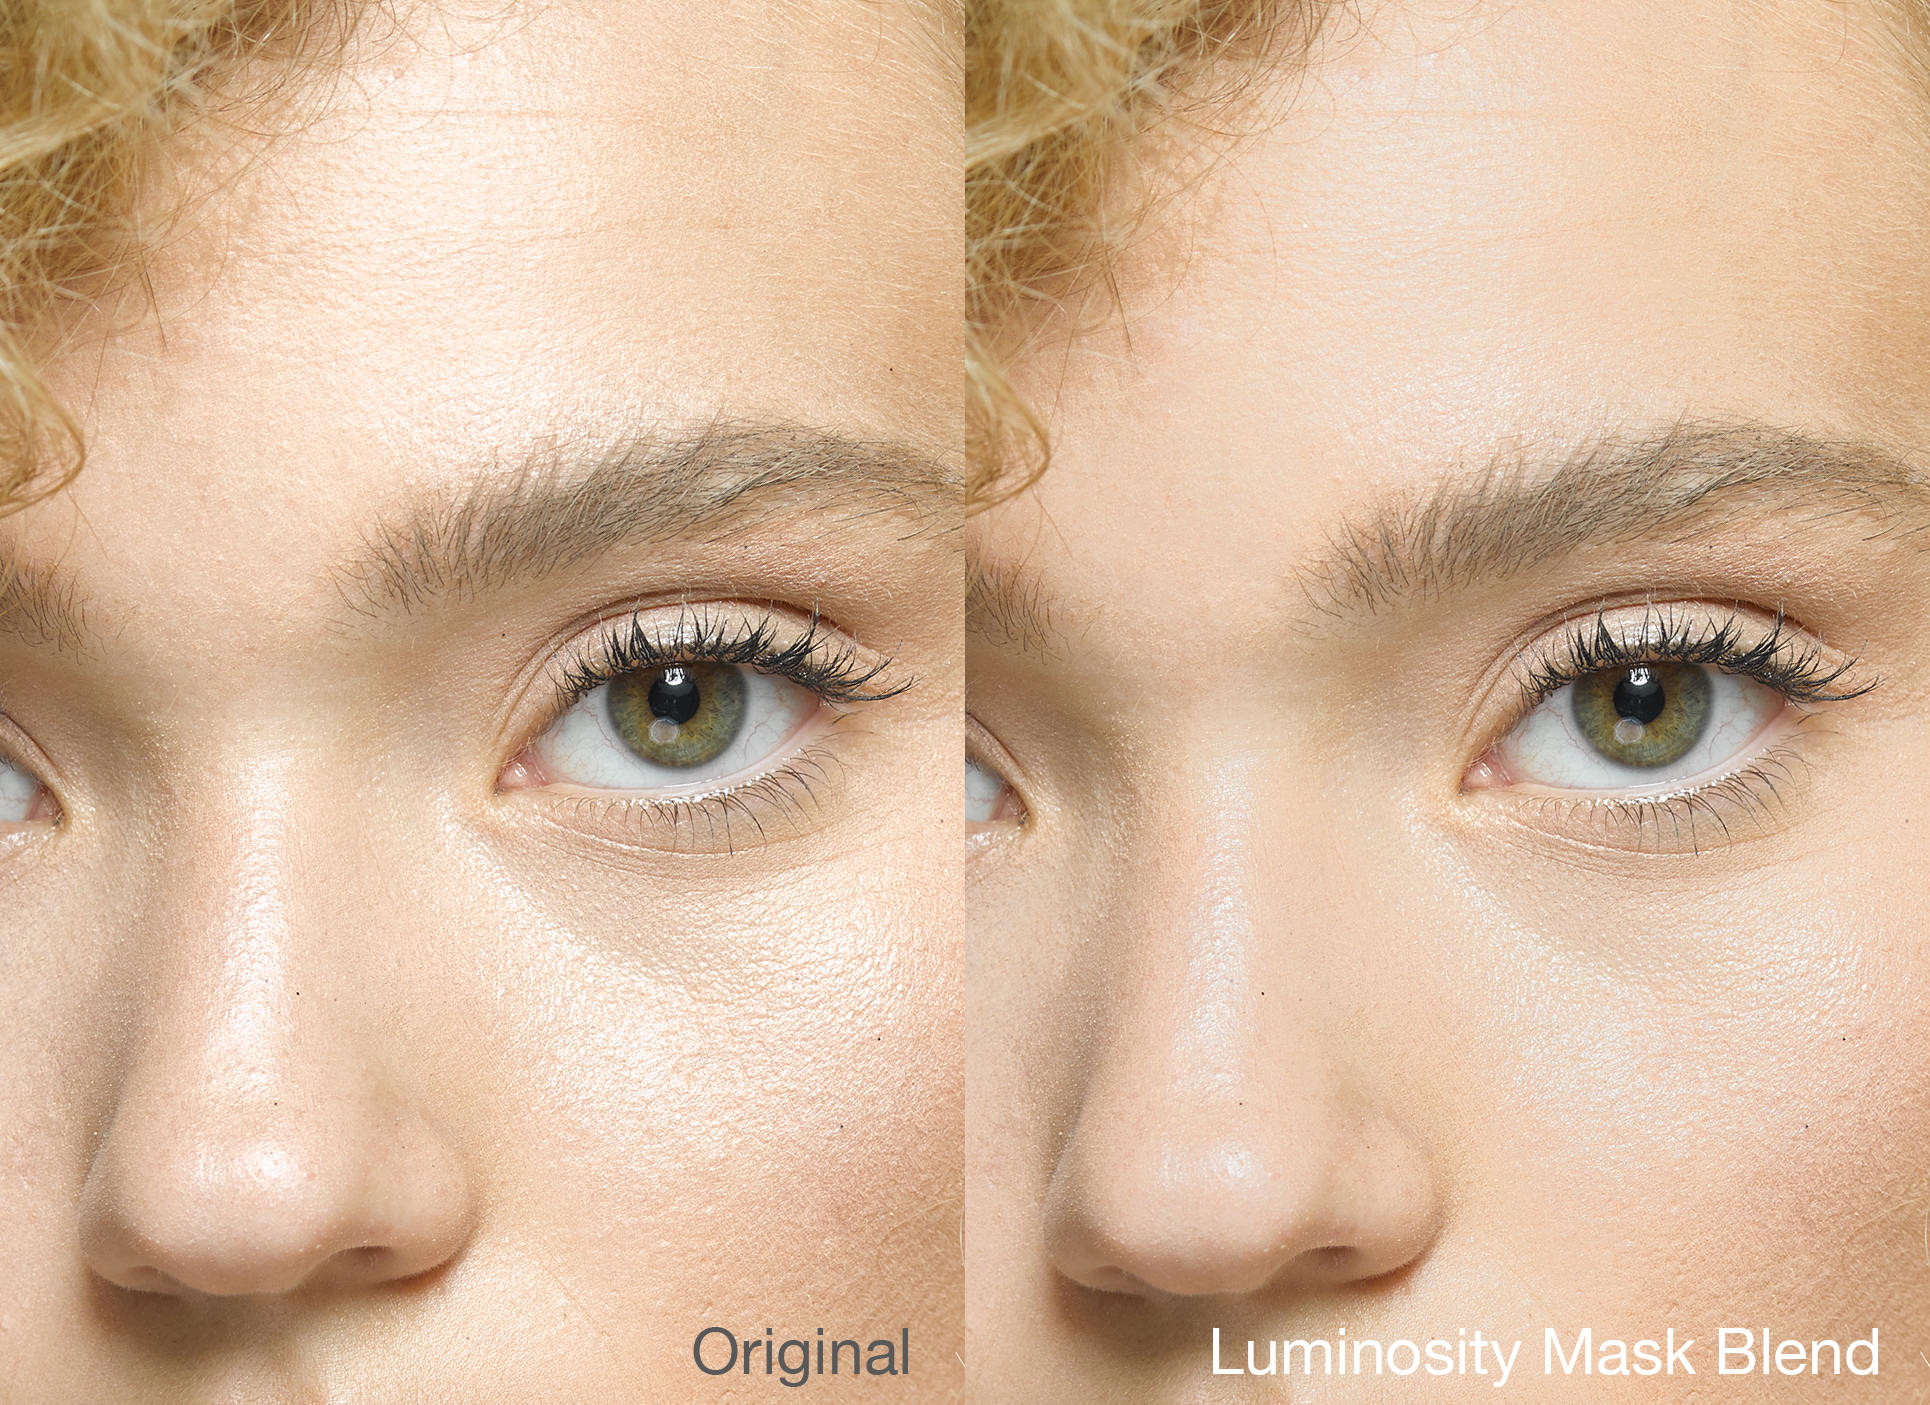
To get around these problems, we can use luminosity masks to blend just certain targeted highlight areas from our raw-recovered image with our base image. While the overall image looks better, it's often detrimental to the appearance of skin texture as seen below.
To get around these problems, you can use a hybrid approach which involves taking the desirable part of the raw recovered image (the texture) and us it to enhance the original image which contains our overall luminosity and tonal information to produce the result seen below.
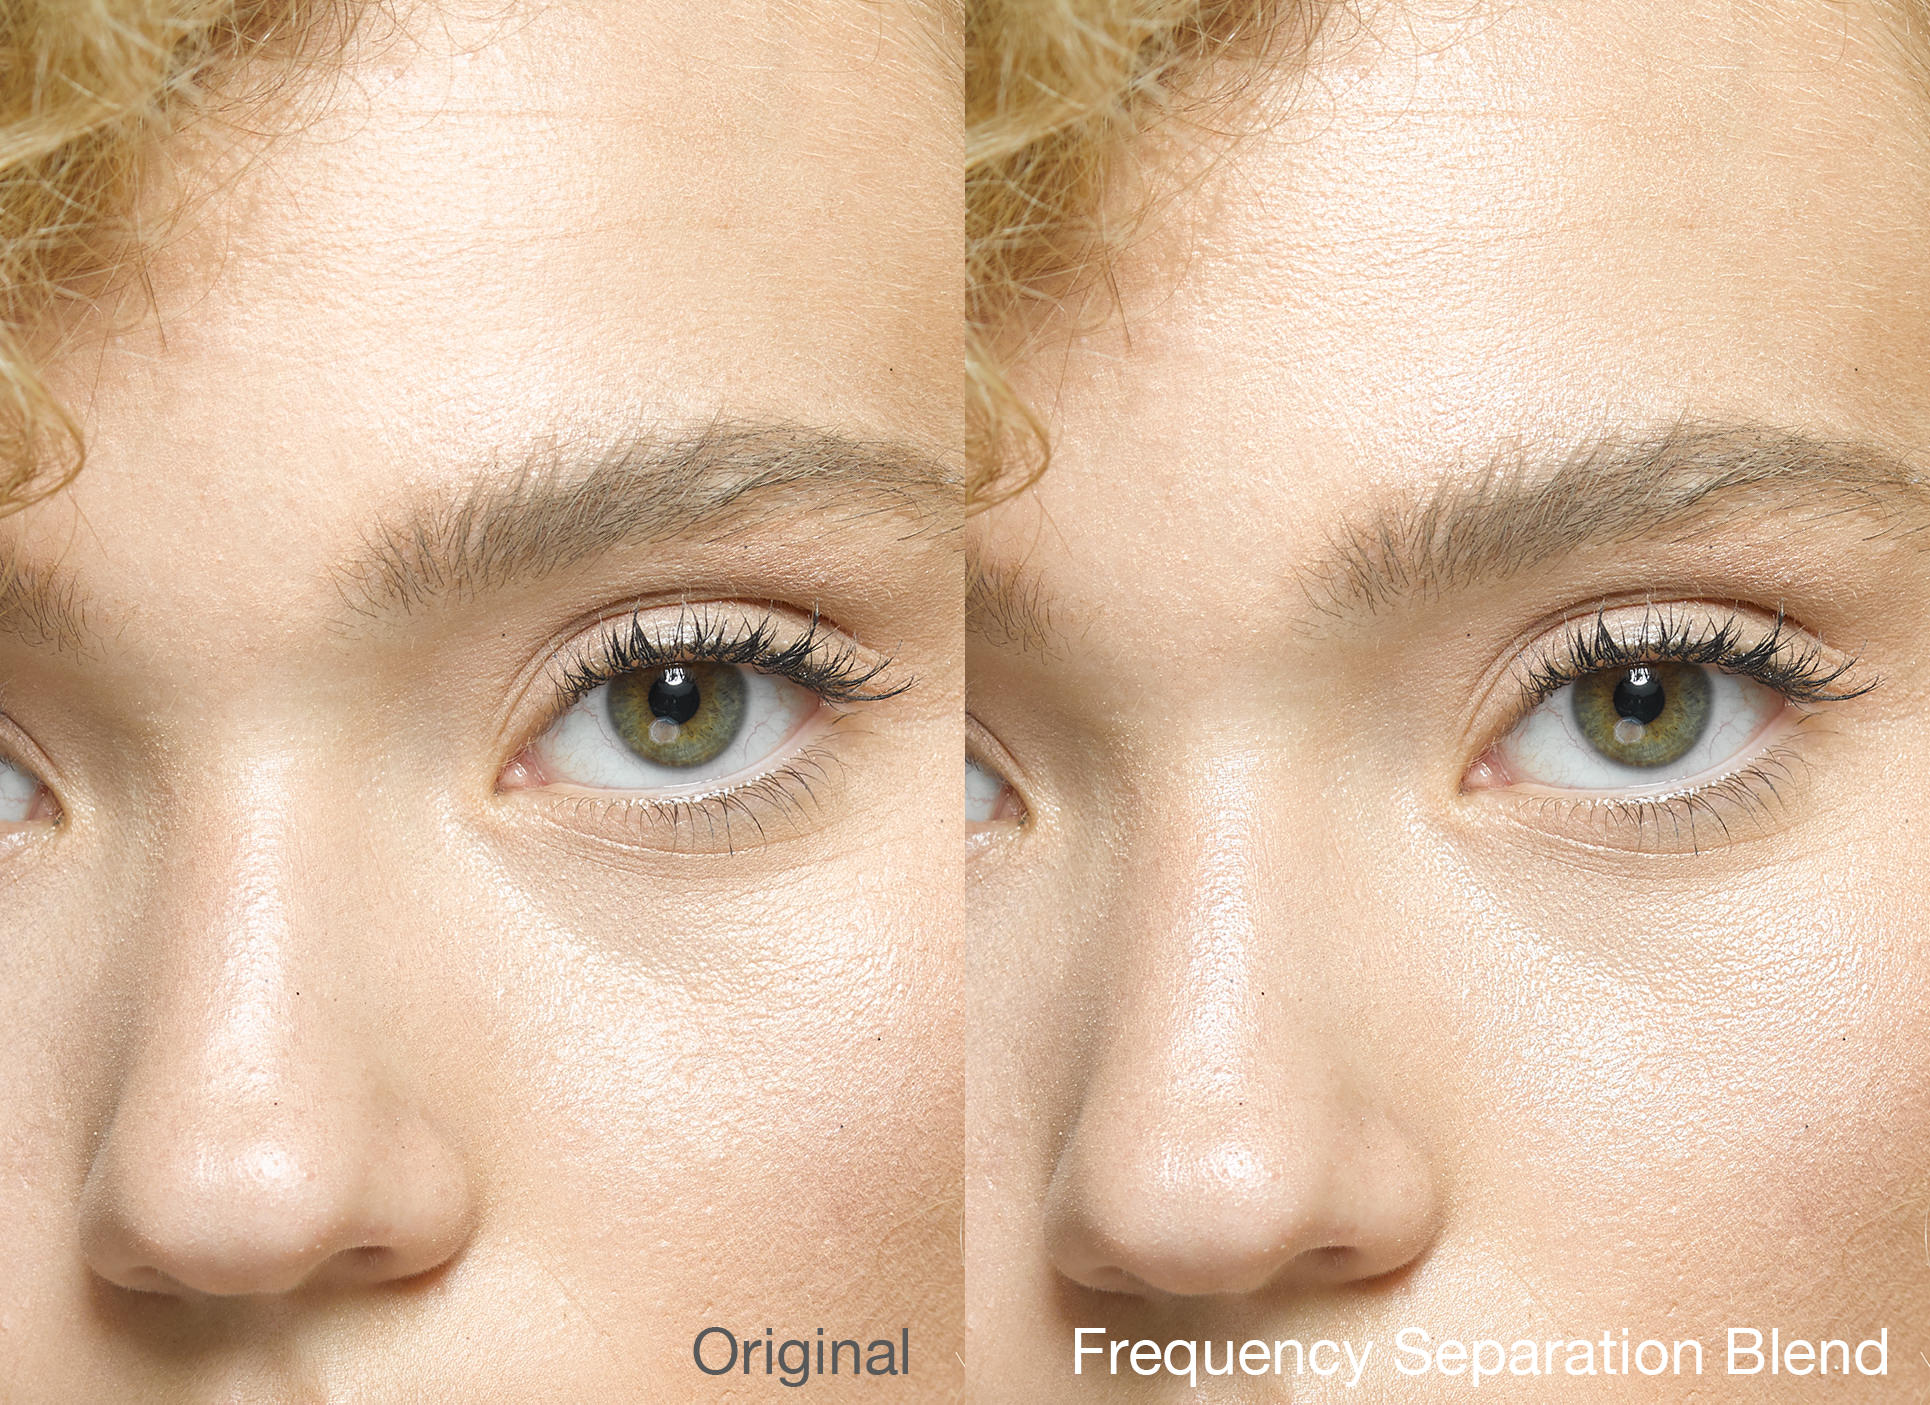
This tutorial assumes that you have a working knowledge of Frequency Separation so if this is your first time using it, be sure to check out Julia Kuzmenko's excellent article on the subject here. Of course in order for this to work, you do have to have some information in the highlight area, otherwise we'll have nothing to work from. If your highlight areas is completely blown-out, I'd recommend using a more complicated texture grafting approach that I demonstrate here.
Although I use Adobe Camera Raw in the above video, you can also do the same thing in Capture One using multiple variants and overlaying them into one PSD file.
You can connect with me via the social media links below.


Join the Fstoppers community for free
-
Post comments and join in the discussions
-
Browse the site ad-free
-
Share your work and get featured in the community
-
Compete in the photo contests for fun and prizes
5 Comments
thank you for this Michael :-)
A quick method: Sample a skin tone color just outside of the blown highlight area with the brush tool. Then set the brush to 0% hardness / flow 4% and paint on the blown out area, don't over paint and at 4% you should still see the skin texture, keep on sampling new skin tones (alt click) when repairing a large area. This method is amazing for toning down shiny skin and repairing lightly blown highlights as it is akin to a makeup artist putting on foundation powder.
Thanks for that other tip Robert, always good to have new ways to try out, sometimes it works, sometimes one method doesn't work out well but another one does.
This also works on blown out fabric on shirts, too! Great way to get that texture back. I actually just add a black mask on the Recovery high freq layer and softly bring the texture back in with a low-flow soft brush
Thanks, realy grate tutorial!