
We are not always fortunate to have the perfect background that matches the total vision of a shoot. The same goes for having a huge budget to build the set, which leaves a few options. Spend the time with compositions or use a printed backdrop to complete the scene. To save time, at least in my case, I opted to go with a printed backdrop for the shoot since there would be multiple images.
The Backdrop
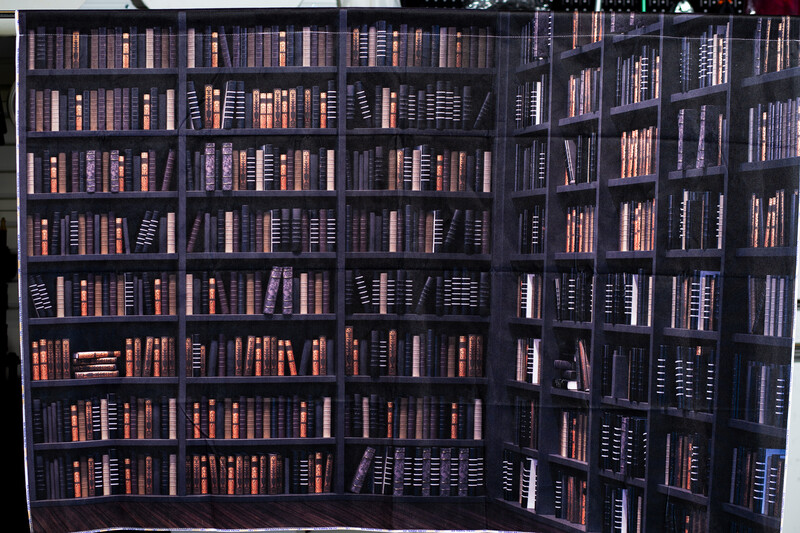
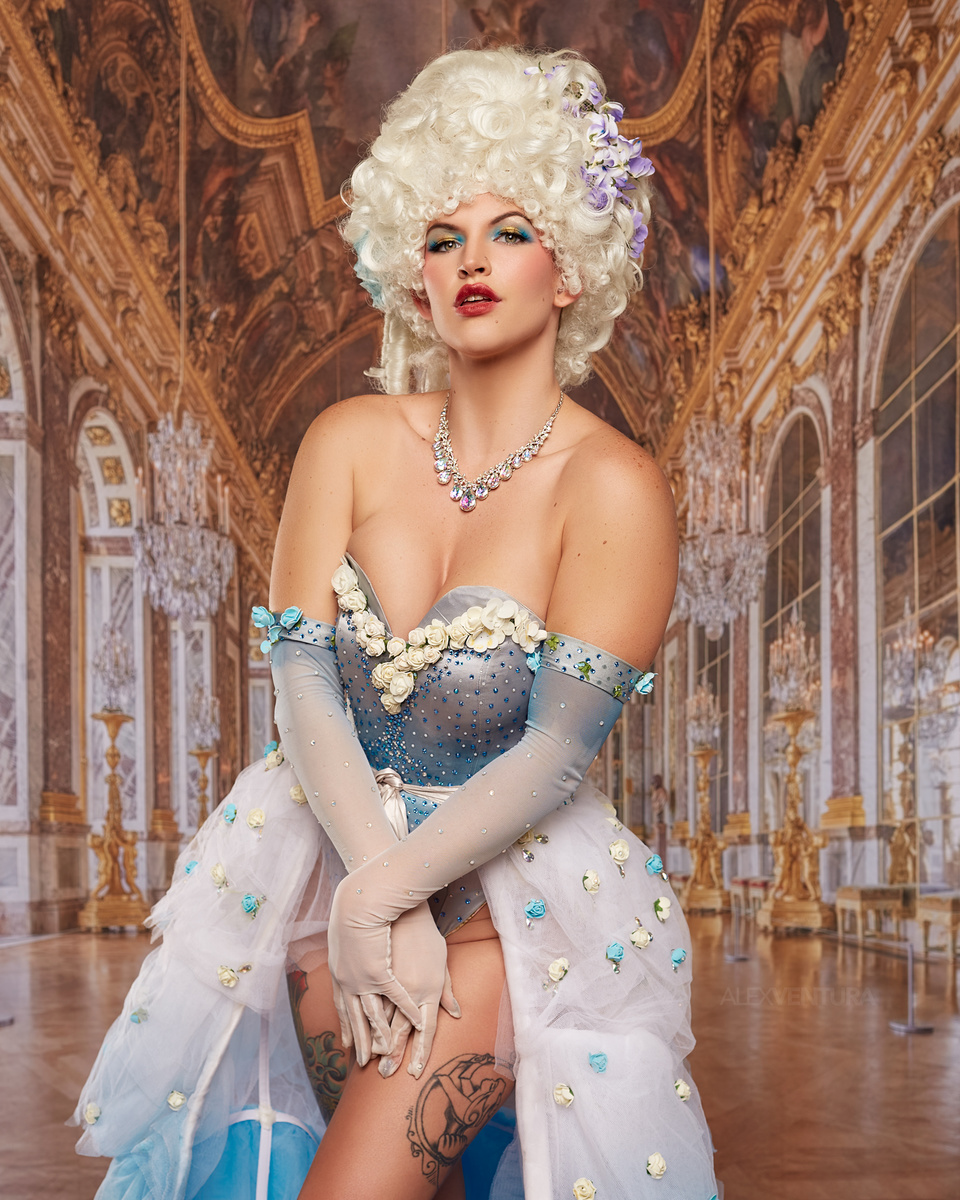
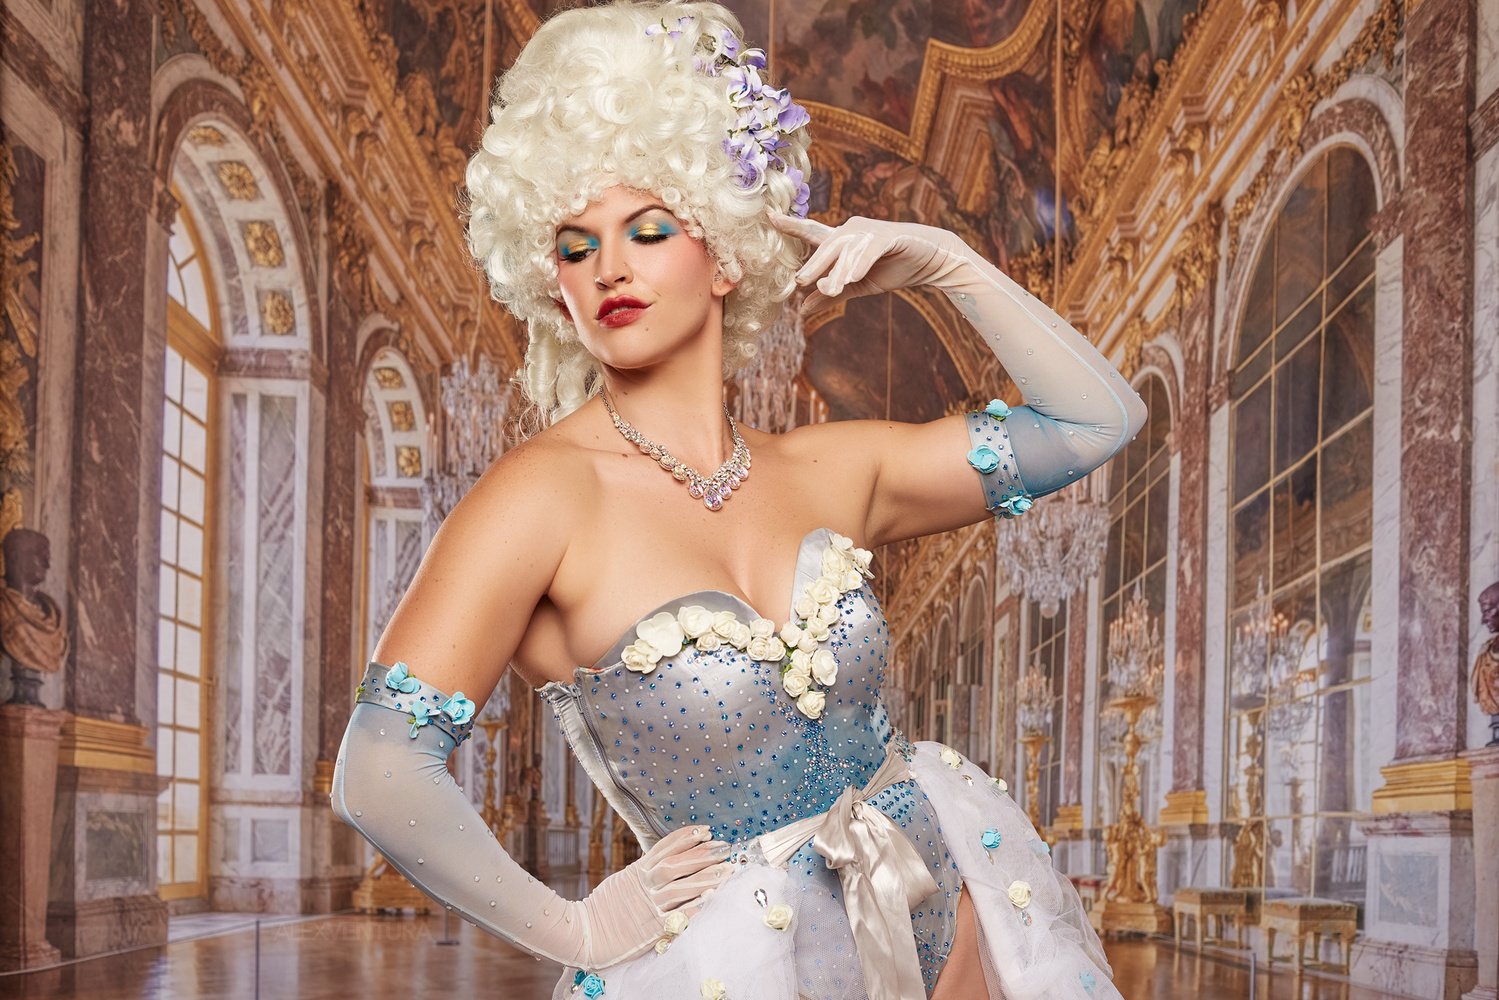
Initially, I picked out two different printed backdrops from Kate Backdrop. The first backdrop I selected was the Kate Back to School/Graduation Backdrop which would work out great for headshots or any portraits that wanted an "I'm in a library" type look. However, that wasn't the look we went with. For this shoot, the vibe was a Marie Antoinette type of look within a fancy palace hallway. For the second background, I went with the Kate Hall of Mirrors and Wedding in front of the Palace at Versailles Backdrop, which I think worked perfectly for this project.
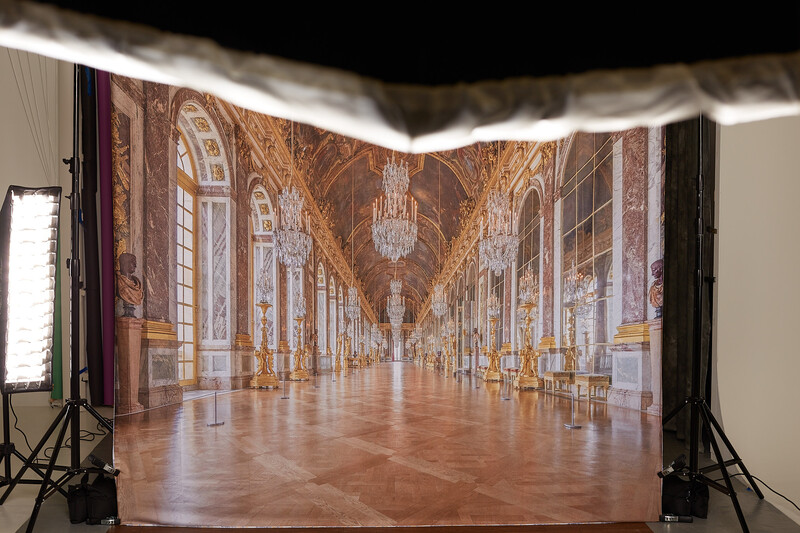
These backdrops are computer-printed on a wrinkle-resistant microfiber cloth and folded into a package for shipping. I knew the studio had a steamer, and it didn't take long to steam out the creases that were there. If you are doing the shoot at home, you can pop them into the dryer instead of pulling out the iron or streamer. Here's a tip: iron or steam the backdrop from the backside (unprinted side), as some other users have said when they did it from the front, some marks were left.
When it comes down to selecting the size for your backdrop, I personally would opt for the largest one that fits in your space and one that works with what your shoot requires. As I mentioned, the first backdrop would be perfect for headshots. I am limited to just that, as the size is 5' x 3' (1.5 x 1 m). If my flooring matched better, I could shoot full-body portraits with the size of the second backdrop. Better yet, opt for one of their backdrops that also has a floor section in it. Another one of the options for the backdrops is that you can request yours to be without the pocket across the top if you have another method of hanging. For me, it's more convenient to keep it there and a relatively easy fix in Photoshop depending on the background.
There are several ways you can light a scene, and it's not any different using a backdrop. You could shoot it very stylized and not blend the subject in the scene to have them pop out, which I have seen done several times. However, when you see these types of shots with printed backdrops, some people may look at it and see that it looks good but something may be a bit off. What happens in some cases is that the background has the light source coming from one direction, while the lighting on the subject and the shadow on the background from the subject is in a completely different direction.
Lighting Setup
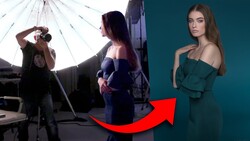
In order to make it seem like my model was standing in the palace halls, I wanted to match the lighting that was present in the background. For the most part, the backdrop looks like it had even, soft lighting. There weren't a lot of shadows, and there was a bit of glow coming into the frame from camera left from the windows. This is what I used to set up my lighting. I positioned one rim light camera left behind the subject and had a big light source as my main light. I added a background light camera right to fill in some of the shadows that were appearing in the shot.
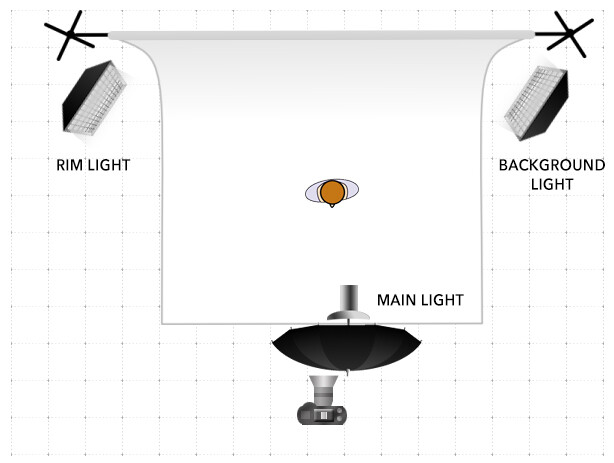
Main light: Paul C. Buff DigiBee DB800 Flash unit (320 Ws) in 86" Soft Silver PLM umbrella with white front diffusion fabric
Rim light: Paul C. Buff DigiBee DB800 Flash unit (320 Ws) in gridded 10"x36" stripbox
Background light: Paul C. Buff Einstein E640 Flash unit (640 Ws) in gridded 10"x36" stripbox
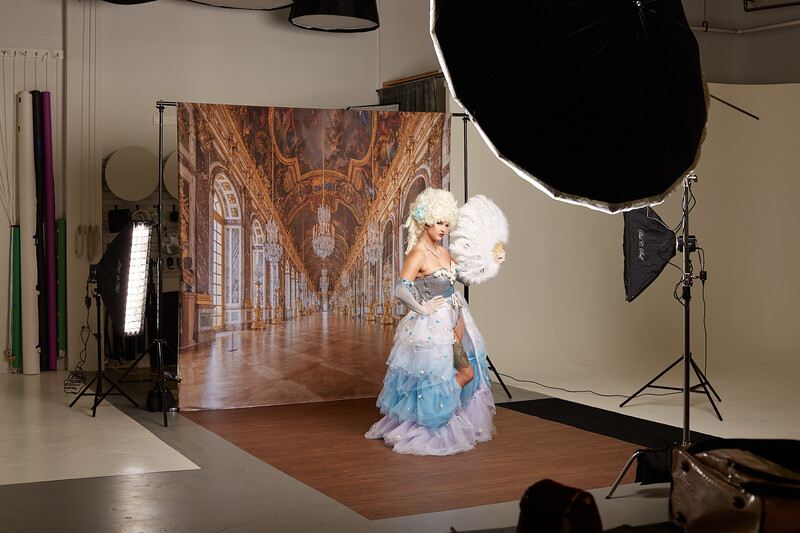
The strength of the rim light is very subjective. Some people like it very minimal, but I like it a bit stronger, so it was about a 1/4 of a stop brighter than my main light. Also, your power settings can vary due to the distance from the model, so if your light is closer to your subject, you won't need it stronger than your main light. I know I previously said I wanted it to be matching the background source, but I with went an artistic decision to have a brighter rim light to mimic the light coming in from the windows. If you wanted more wrap-around from the rim light, you can use a softbox without a grid.
Yeah, I probably could have just used one light, but as mentioned previously, I wanted to reduce the shadow that was falling on the backdrop and also give her a bit of rim window from the windows.
Extra: I did add a brown floor mat just in front of the backdrop in case there was any color cast from light reflecting on the floor, which may have been very minium and probably not that noticeable.
Camera Gear
I usually favor the 85mm lens in the studio for portraits, and it would have worked fine for this shoot. However, I wanted to showcase as much of the backdrop as possible, and since the backdrop wasn't massive, I went with the 50mm lens to get more of the backdrop in the shot. If you are looking for lens recommendations, check out this article on how to choose the Best Lenses for Studio Photography guide. For more articles, check out the Katebackdrop Blog.

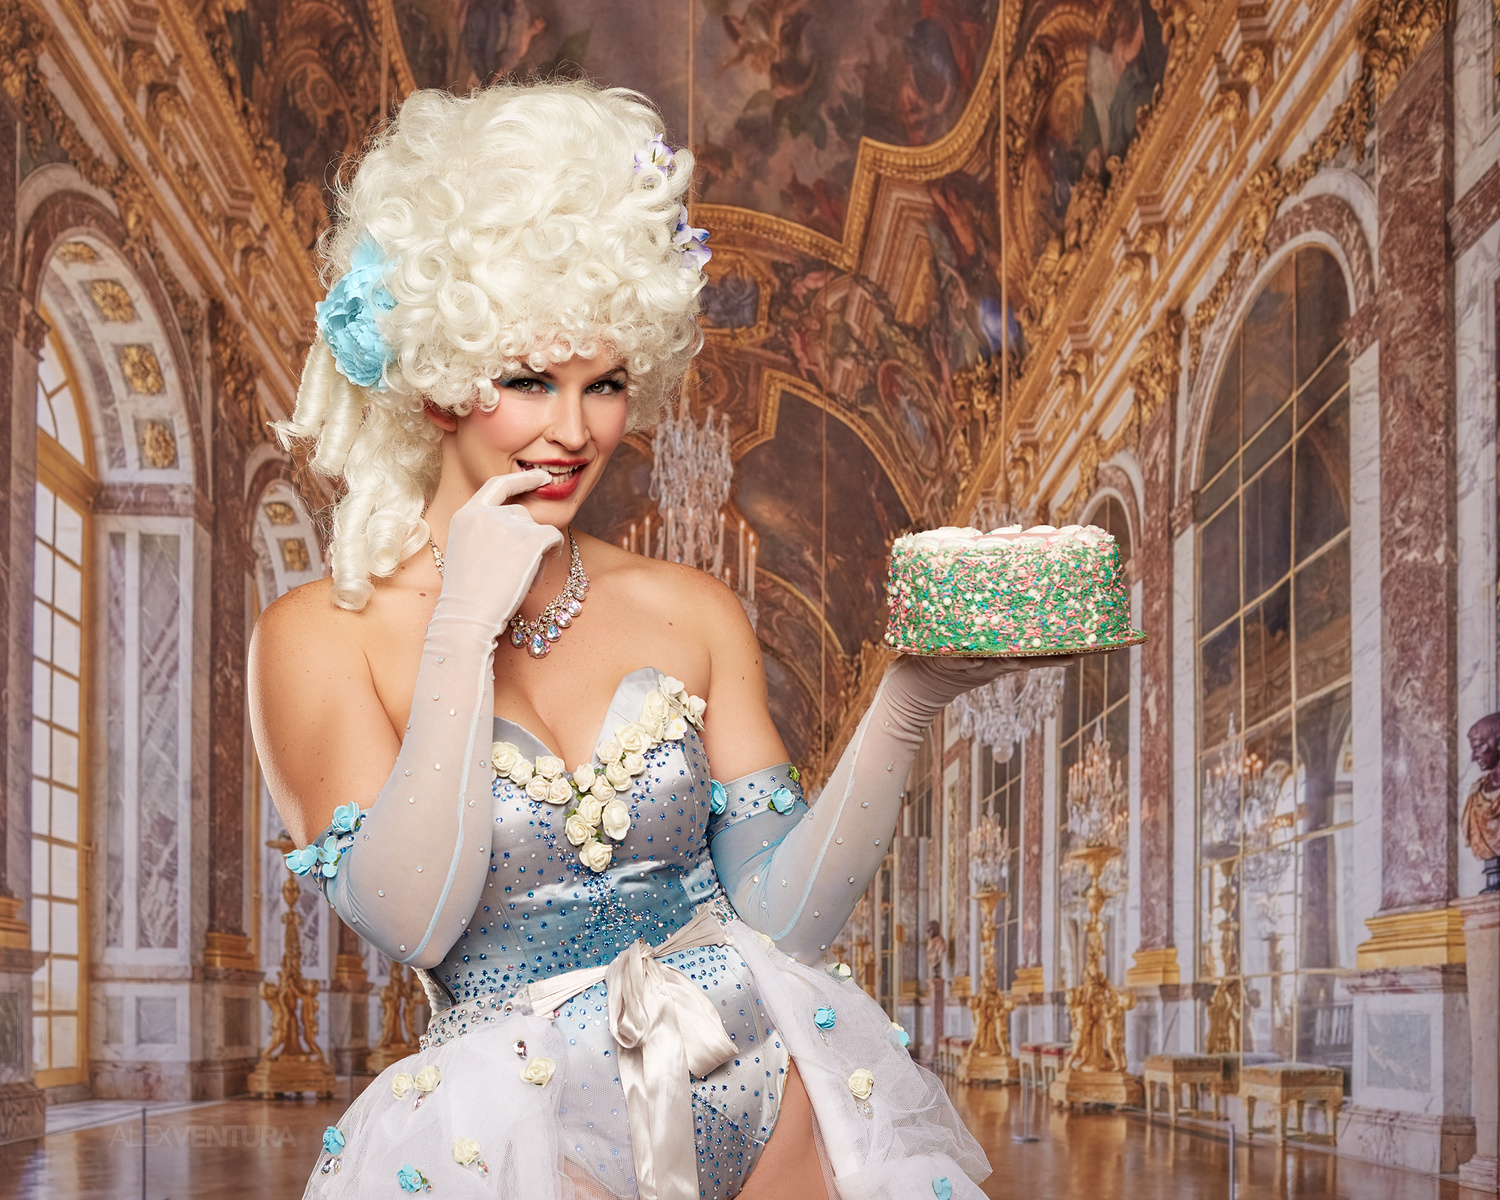
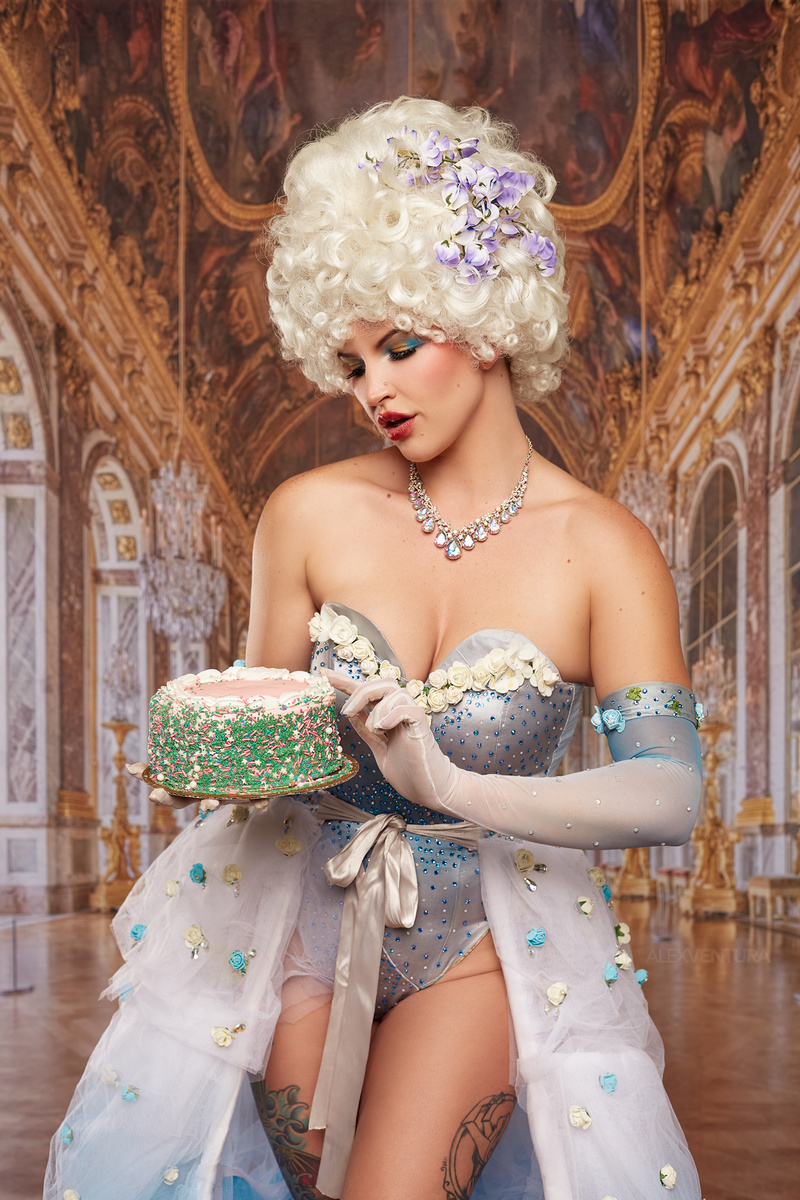
Yes, we had cake for her palace debut!
Closing
I would love to build amazing studio sets for these types of portraits; however, I usually don't have the budget, the time, and the space to build them out. If I was doing one to two shots, maybe a composite would have been fine, but for me, setting up a backdrop is much faster and easier, especially since I was doing more than a few shots for this project. I can easily set up several different scenes with these printed backdrops, and they all fold away into compact sizes for storage. With any backdrop, I would recommend looking at the light direction in it and following that as a guide for your light setup. You can still add your style to it and stylize it a bit as I did to make it fit your work.
For two more great resources for backdrops, check out Fox Backdrop and U Backdrop.
Do you use printed backdrops often? Share some of your favorites in the comments below.
Photographer: Alex Ventura
Model: Nikki Knockout
Makeup and Hair Stylist: Ashly Martinez
Studio: Altered Visions Studio in Houston, TX

Join the Fstoppers community for free
-
Post comments and join in the discussions
-
Browse the site ad-free
-
Share your work and get featured in the community
-
Compete in the photo contests for fun and prizes
No comments yet