
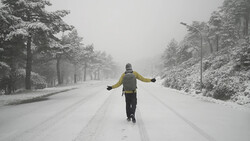
A few years ago, simple timelapse videos were all the rage. To spice things up, videographers started to add small camera movements to their timelapses using motorized sliders. Those small camera movements have become far more complex today as some of these camera movements are miles in length. These are called "hyperlapse" videos.
These videos may seem incredibly difficult to produce, but that isn't entirely true. They are time-consuming, but if you have the patience, you can do it. Check out the video above for a basic tutorial on creating a hyperlapse video, or read the list below.
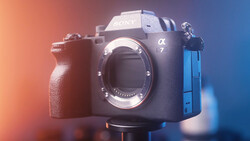
1. Place your camera on a tripod around eye level. You don't want to be bending over for every shot.
2. Set your camera and focus to full manual. Make sure that your shutter speed is slow enough to capture motion blur (usually slower than 1/15th of a second).
3. Using the guides or focus point inside your viewfinder to pick a spot in the distance that you can aim at. Shoot wider than you might think you should so that you can crop in and stabilize the footage later.
4. Take a photo and move the entire camera and tripod an even distance (the length of your foot for example).
5. Continue to take one picture in-between each move while reframing the shot each time.
Post-Processing
6. Bring all of the raw files into software like Adobe Lightroom or Capture One.
7. Edit one image to your liking, and then, sync all of the rest to match.
8. If the exposure from shot to shot is flickering due to changing weather conditions, you may want to use software like LR Timelapse to smooth the exposures.
9. Import the files into Adobe AfterEffects.
10. Compose and crop your pictures here to fit your video frame.
11. Use the Warp Stabilizer effect to stabilize the jittery footage.
12. Export the final movie.
If you want to add a bit more complexity to your hyperlapse, try adding a zoom in or out to your shot as you move. This is called a "zolly" in filmmaking.
Here is a video that explains this technique.
Make sure that if you do add a zoom that you autofocus in-between each shot because most lenses will not remain focused at different focal lengths. Other than that, the technique is pretty similar.
As with anything photography related, your first attempt may not be perfect, but over time you will learn what works and what doesn't.
Here's an amazing hyperlapse by Vadim Tereshchenko with a bit of fancy editing to make it even more exciting.
https://vimeo.com/136722796
My favorite hyperlapse has to be "Dubai Flow Motion," by Rob Whitworth. I can't imagine how much time and effort he put into making this.


Join the Fstoppers community for free
-
Post comments and join in the discussions
-
Browse the site ad-free
-
Share your work and get featured in the community
-
Compete in the photo contests for fun and prizes
2 Comments
I don't think he added enough clarity
Oh my! That Dubai video was incredible. I've seen some crazy time lapse videos before but that was something special. Going to have to start practicing my hyper lapse skills tomorrow!