
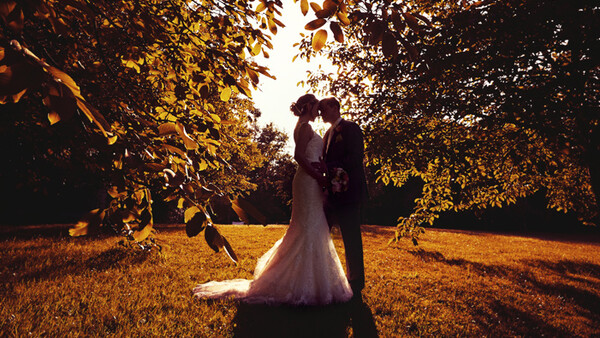
Retouching can vary from photographer to photographer. But it can also vary depending on the genre you are shooting. I know it does for me. My wedding retouching is far from being as refined and time-consuming as my portrait retouching. When dealing with hundreds of pictures, you have to find techniques that get you close to a perfect result, but as quickly as possible. One thing I had trouble getting my head around was maximizing my dynamic range in my wedding pictures without stacking multiple raw developments. That was until I made a lucky mistake when sharpening an image using a high pass filter.
Make the Details Pop
Like I said, if you are looking for a perfect technique you can use on your beauty images, this will probably not be something for you. It can help in some cases, but this is meant to be a quick and kind of dirty trick for when you have tons of images to edit.
Now, with that in mind, let's see how we can get more details out of our shadows without losing too much detail and giving an impression of more depth to our image. If you have already used frequency separation, the basics will be pretty straight forward.
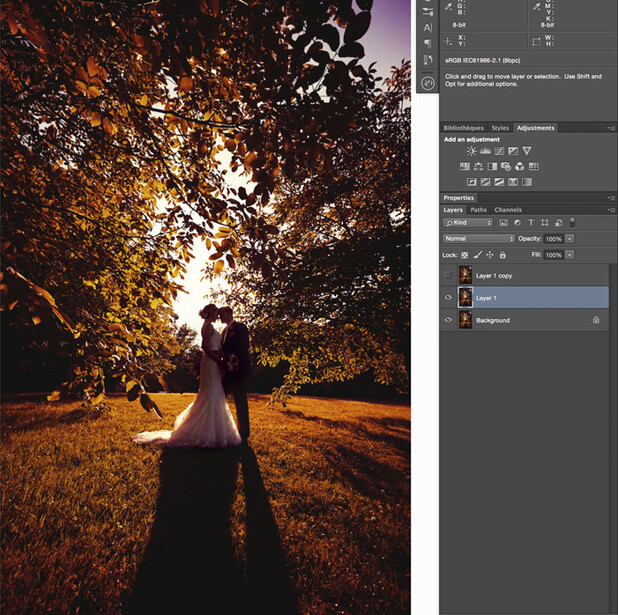
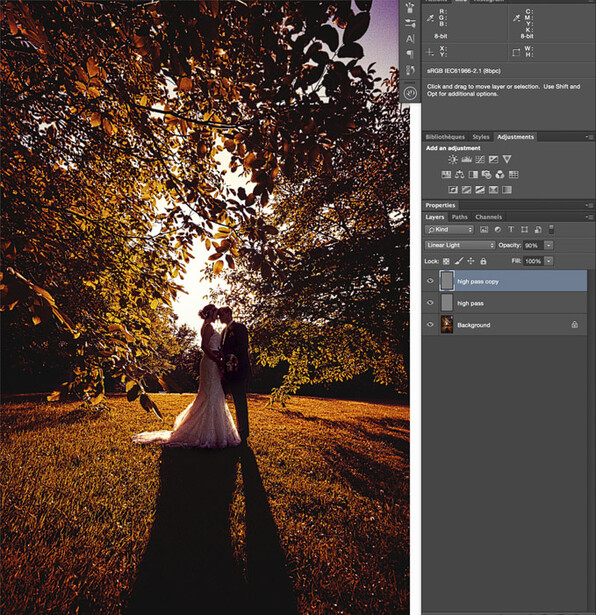
To start, we have to duplicate our background layer twice (cmd+j or ctrl+j). If you already have other adjustments made, a copy merge of everything (cmd+alt+shift+e or ctrl+alt+shift+e) and then a duplicate will do. You should now have two layers. Disable the one on top and activate the one just below.
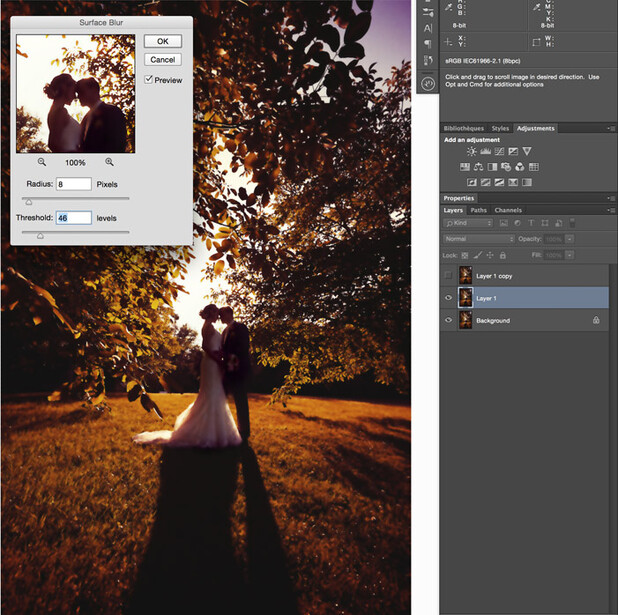
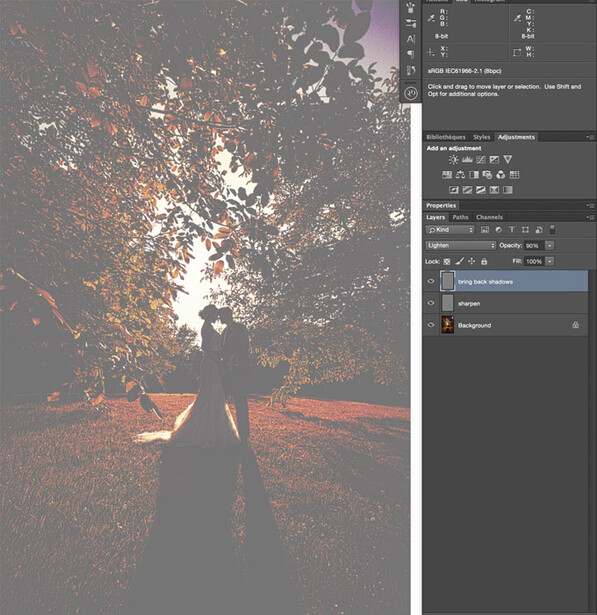
Just like a frequency separation, we are going to blur this first layer. But... unlike frequency separation, we are going to use a surface blur (if you are working with a 16-bit file and do not have time, a Gaussian blur is fine but will yield a less refined result). So with our first layer activated, let's go to the Filter menu, find Blur and then Surface Blur. You are going to want to blur enough to remove the texture of your subject and the environment but then use the threshold to bring back the outline of your subject. You subject should not blend in with your background. This step might take a bit of practice to get right every time.
If you have a lot of layers in your file, feel free to rename the layer we just blurred like I did for this example. I called it blur. Now we have to bring back the details by creating something similar to what the high pass filter does. But for that we are going to use Apply Image. So we must reactivate the top layer and then go to the Image menu and find Apply Image. Depending on the bit depth of your file, the settings here are going to be different. If you have an 8-bit file, set the blending mode to Subtract, the scale to 2 and the offset to 128. If you have a 16-bit file click invert, set the blending mode to Add, the scale to 2 and the offset to 0. With the preview enabled you should see a result very similar to a high pass filter result. Meaning you should have a mid gray layer with texture and almost no color. That means it is time to click ok and go to the next step!

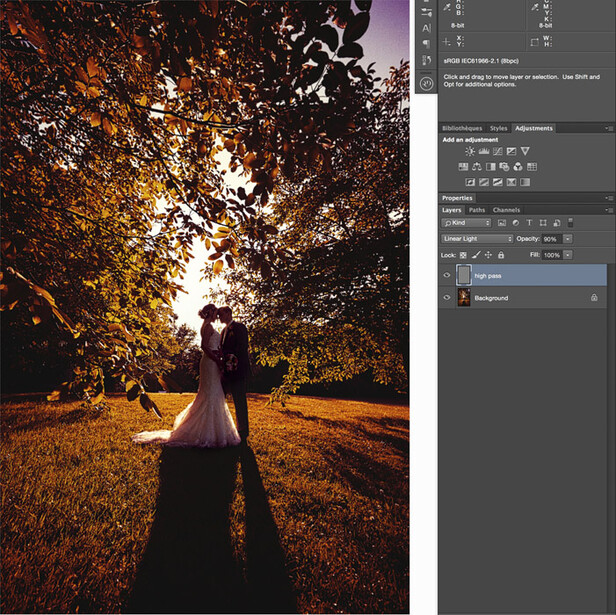
The blur layer is of no use anymore. So we can delete it. The high pass layer is now masking our image, which is clearly not what we want. We must change its blending mode to make it a sharpening layer. You can set its blending mode to Linear Light, Overlay or Soft Light depending on how much sharpening you want. This sharpening is going to help us strengthen the highlights and the contrast. I personally set the blending mode to Linear light most of the time and then play around with the opacity.
Bring the Shadows Back to Life
Our image has a little bit more "pop" now. But that is not enough. In the sample image, the shadows seem a bit too dark for my taste. I already know this is going to make a mess if printed this way. I need to make them slightly lighter so that the file can be printed correctly. This will also help give an impression of more dynamic range by having more details across all zones of the histogram.
To do so, only five clicks are required. And I am sure we can do that in just two clicks actually. We are going to duplicate our sharpening/high pass layer (cmd+j or ctrl+j). This should make our image overly sharp and pretty much disgusting... So let's change this!
To make it look better, we are going to set the blending mode of the newly created layer to Lighten.
Wait... that is still looking awfully bad. That is because we did not adjust the opacity. By putting the layer into lighten blending mode, the high pass will be visible only on dark areas (lower part of the histogram), so if we set it to a really low opacity (between 2 and 10%) it will make them appear lighter. Like so:
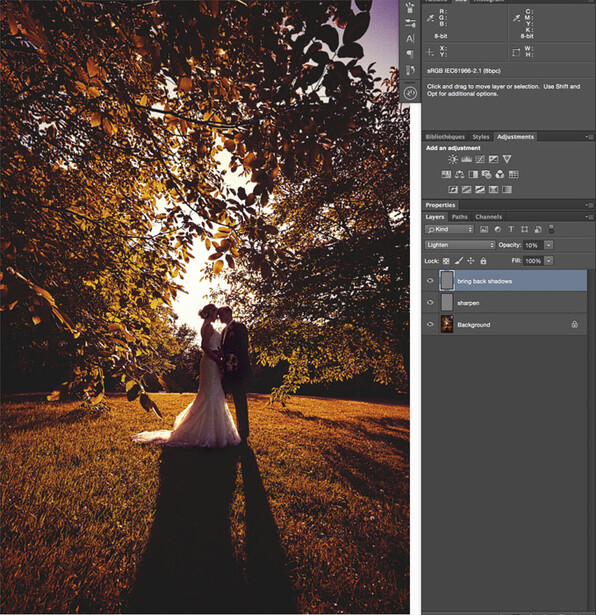
If you worry about the texture, well don't! Because of the way we set up these layers, we have kept all the texture in the high pass layer we duplicated to lighten the dark zones and blacks. Also, because the high pass layer is made out of mid gray, putting it in lighten blending mode will affect only the lower part of the histogram unlike a curve that would have been pushed up.
Here is a before/after of the sample image with this technique:
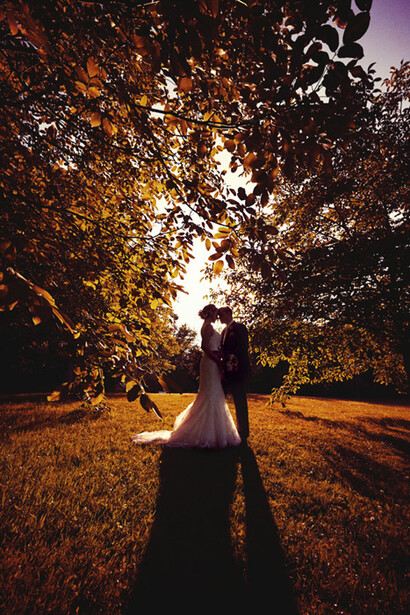
On screen, the before might look better, but the darkest zones would have just looked bad once printed. Another note to take into account, here I applied it to the whole image to make it as visible as possible despite the web compression. However, you can use this only sparingly. For example, you could use a luminosity mask or create a mask yourself. This way you can give more depth to precise zones of your image to make your subject stand out even more! Be careful though with adding too much sharpness. It will also make the noise more visible. Which might not be desirable and would look really bad when printed.
This is how I use this technique in my everyday workflow. However, you can tweak it the way you want. For example, it could be a great idea to remove any color from the high pass filter to yield a better result and avoid any color shifting issue. Also, like I mentioned, you can use Gaussian blur instead of surface blur if it is too slow on your computer to render. Finally, if time is really an issue, a very simple high pass filter could do the trick instead of this. Photoshop is awesome for this reason, there is not a single way that is right, there are multiple! So try it out, see how this technique works and how you can tweak it to make fit your workflow if that is something you need.


12 Comments
I will try anything you suggest!
I think we need to see it at printable sizes to really discern the advantages. That's such a small final example I can't really decide if all that work is an improvement.
I agree, it looks like the after example is slightly sharpened and has the shadows brought up a bit, but that's it.
Wouldn't it just be easier to use the shadow adjustment slider in either camera raw or lightroom?
Would you be able to do a video of this process?
Can we PLEASE stop using the word 'pop!'
hmm. I fail to see any difference except some little sharpening and a little green tint.
Is there a prize on offer for being able to spot a difference, you could have saved yourself some time and just used the same image twice and called one before and the other after.... oh... it seems you did !
It seems like only light dodging here and there.
...or duplicate layer, apply a highpass filter set between 5 and 8(the more you add the more details are shown), desaturate the layer after applying highpass and set the layer on soft light and voila! You can play with the opacity between the layers if is to much.
Sorry late in this thread however why not use the following product with has helped me tremendously in my post productions .X-Rite ColorChecker Passport.Works really great with lightroom