
Making great portraits isn't only for people, and with our pets being live-in models, we can get a little more practice perfecting our lighting and post-processing even at home.
Taking a portrait doesn't stop with people, and many of us view our pets as integral to our families as any son or daughter might be. Let's chat about how we can create a fantastic portrait of our four-legged loved ones that we would all be excited to place on our walls.
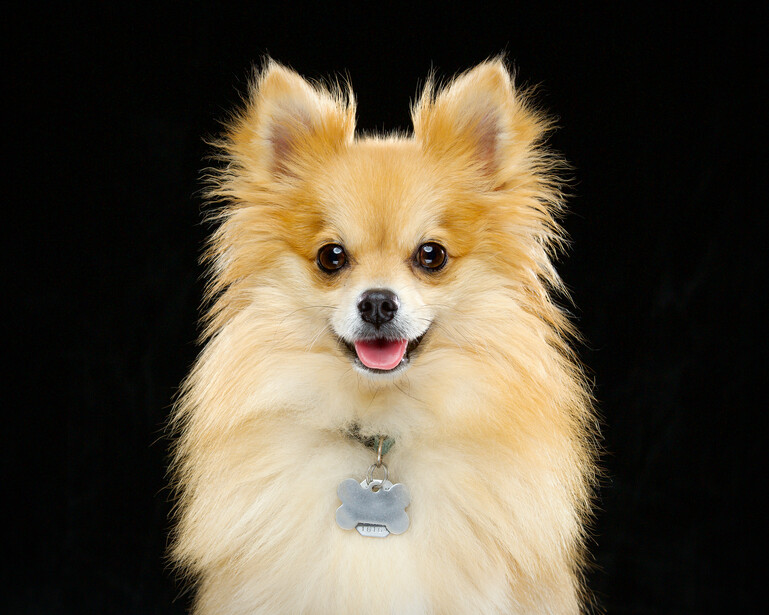
Creating a family member portrait that we are personally proud of is going to take many forms, with some being outside and using the sun as the main source of lighting all the way to my portrait in this article, where I used a clamshell lighting set up with rim lights on either side of my subject. Whether your portrait is telling a story about your family member or is a headshot-esque lighting setup, make sure to wait for the expression that emulates your pet's personality. This may take some time and even a few treats, but that image will connect so much more with you in the future by showing how they are if the camera isn't in between you and them.
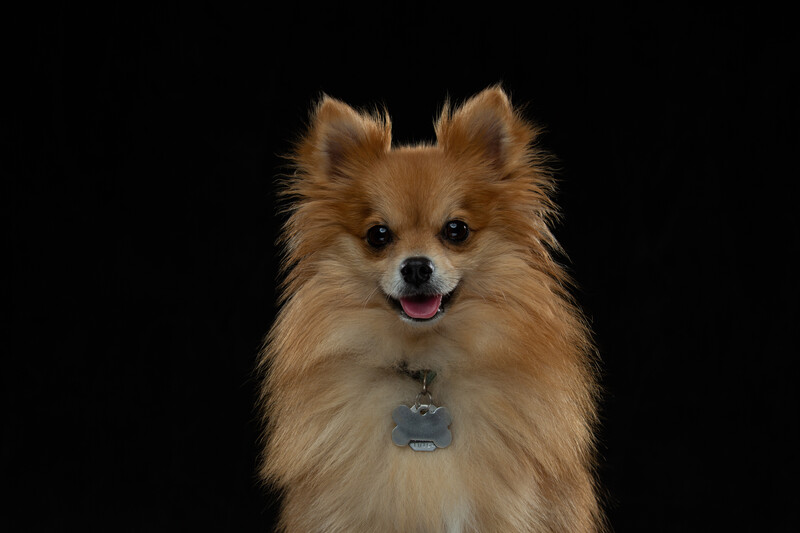
Settings for my original image were 1/200s at f/11 and ISO 160. My image above is definitely underexposed with my lighting. We always want our images to be perfect straight out of the camera, but we are all human and sometimes mess up. If we do, it's always better to slightly underexpose than to slightly overexpose with a portrait. With my pup, Loki, in this image, he still has highlights on his nose from the rim lighting, and the edges of his fur are lit just bright enough and without the fur overexposed from the rim light. His brighter fur in the front is also layered against darker shades of his coat, and we don't want to overexpose that fur detail. Keep in mind if your pet has lighter fur when photographing them, as you can usually work with underexposure and still have information in the file, while with overexposure, you won't have any detail in the fur.
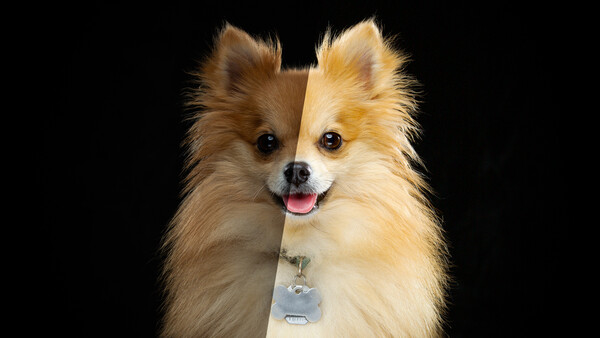
Let's dive into the post-processing side of this puppy portrait. Photographers have some fantastic options when it comes to post-processing their images no matter who or what the subject is, including our furry family members. Having a well-lit and creative pet portrait is only the first part of bringing your image to life. The next step in that equation would be taking all the raw data from your imagery and developing that portrait with a mindset that places our subject front and center. As we begin this process, let's see how easy it can be to add life and dimension into Loki's new portrait.
I'm working with ACDSee for my post-processing in this image, and it feels like it is really two programs combined into one with its digital asset management system and editing system of panels. Digital asset management is doing some intense heavy lifting without breaking a sweat, which is incredible if you've ever worked with software that was slow and clunky. Whether it’s sorting through images to clear out bad takes or updating the metadata with the GPS location of the images via a drag and drop map, you have a fast and functional system that just works and goes at your speed.
I really want to emphasize that from the beginning of working with ACDSee, I’ve noticed a dramatic difference in how snappy the software is and how quickly it can import images to immediately begin working through. If you dread the start and stop of jumping between programs when raw editing, then ACDSee may be exactly what you're looking for. On another plus side, if you're a photographer who uses Windows computers, then you have a fully functional layer editing solution included with ACDSee that you can take advantage of while also using the raw editor.
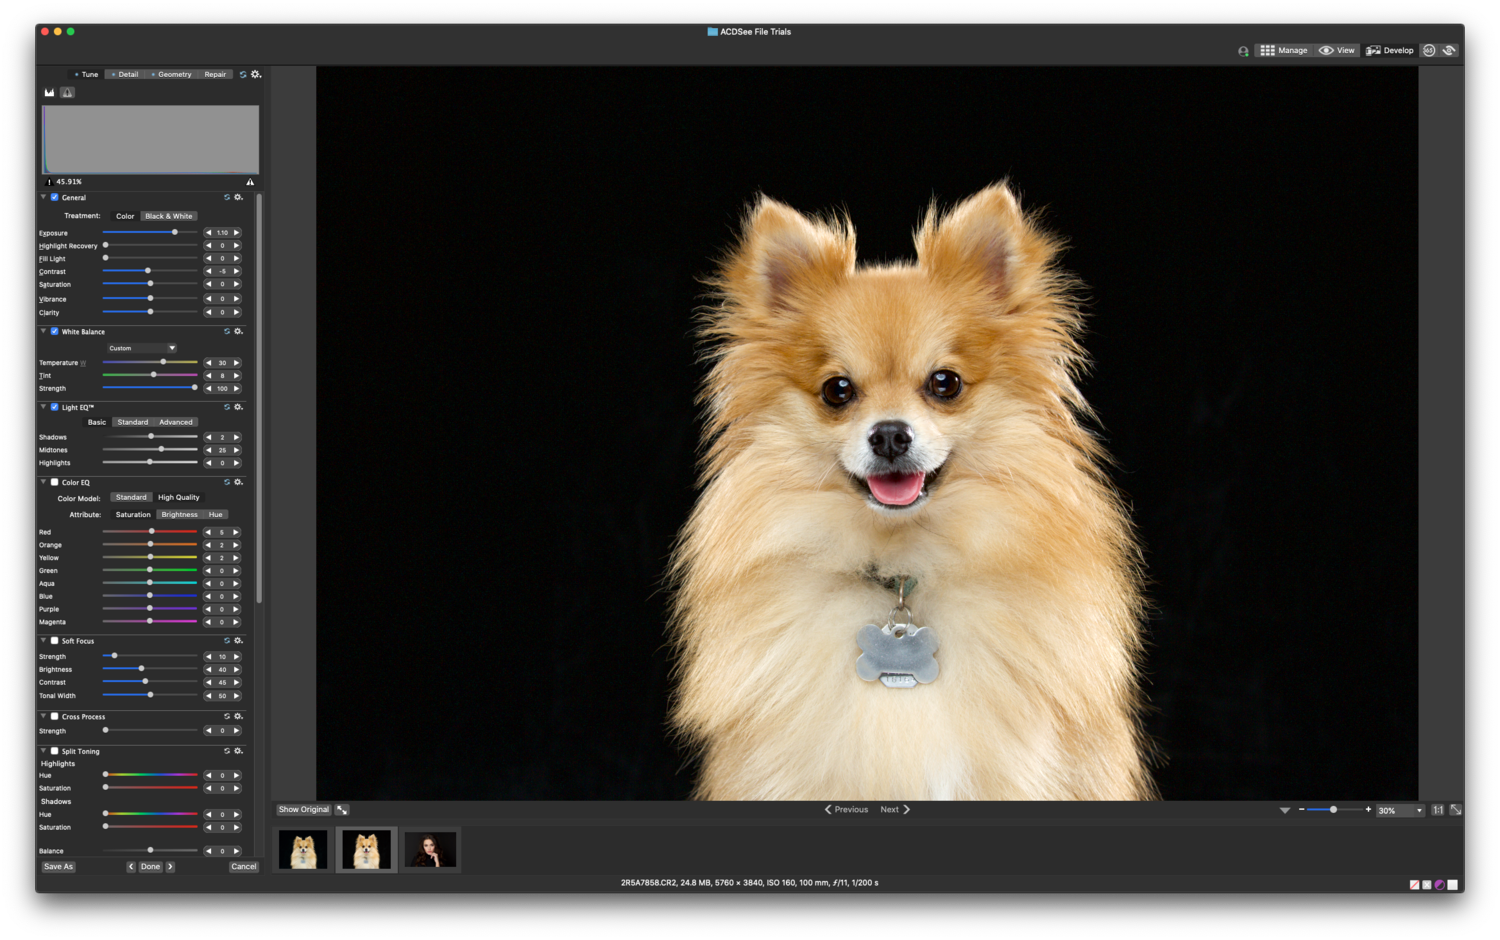
In the images above, you can see I began my processing by looking into the General tab in ACDSee and bringing up my exposure a little more than a full stop while keeping an eye on the histogram for any clipping in the highlights. I also reduced some of the contrast in the image, so the shadows in Loki's fur would not take your eye away from his expression. I adjusted the temperature in the White Balance tab and tint just a touch, as it seemed slightly off neutral on my screen. I also used Light EQ to brighten up the midtones a good amount more and raised the shadows a smidgen. My rationale is to not accentuate the shadows layered against the bright areas of the fur and to try to lessen their contrast between the light and dark layers.
Loki has some dramatic layering of his lighter and darker fur, and it shows very well in the clamshell lighting, and I used the Color EQ setting to bring those colors closer together. This is where I really brightened up the portrait by taking some care and adjusting the brightness of the different colors of fur so they would balance more evenly. I also shifted Loki's tongue hue to be slightly pinker, so your eye wouldn't necessarily pull to the original red color of his tongue over his eyes and overall expression.
The Soft Focus tab is new to me, and it reminds me of Gaussian Blur with a slider, which is a neat addition to this editor. Softening an image slightly can sometimes feel more appropriate for a portrait. We don't necessarily want the body of the subject in a portrait in sharp relief next to the eyes, nose, and mouth. This may pull or even direct our eyes away from where we would connect with a portrait. Just be mindful when using the Soft Focus tab to not go overboard.
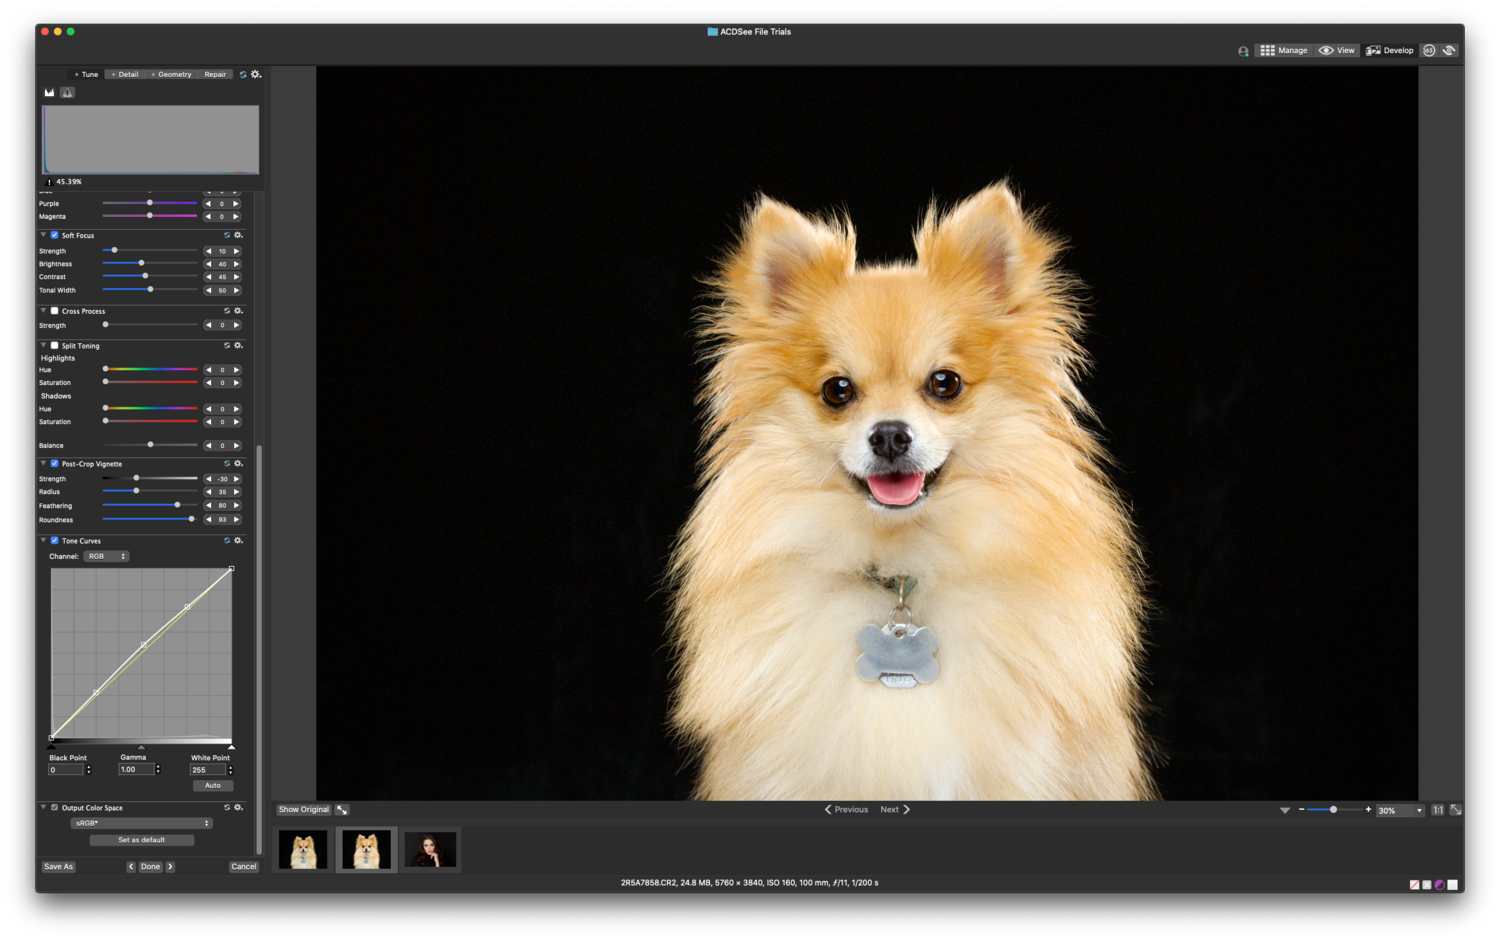
I jumped down to the Tone Curve tab to elevate the mid-tones on Loki ever so slightly more while restricting the highlights and shadows from being raised too much in response to the curve anchor being moved. I then adjusted my Post-Crop Vignette in its own tab to push the background to shadow without detail showing, while also centering that vignette around Loki without darkening his fur on the bottom of the image.
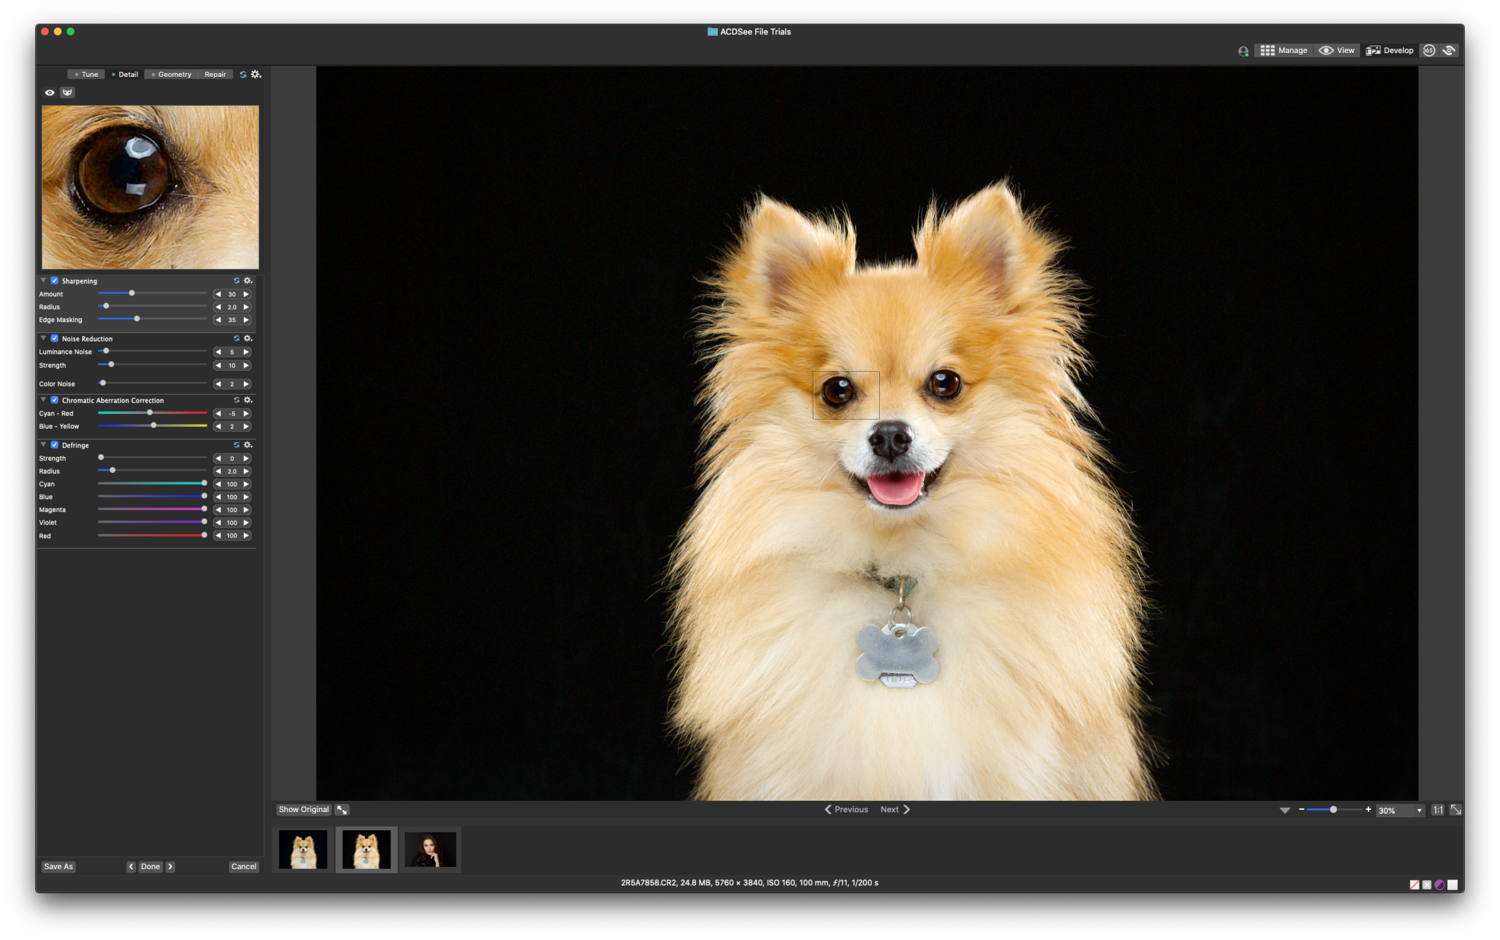
We are very nearly done at this point. We just have to head into the Detail panel and clean up some noise in the image. I underexposed my original photo of Loki, and I'll want to remove any luminance or color noise in the image. Take your time and zoom in 1:1 or closer to check if you're adding enough or possibly adding too much in the Noise Reduction tab for the image. I've already added a touch of softening, so I don't want to push these sliders too far.
Next, I went to the Chromatic Aberration Correction tab and adjusted the sliders to remove some magenta looking coloring that was around the highlights in the edges of the fur and on the nose. I then finished up in this panel by adding some sharpening to the portrait from its own tab. Now, this is a global adjustment, but it does allow for edge masking and changing the radius, so the sharpening being done will allow for a less heavy-handed amount of being added to the image. The masking will rely most on the contrast in the image, and since I have flattened out much of the body contrast, primarily the edges of the eyes, mouth, and body outline will be masked the most for sharpening.
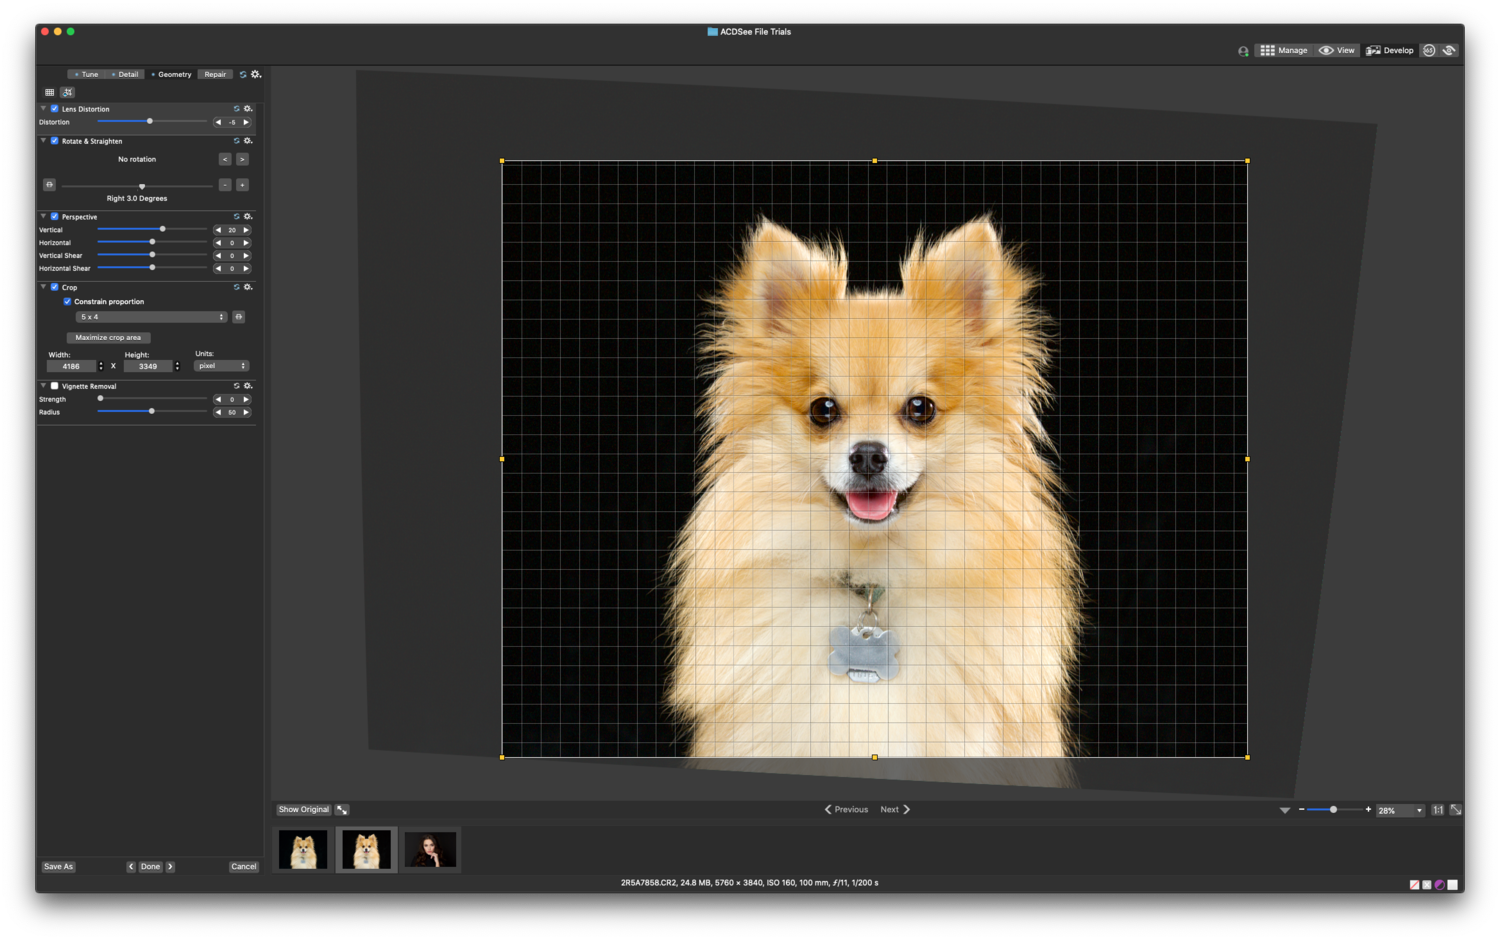
Finally, I finished up in the Geometry panel by reducing any apparent lens distortion in the image and rotating the image so Loki would not have a tilt. I also decided to change the perspective of Loki slightly and essentially gave the image some keystoning, which increased the size of his head in relation to his body. I wanted to adjust his stature slightly so he didn't look so bottom-heavy with his fur, and adjusting his vertical perspective did exactly that. Lastly, I decided on a 5x4 crop and kept the portrait in landscape orientation to not unconsciously increase Loki's impressive 11-inch tall stature.
If you’ve tackled light shaping and have created an interesting portrait of a couple, a family member, or your own furry best friends, then it’s time to start putting that image together. We get to exercise our imagination and creative outlets by developing that image so it will attract the viewer in an emotionally connecting way. Post-processing allows you to stretch reality just ever so slightly by expanding our ability to make our shadows a little bit darker, our whites and highlights just a touch brighter, and parts of the image ever so slightly softer. This type of contrast could add punch to our images even if they weren’t lit that dynamically in the original image. A different edit, for example, softening parts of the subject in a portrait, like fur, can keep the subject from being too sharp, which may seem odd from our normal perception of our pets.
To add, post-processing is always personal, but remember that when editing your raw images, it can be like creating a recipe. To quote a fantastic photographer from Lubbock, Texas named Cris Duncan:
A little bit of garlic goes a long way, but too much ruins the whole thing.
In that same vein, we can look at not only adding contrast or saturation but also shifting white balance or adding some softness and sharpening. Blending each of these creates a personal style in our imagery while also being mindful not to give our photos an otherworldly tilt or tint that would pull our attention away from the way we see our furry family members.
Have you tried creating a pet portrait you're proud of? Share your images and any special "formulas" you have in the comments below.
Also, make sure to check out ACDSee for a responsive post-processing software that makes quick editing like this very easy.


Join the Fstoppers community for free
-
Post comments and join in the discussions
-
Browse the site ad-free
-
Share your work and get featured in the community
-
Compete in the photo contests for fun and prizes
1 Comment
Sweet :)