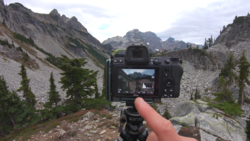
For many, the 7’ parabolic umbrella seems like a one-trick pony. The textbook move of sandwiching the camera between the subject and the light for an edgy, high-key look is quickly growing old. In this video, commercial photographer Joel Grimes shows a different way of using the 7’ parabolic to create soft, high-key images best suited for beauty photography.
To get this effect, Joel starts by outfitting the 7’ para with a diffusion cover and positions it adjacent to the camera. He then gets it close as possible to the model just outside of the frame. The shear size of the para in relation the model helps in creating a super soft light that wraps around her face with smooth and subtle falloff points. The light falling off the white wall acts as the perfect fill and collectively this creates a very attractive and radiant glow to the overall image.
Obviously this video was created to promote the Westcott 7’ Parabolic and its diffusion cover, but the simple setup demonstrated by Grimes can be applied with or without the mentioned gear. To achieve the same or similar effect, keep in mind one important thing: the larger the light source is in relation to your subject the softer it will be. Knowing this, you don’t necessarily need a 7’ parabolic if you are shooting kids or smaller models. For the same or similar effect, a diffused 43” umbrella or octobox may just do the trick. Once the light source is considerably larger than your subject, you'll find yourself at a good starting point.
Another key takeaway would to use the environment to your advantage (the wall in this case). Great images can easily be created even with the limited gear that you may have.

Join the Fstoppers community for free
-
Post comments and join in the discussions
-
Browse the site ad-free
-
Share your work and get featured in the community
-
Compete in the photo contests for fun and prizes
9 Comments
The high key look works very well here. However the retouch is obviously a big part of it, especially the treatment of her skin tone by desaturation and brightening. It looks very easy to pull off, but if you don't pay attention, it's actually very easy to blow out parts of the image or loose essential contrast. I imagine highlight tone priority would help here too.
Just watch that Histogram on the back of your camera my friend. As long as the pixels are there they can be moved.
As much as I like the set up I would like to see the image before editing… having said that this video doesn't do much as the biggest portion of creating this image (editing) was cut off.
He mentions in the beginning about being about he control the shadow on the far side and then never actually shows the examples. lol.
This felt like an edited-down version, definitely felt incomplete. No doubt he's a talented photographer but the final results in this one are just okay.
Sadly thats what you get with a lot of tech savvy west coasters. By no means am I being offensive, but I feel the east coast nails the photo and the west coast the techniques.
What kind of gangster mentality is this?
If you watch the video to the end he does show a very brief side-by-side comparison of the two different settings
I'm using the Paul C Buff, 7' PLM for some corporate headshot shoots (depending on subject or look I want), set up behind me, or next to my left or right. I'm wondering if anyone is using Joel's techy West coast gangster setup for corporate head shots. Or what they think for using this setup for head shots.
..............sorry but this video was totally useless....... lol
Nothing was covered beside the same old, bigger light/closer = softer...
So to sum up the video, use a 7' umbrella.
Sorry, I'm not usually the one to hate or bash, but this video... is just.... face palm.
Thanks for sharing anyways Arthur