
The faster you can edit a photograph in Lightroom, the more time you have to go back out and shoot. The catch is keeping your edits high quality while also saving time, so I'll show you some essential Lightroom shortcuts that you can use next time you go to edit.
Learning how to use editing software is the first step to developing your own photos and cultivating a style, but it all takes time. If there's any way to speed up your workflow while maintaining the highest quality, then you'll want to learn, about it and thankfully, I know of quite a few handy shortcuts in Lightroom that will do just that. So, I'll start with some basic keyboard shortcut controls that can really speed up Lightroom use for those that aren't already aware of them, and then I'll dive into some slightly more advanced shortcuts for power users.
Reset Your Settings
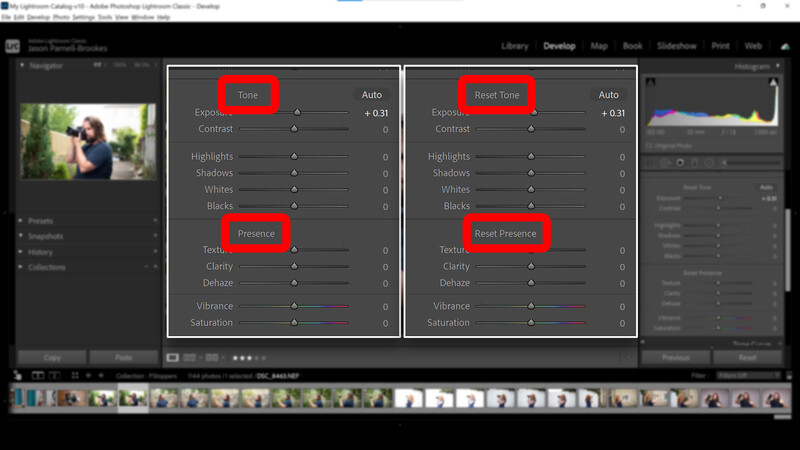
Occasionally, there are times when you need to reset a panel of settings in the Develop Module in order to start from scratch. It might be when you want to reset the Adjustment Brush settings in order to make a new localized adjustment, or it could be that those transform controls you used for another photo aren't quite right for the next. If you just hit the reset button at the bottom of the module, you'll see all the settings revert back to 0 which may not be helpful if it's just one particular set of parameters you need to change.
So, instead of hitting that reset button, click on the panel you're using such as the Basic panel, and then hold Alt on your keyboard, and you'll see that the panel titles change. For example, in the Basic panel, it changes from "Tone" and "Presence" to "Reset Tone" and "Reset Presence" when you hold down Alt. Now, you can zero individual panels without affecting the other parts of your edit and make changes from there instead of zeroing each slider one-by-one.
Make a Clearer View
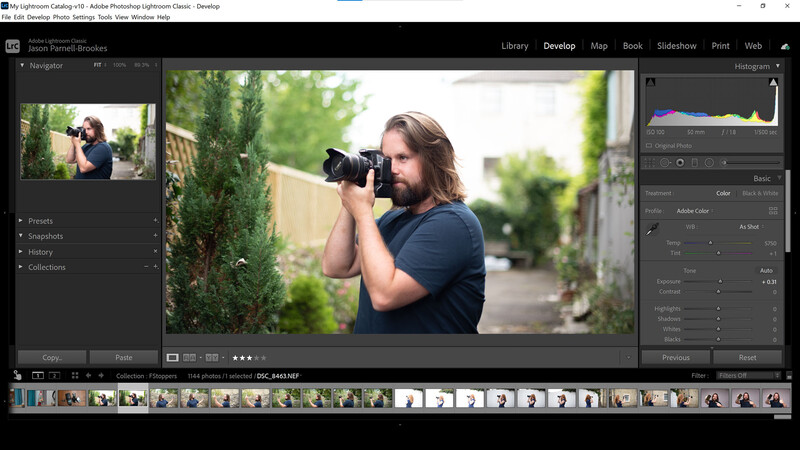
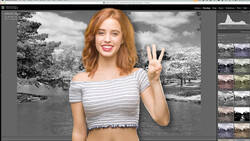
I often find when editing on my laptop that although I have a 15" screen, which seems plenty spacious enough, there are extraneous windows and panels that clutter up the workspace. The operating system taskbar cuts away a little space, then the top of Lightroom's window takes a little off the top, and by the time I've got the left and right panels added, my 15" screen now only displays my photographs in Lightroom at little more than 5" x 7". But there's a way around that.
Using the Tab button on your keyboard, you can make the left and right panels disappear temporarily in Lightroom. By toggling the Tab key, you can get a closer look at your photograph and almost fill the screen without losing the ability to access the filmstrip at the bottom to switch between photos.
Go Fullscreen
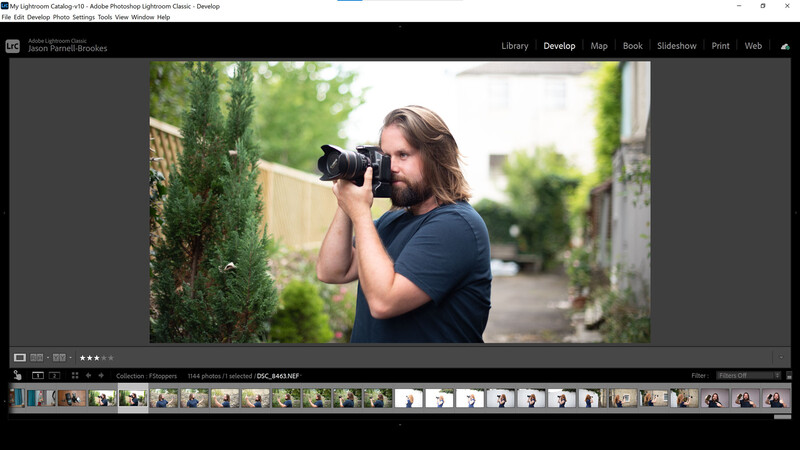
You can take the previous tip one step closer by using the keyboard shortcut F to generate a fullscreen view of your selected photograph. Now, depending on the power of your computer, this might take a little while, as it generates a highly detailed view of your image, but it's great for studying the photo intensely with no other on-screen distractions.
Scrolling through to other photos might not be the best idea, though, as it will likely take a while even if you have a speedy viewing device. So, it's still probably best to press F again and go down to the filmstrip and select another photo.
Speed Up Selection
There's always more than one way to skin a cat in Lightroom, as you've seen from the previous steps, but depending on your Lightroom preferences, you might find that sticking to a certain order might speed up your workflow. For instance, if you're intending to check through 500 shots to pick the best five, you're probably better off not going fullscreen and toggling through. So, here's a tip to keep things speedy.
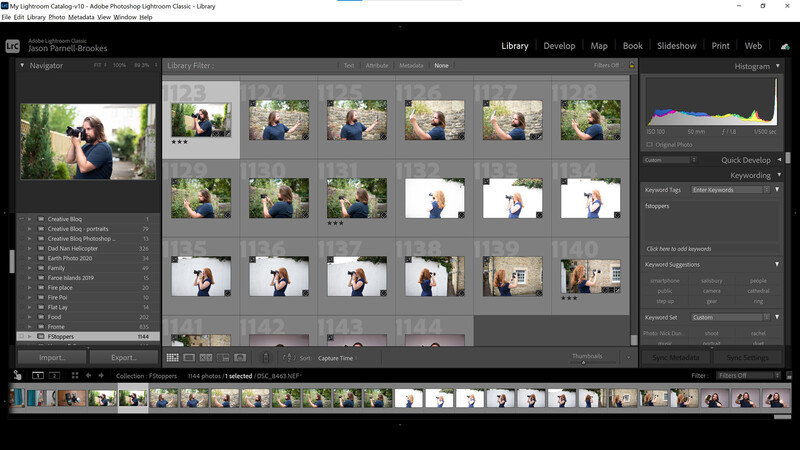
When looking through a large collection of images, it's better to head over to the Library module and select the Grid view (keyboard shortcut G) before scrolling through the thumbnails and selecting your favorites. It takes less time to load the thumbnails, and you can always switch back to either Loupe view (keyboard shortcut E) to get a bigger view or press D and open it in the Develop module and quickly make edits.
Find Your Photos Faster
We've all been there, sitting at the computer, searching for that holiday snap you took last year but you can't find it because you've added thousands of other photos in the catalog since and haven't yet got around to organizing them. Well, even if your photos are all in a jumble already, it's pretty easy to sort them out quickly.
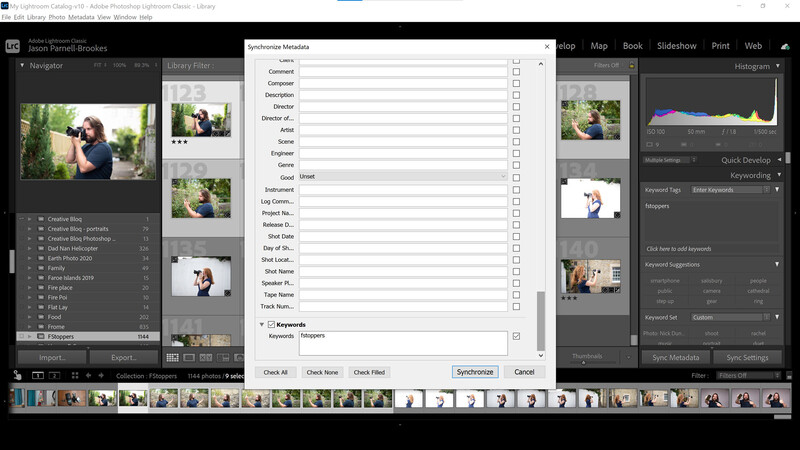
Head to the Library module and open the Keywording panel on the right-hand side. Now, enter a bunch of helpful keywords separated by a comma. For a holiday, you might type holiday, hols, beach, family, ocean, etc. depending on where you went. Do this for the first image, and then, in Grid view, scroll down to the final holiday snap and hold Shift before clicking it. Now, all those photos will be selected and you can press the Sync Metadata button in the bottom-right of the window. All those keywords will now be added to every photo selected and you can move on to the next set of images without having to retype everything.
Scroll to Zoom
In either Loupe view or the Develop module view, you can click on a photo to zoom in and see more detail. The specified level Lightroom zooms to depends on what you have set in the Navigator in the top-left, or how much you've pressed Ctrl and + once you've clicked. But there's another way.
In the Develop module, hold down Shift, and you'll see the cursor changes from a magnifying glass to a glass with two arrows next to it. Now, you can scrub zoom by scrolling left and right. Lightroom will zoom to wherever you click with the cursor and automatically center it to the middle of the display window.
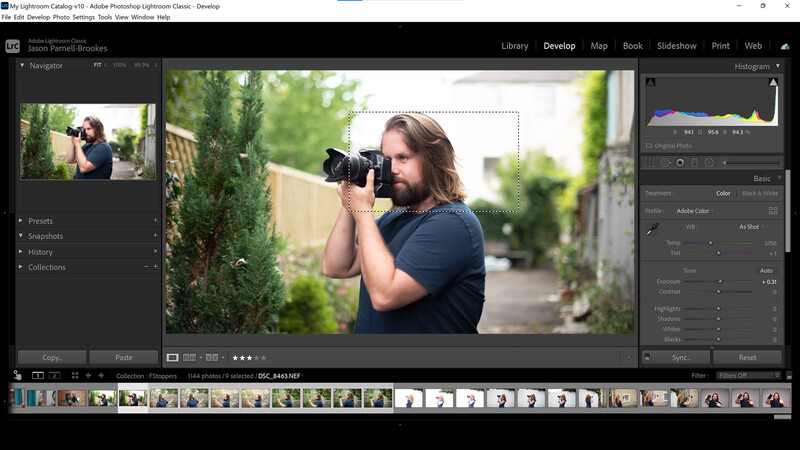
Still not good enough for you? Hold down Ctrl instead, and you can select a portion of the image you want to study by clicking and dragging with the cursor. Lightroom will then automatically zoom in to that particular area. Neat, huh?
There's More
Sure, there are plenty more keyboard shortcuts in Lightroom that can help speed up workflow, but hopefully, there were a few in this list that you haven't used before and maybe even a couple you weren't aware of. The key to these shortcuts is just that, to make things quicker. And if it's possible to speed up editing without compromising the quality of our work, then why wouldn't we use it?
Main image in part by Icey, used under Creative Commons.


Join the Fstoppers community for free
-
Post comments and join in the discussions
-
Browse the site ad-free
-
Share your work and get featured in the community
-
Compete in the photo contests for fun and prizes
5 Comments
Shortcuts are great! Added several of them to my mouse (Logitech G604) for faster switching and macros. However, when talking about the Tab-shortcut, you should also include Tab+Shift as a fast way to minimize every panel.
Thanks! I knew all of them except the one on your comment :-D
What is this thing about speed, slow down life is not to be rushed
Hugely useful article - thanks!
Now if they could just fix the F'in issue of it resetting the order of images in the Library after you edit in PS and export back into LR, that would be great.