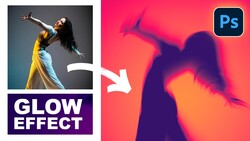
The pixel stretch effect looks like something out of a high-end ad campaign, yet it comes down to a handful of clicks in Photoshop. If you've ever wanted to add motion, energy, or a graphic edge to a portrait or product shot, this technique gets you there in minutes.
The full walkthrough comes from Aaron Nace of Phlearn, who builds the effect from scratch on three different sample images. He starts with a simple subject, uses Select Subject from the contextual taskbar, then duplicates that subject twice with Command or Control J. The middle layer becomes the workhorse. From there, he reaches for a tool most people ignore completely: the single-column marquee. You almost never touch it, but it's the entire foundation of this effect, pulling one thin strip of pixels that you'll stretch across the frame.
Once that column is selected, a Transform command does the heavy lifting. Nace holds Command or Control and drags outward, and the single strip smears across the image into a clean streak. He then right-clicks and switches to Warp, which is where the effect stops looking like a flat drag and starts looking expensive. Warping lets you push the grid up, down, or from the center, giving the stretch a soft fade and a sense of depth. He layers in a mask and a foreground-to-transparent gradient with the Gradient tool set to black, so the streak dissolves exactly where you want it to. That control over how the effect fades is what separates a gimmick from something you'd actually put in a portfolio.
The choice of which layer sits on top is where this gets genuinely useful across different subjects. With the running athlete, Nace grabs the forward foot for the stretch, and because the streak trails behind the rear foot, the whole thing reads as three-dimensional motion rather than a 2D filter. Toggling the top subject layer on or off, or dropping its opacity, decides whether the subject sits cleanly above the warp or bleeds through it. The tiny car in the third example proves the same steps work on objects, not just people, using the Object Selection tool with a simple rectangle drag instead of Select Subject.
Pixel stretching sits in a long tradition of motion-faking techniques that photographers reach for when a shot froze the action too cleanly. Panning blur, radial zoom blur, and slow-shutter trails all try to reintroduce the sense of speed that a fast shutter kills. What makes the pixel stretch approach stand out is that it's built entirely in post from existing pixels, so the streak carries the actual colors of your subject rather than a generic smear. That means it holds up on sports frames, dance, cars, or anything with implied direction. If you shoot editorial, album covers, or social content where a graphic punch matters more than realism, this belongs in your toolkit. The principle worth carrying forward is that a single row or column of pixels, transformed and warped, can generate motion in any direction you choose, and the layer mask decides how believable it stays.
Watch the full tutorial above to see all three examples built step by step and pick up the exact warp and masking moves Nace uses to sell the effect.


Join the Fstoppers community for free
-
Post comments and join in the discussions
-
Browse the site ad-free
-
Share your work and get featured in the community
-
Compete in the photo contests for fun and prizes
No comments yet