
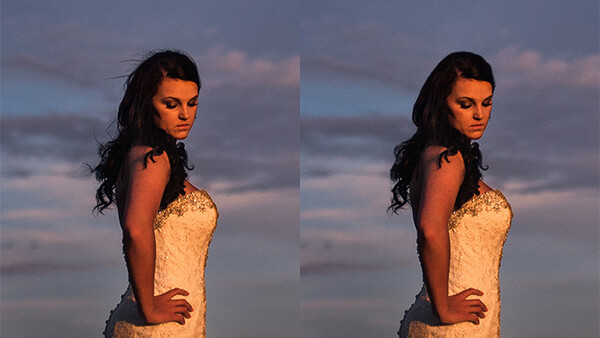
Sometimes you need to get rid of that frizzy wind-blown hair but you don’t have the time to mess with cloning and blending. This can be even more difficult and time consuming with more complicated backgrounds that have gradients in them. I’m here to show you my quick and dirty way to get rid of those flyaways.
My trick to doing this very quickly is by using the liquify tool. I know it sounds crazy, but bare with me. When getting rid of flyaway hair, the general way to do this is to clone pieces of your background in on top of the hair in order to cover it up. The main problem I encounter with this is when I’m dealing with complicated backgrounds. It was always difficult for me to get the different gradients of color to line up and blend well together. Instead of messing with cloning and blending, I use the liquify tool to expand my background into the areas I want to fix. I then use a layer mask to bring back the parts I want. Below is a step by step.
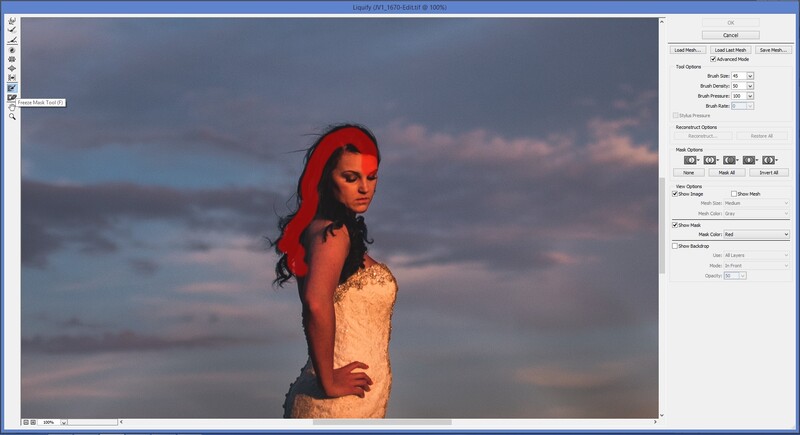
First thing you do is duplicate your layer. From here, I take the top layer into the liquify tool (Filter > Liquify). I now need to know how far to extend my background into the subject. For this I use the Freeze Mask Tool to approximately line out where I want my hairline to be.
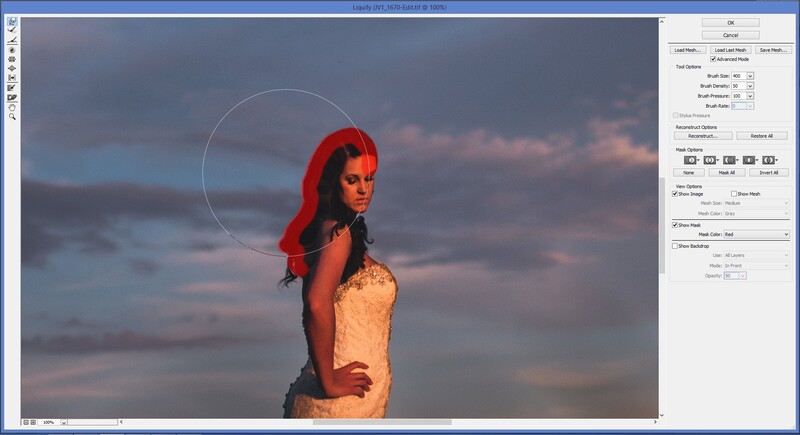
Using a large brush with the Push Tool, I extend the background into the subject. It’s important here to pay attention to the lines and shapes of what you are liquefying. Most of the time I do this, it’s with completely blurred backgrounds or in instances like this with just sky and clouds. This makes the liquefying process easy because I can push and pull my background however I want, since these types of backgrounds don’t have a definitive shape. If I was trying to do this with a brick wall, this technique might not be as useful or would at the very least it would be much more difficult.
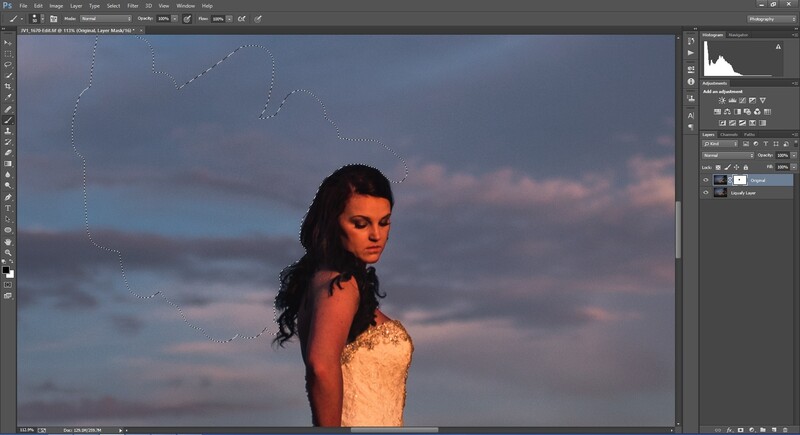
We now put the liquefied layer behind the unaltered layer and add a layer mask to the unaltered layer. By utilizing a black brush we can paint away the frizzy hair. For this part I had my brush set to 75% hardness, but this will depend on the resolution of your image, the size of your brush, and how big your subject is in the image. I also have my layer mask expand farther out into the background because I want to make sure I bring in all the pixels that I altered. This is what makes everything blend perfectly together.

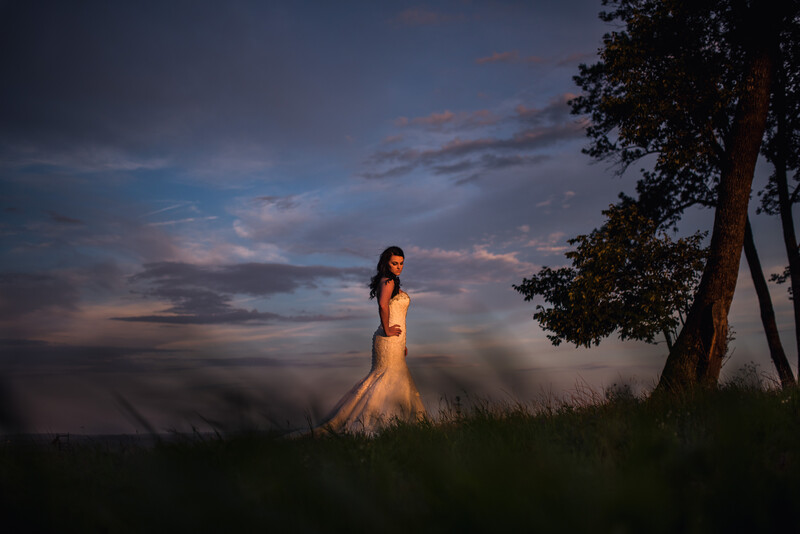
And here is the full before-and-after image:

What questions do you have? Has anyone ever used this technique to remove flyaways? What other odd things do you use the liquefy tool for? Do you have another simple way of doing this?
And don't mind the messy painting in this example, my dog literally ate the pen to my Wacom tablet.
18 Comments
Dude! This is awesome. Provided exactly what was promised: quick and dirty (and it wasn't even SO dirty). Not bad! :-) This could be a faster way to easily bring some control to hair without breaking the back (or hand, more likely)... Thanks!
Thanks a lot man! Glad you liked it!
I could have used this a month ago instead of cloning for hours at a time. This looks awesome.
With zoon is artificial.
With zoom is artificial?
Word, yo.
#zoon ;)
Thanks, but I prefer the original. Maybe if I was to adjust, I might just drop it back as opposed to totally climate it. Just another approach.
ya that's defiantly a good option. Client wanted it all gone though.
I just looks like you copied the hole Bride into the picture. The original one was way better.
Unless it's a stray on her face, I would leave it. This is an example of why I think people rely on their computer too much for photography. I'd rather have a realistic image than a "perfect" one that looks fake,
I actually prefer the before image as well. But what the client wants doesn't always match what you want. Most girls don't like frizzy hair.
I don't like the "cut out" look personally, but it delivered on the title. "A quick and dirty way to get rid of frizzy hair." My personal favorite method:
- duplicate later
- select subject face, frizz, and all
- content aware fill on top layer
- fill with black mask
- quickly brush in white and it's a magic paint brush that gets rid of the perfect amount of frizz
ya that's pretty much what I did here but instead of letting Photoshop pick the pixels, i just moved some pixels that were already there.
Yea sorry don't like it. It has got that hard edge cut out look, which is unnatural to the eye in my opinion. The final results are not so impressive as the method Ben Lucas suggested or even easier Jim Garners method (Gaussian blur with noise), which I find an absolute life saver as a wedding photog with literally hundreds of photos to edit and no stylist on hand to fix flyways. I haven't found a method with such good results that is so quick to edit.
Ya, it's not for everyone and there are definitely better options. Just another tool for the kit.
Very useful. Just tried it on an outdoor portrait and I really love the technique. The final picture shouldn't be so far away in this example though, I barely notice the difference at that distance. :)
glad you like it! and ya, that's why I mostly used the zoomed in shots to show the technique since its hard to tell with the subject so far away. The image was for a big print though so its more noticeable in the final product.