
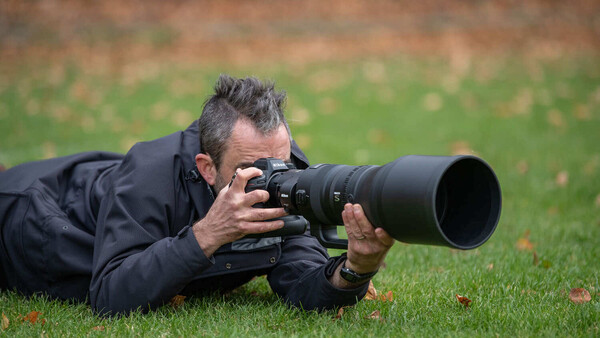
Your camera's autofocus system is doing more work than you probably realize. Every time you half-press the shutter button, a processor analyzes contrast patterns or phase differences across hundreds of points on the sensor, calculates the distance to your subject, and drives a motor inside the lens to bring that subject into focus. On a modern mirrorless camera, this happens in a fraction of a second. It is, by any reasonable measure, the most sophisticated thing your camera does on a shot-by-shot basis.
And yet many beginners leave it on the default setting and never touch it again. That works fine until it does not: the camera locks onto the background instead of the face, hunts back and forth in low light, or snaps a portrait with the nose sharp and the eyes soft. These are not camera failures. They are autofocus settings that do not match the situation, and fixing them takes about two seconds once you know what you are looking at.
This guide covers the three things you need to understand: AF modes (how the camera focuses), AF area modes (where the camera focuses), and subject detection (what the camera focuses on). Master those three layers and you will nail focus in virtually any situation your camera can handle.
Layer 1: AF Modes (How Your Camera Focuses)
AF mode determines the camera's focusing behavior when you press the shutter button or the AF-ON button. There are only two modes that matter, plus a hybrid that tries to pick between them for you.
Single AF
Single AF locks focus once when you half-press the shutter button and holds it there until you release. If your subject moves after the lock, focus does not follow. The camera assumes your subject is staying put.
The names vary by brand:
- Canon: One-Shot AF
- Nikon: AF-S (autofocus single)
- Sony: AF-S
- Fujifilm: AF-S
- OM System: S-AF
Single AF is the right choice whenever your subject is stationary or close to stationary: portraits where the person is standing still, landscapes, architecture, product shots, food photography, still life. It is precise, it is predictable, and it gives you the option to lock focus and recompose (point the AF point at the subject, lock, then shift the frame slightly before pressing the shutter the rest of the way).

The limitation is obvious. If your subject moves after the lock, you get a sharp photo of the wrong distance. A kid running toward you, a dog mid-leap, a cyclist passing through the frame: Single AF will miss all of them because it stopped paying attention the moment it locked.
Continuous AF
Unlike Single AF, Continuous AF never stops working. The camera recalculates focus the entire time your finger is on the shutter button (or the AF-ON button), chasing your subject as the distance between you changes. Whether the subject drifts closer, pulls away, or cuts sideways, the lens motor follows.
The names:
- Canon: AI Servo AF (called "Servo AF" on some newer EOS R bodies)
- Nikon: AF-C (autofocus continuous)
- Sony: AF-C
- Fujifilm: AF-C
- OM System: C-AF
Continuous AF is the right choice whenever your subject is in motion or might move unpredictably: sports, wildlife, children, pets, street photography, events, anything where the distance between camera and subject is changing. Most modern mirrorless cameras are so good at continuous AF that many professionals leave it on all the time, even for stationary subjects, because the performance penalty compared to Single AF is negligible and you never get caught flat-footed when something unexpected moves.
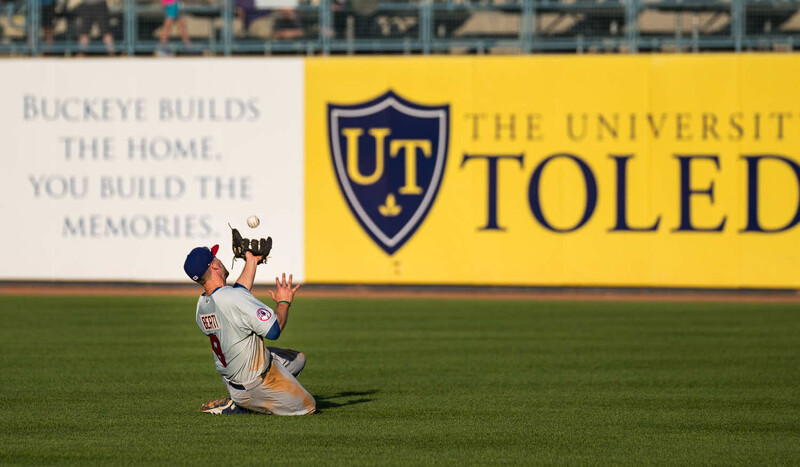
The trade-off used to be that Continuous AF was less precise than Single AF for stationary subjects. On cameras from the last few years, that gap has narrowed to the point where it is practically invisible. If you want one setting and never want to think about it again, Continuous AF with subject detection is the closest thing to a universal answer.
Automatic AF (the Hybrid)
Some cameras offer an automatic mode that starts in Single AF behavior and switches to Continuous AF if it detects the subject moving.
- Canon: AI Focus AF
- Nikon: AF-A (autofocus auto)
- Sony: AF-A or "Automatic AF" on some models, though many recent bodies (including the a1 II) have dropped it entirely, offering only AF-S, AF-C, DMF, and MF
Fujifilm and OM System do not offer a direct equivalent. Canon's EOS R mirrorless system has largely moved away from offering AI Focus as a prominent option, folding its logic into the Servo AF behavior instead. The trend across brands is clear: manufacturers increasingly expect you to choose Single or Continuous yourself rather than letting the camera guess when to switch.
Automatic AF sounds ideal on paper, but in practice the camera's decision about when to switch can introduce a slight delay at exactly the moment you need instant tracking. Many photographers skip it entirely and choose Single or Continuous deliberately. If you are not sure which to use, start with Continuous. You can always switch to Single for slow, precise work.
Layer 2: AF Area Modes (Where Your Camera Focuses)
AF mode tells the camera how to focus. AF area mode tells the camera where to look. This is the setting that determines whether the camera uses a single tiny point, a cluster of points, or the entire sensor to find and follow your subject.
Every brand names these differently, but they all offer variations on the same concepts. Here are the ones you will use most:
Single Point
The camera focuses on one specific point that you position manually using the joystick, touchscreen, or directional pad. Nothing else in the frame matters. If your subject is not on that point, it will not be in focus.

When to use it: Any time you need surgical precision and your subject is not moving much. Portraits where you want to place focus exactly on the near eye. Product shots. Macro photography. Architecture details. Single point gives you the most control and the least room for the camera to make a decision you did not want.
Zone or Flexible Zone
The camera uses a cluster of AF points within a region you select. You pick the neighborhood; the camera picks the exact address. It is looser than Single Point on purpose, giving the AF system room to grab a moving subject without requiring you to keep a tiny crosshair pinned on it.
When to use it: When your subject is moving within a predictable area but too fast to track with a single point. A speaker pacing across a stage. A point guard weaving through traffic on a fast break. A golden retriever tearing laps around the yard. Zone gives the AF system enough room to track without giving it free rein over the entire frame.
Wide Area or Whole Area
The camera uses the entire sensor (or nearly all of it) to detect and focus on subjects. This is the broadest, most hands-off area mode. The camera decides what the subject is, usually based on proximity and subject detection algorithms.
When to use it: Fast, unpredictable action where you do not have time to position a focus point. Wildlife in flight. Street photography. Photojournalism. Situations where getting the shot matters more than placing focus with surgical precision. On modern cameras with strong subject detection, Wide Area is surprisingly accurate because the camera is not just guessing; it is identifying faces, eyes, and bodies and prioritizing them.
When to avoid it: Any scene where the camera might lock onto the wrong subject. If there are multiple people in the frame and you want the one in the back, Wide Area will probably grab the nearest face instead. Switch to Zone or Single Point and place focus deliberately.
Tracking (Varies by Brand)
Several brands offer a dedicated tracking area mode (distinct from Continuous AF mode) that lets you select a subject and then follows it across the frame regardless of where it moves. Nikon calls this "3D-tracking" or "Subject-tracking AF." Sony integrates it into its "Tracking" area mode. Canon builds similar behavior into Servo AF with subject detection enabled.

When to use it: Any time your subject moves unpredictably across large portions of the frame. Birds in flight. A toddler weaving through a room. A cyclist in a criterium. Tracking is the combination of Continuous AF mode and a smart area mode, and on the best current cameras, it works remarkably well.
Layer 3: Subject Detection (What Your Camera Focuses On)
This is the layer that has changed the most dramatically in recent years and the one that makes modern mirrorless cameras feel like a generational leap over everything that came before. Subject detection uses machine learning to identify specific types of subjects in the frame and direct the AF system to lock onto them automatically.
Most current mirrorless cameras from Canon, Nikon, Sony, Fujifilm, and OM System can detect and prioritize the following subjects:
- People: Face and eye detection, often distinguishing left eye from right eye. Some cameras also detect head and body position when the face is turned away.
- Animals: Dogs, cats, horses, and other common animals. Eye detection for animals is now standard on mid-range and higher bodies.
- Birds: Separate from general animal detection because birds present a different size, shape, and movement pattern. Bird eye detection is available on most current systems.
- Vehicles: Cars, motorcycles, trains, and airplanes. Particularly useful for motorsport and aviation photography.
- Insects: A newer category. Sony and Fujifilm have been the most prominent in documenting insect detection for macro shooters.
To use subject detection effectively, you typically need to enable it in the AF menu and select the subject type you are shooting. Some cameras (Sony's recent bodies, for instance) offer an "Auto" subject detection mode that attempts to identify whatever is in the frame without you specifying. The results are good but not perfect; if you know you are shooting birds, telling the camera "birds" will outperform the generic auto setting.
The practical impact of subject detection is enormous. In the past, keeping a bird's eye in focus as it flew across the frame required extraordinary skill, fast reflexes, and a high volume of throwaway frames. Today, you set Continuous AF, Wide Area, and Bird detection, and the camera does the tracking for you. Your job shifts from technical execution to composition, timing, and anticipation, which is where it should have been all along.
Putting It All Together: Settings for Common Scenarios
Here are starting points. Adjust based on your results.
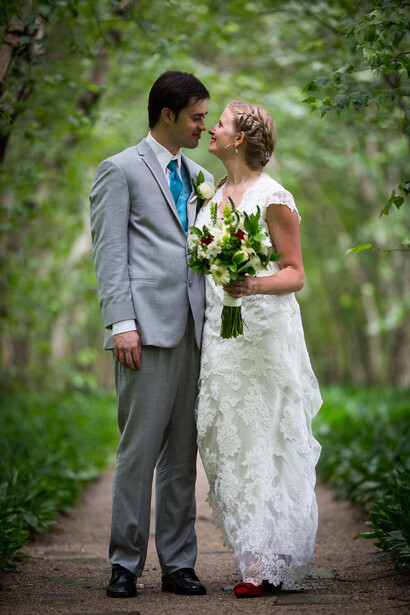
Portraits (subject standing or sitting): Single AF + Single Point (placed on the near eye). If your camera has face/eye detection and you trust it, Continuous AF + Wide Area with People detection works beautifully and saves you from manually placing the AF point for every frame.
Group photos: Single AF + Zone or Wide Area with face detection. Make sure the camera is not locking onto the person closest to you while ignoring the people in the back row. Check focus on the LCD after your first few frames.
Kids and pets indoors: Continuous AF + Zone or Wide Area + People or Animal detection. They will not hold still. Do not pretend they will. Let the AF system track them.
Sports and action: Continuous AF + Wide Area or Tracking + appropriate subject detection (People for team sports, Vehicles for motorsport). Set your camera to high-speed burst and let the AF system update between frames.
Wildlife and birds: Continuous AF + Wide Area or Tracking + Animal or Bird detection. Pair this with a telephoto lens long enough to fill the frame and a shutter speed fast enough to freeze wing motion (1/2,000 or faster for birds in flight).
Landscapes: Single AF + Single Point. Focus one-third of the way into the scene for maximum depth of field at f/8 to f/11, or focus on the most important element (a foreground rock, a distant peak) and let the narrow aperture carry the rest. Subject detection is unnecessary here.
Street photography: Continuous AF + Wide Area + People detection. Speed matters more than precision. If your camera grabs the nearest face and it is sharp, that is a good frame. If you want more control, Zone with face detection is a solid middle ground.
Macro: Single AF + Single Point (or Pinpoint if your camera offers it). When you are shooting at life-size or near life-size magnification, the zone of acceptable sharpness can be thinner than a credit card. There is zero room for the AF system to guess. Place the point yourself, or better yet, switch to manual focus and nudge your body forward and backward until the critical detail snaps sharp.
Back-Button Focus: The One Custom Setting Worth Learning
By default, your camera activates autofocus when you half-press the shutter button. Back-button focus reassigns AF activation to a separate button on the back of the camera (usually labeled AF-ON) and removes it from the shutter button entirely. The shutter button now only fires the shutter.
Why this matters: with back-button focus, you can press AF-ON to focus, release it to lock, and then recompose and shoot without the camera refocusing when you press the shutter. If the subject moves, you press AF-ON again and the camera resumes tracking. You effectively get Single AF and Continuous AF behavior from the same setting, toggled by whether your thumb is on the button or not.
Back-button focus takes about a day to feel natural and about a week to become something you cannot live without. Every brand supports it; look for "AF-ON" or "AF activation" in your custom controls menu. It is the single most useful custom setting change you can make on any camera.
When Autofocus Fails (and What to Do About It)
Autofocus is not infallible. It struggles in specific, predictable situations:
Low light: The camera needs contrast to focus. In near-darkness, it may hunt back and forth without locking. Solutions: use the AF-assist beam if your camera has one, focus on an edge or high-contrast boundary near your subject, or switch to manual focus.
Low-contrast subjects: A blank white wall, a cloudless sky, smooth water. No contrast means no reference for the AF system. Move the AF point to an edge where contrast exists, lock focus, and recompose.
Obstructions between camera and subject: Shooting through a fence, a window, foliage, or a crowd. The AF system may grab the obstruction instead of the subject behind it. Use Single Point to place focus precisely, or switch to manual.
Extreme close-up distances: Inside the minimum focus distance of your lens, autofocus cannot lock. The lens will hunt endlessly. Either move back slightly or switch to manual focus and rock your body forward and backward until the subject snaps into sharpness (this technique is standard in macro work).
If you want a structured walkthrough of camera fundamentals beyond autofocus, including exposure, metering, composition, and post-processing, Photography 101 covers the full journey from unboxing to finished edit. And for those who already have the basics down but want to see how autofocus technique applies across genres like landscape, portrait, and wildlife photography, those real-world contexts are where AF settings stop being abstract menu options and start becoming muscle memory.
Join the Fstoppers community for free
-
Post comments and join in the discussions
-
Browse the site ad-free
-
Share your work and get featured in the community
-
Compete in the photo contests for fun and prizes
No comments yet