Focus stacking lets you create a landscape image that’s sharp from the closest rock to the distant horizon. When you shoot wide scenes at f/11 or f/16, you still won’t always get everything crisp, and that soft foreground can quietly ruin an otherwise strong frame.
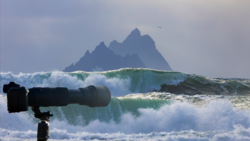
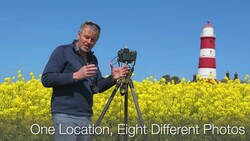
Coming to you from fototripper, this practical video walks through a real-world focus stack from a frozen beach using in-camera focus bracketing and Photoshop. The key idea is simple: instead of hoping depth of field will cover the scene, you shoot multiple frames at different focus points and blend them later. You see how built-in focus bracketing automates the process, including step size, number of frames, and sequence direction. Setting a small focus step and choosing around eight frames gives breathing room, especially when the foreground sits close to the lens. You also see why starting at infinity and letting the camera move toward the minimum focusing distance can be a fast, repeatable approach in rough conditions.
The video doesn’t stop at capture. It shows what happens when light shifts during a sequence, which is common at sunrise or sunset. Shooting one set slightly underexposed protects highlights, then capturing another brighter set preserves shadow detail. That gives options later if exposure blending becomes necessary. You watch the files move from Bridge or Lightroom into Photoshop, where they’re loaded as layers, auto-aligned, and blended using “Auto-Blend Layers” with the stack option. The process sounds automatic, but it isn’t flawless. Masking errors creep in, especially along edges and transition areas, and you see how to fix those manually with layer masks and a soft white brush.
One detail worth adopting is composing a little wider than needed. After auto-aligning layers, minor shifts can leave strange edges around the frame. Leaving 5 to 10% extra space lets you crop cleanly without sacrificing important elements. You also see why duplicating the aligned layers before blending provides a safety net. When Photoshop makes poor masking decisions, you can pull clean detail from the backup group instead of trying to untangle complicated masks. It’s a simple habit that saves time once you spot blurry patches in what should be sharp background areas.
There’s also a practical discussion about frame count. Sometimes two frames are enough when there’s a clear separation between foreground and background. Other scenes with elements stretching from near to far may need six, eight, or more. The number depends on distance relationships and focal length, not on a fixed rule. You get a look at how step size affects the overlap between focus planes and why “more than you think” is often safer than cutting it close. The video also hints at alternative approaches like manual focus racking and a “hopscotch” method for more complex scenes.
In post-processing, basic raw adjustments are synchronized before stacking. Shadows are lifted carefully, highlights are controlled without crushing natural glow in bright clouds, and the horizon is leveled before files ever reach the blending stage. Once stacked, small masking fixes clean up halos and soft patches. The final file is saved as a layered PSB for flexibility, then as a flat TIFF for printing. Check out the video above for the full rundown.
Join the Fstoppers community for free
-
Post comments and join in the discussions
-
Browse the site ad-free
-
Share your work and get featured in the community
-
Compete in the photo contests for fun and prizes
4 Comments
Sir I dedicated exactly 20 min of my time to something I am very interested into but once I saw you left PhotoShop doing the masking for you I just quit and I still have to thank you as you gave me a huge ego boost, when I compare your “pro” shooting and post processing skills into merging a focus stacked landscape I do really feel like I am a much better photographer than I thought I was.
Use an OM System camera. It shoots the series of photos that you set it up for almost instatnly. No tripod needed. And the resulting JPEG, made in-camera, is excellent and instant, so you can check your composition, etc. And, if you want, you can still assemble the raw files produced at the same time into your own composite in, for example, Affinity Photo.
Focus Bracketing has been used by macro shooters for years. but the editing yes mainly in PS. Recently with firmware to say the A7RM5 and also the A7SM3 you can do your macro captures. I have both cameras and did some playing with both. The better to use is the A7SM3 because it is a 12MP camera and you get smaller MP output mainly each image is smaller MP wise so the in post the final image you get yes takes less time and less bulky kind of compared to the A7RM5.
A unknown kind of is for landscapes it will do just three images close, mid and far so in post you can use Helicon SW and have a final in just seconds. Like using Bracketing say 5 at +/- 2EV you would edit in Lrc in HDR to get all merged together. I think Lrc soon will have a focus stacking section also epically for landscapes so the PS having to do so many things to do you will be able to do a merge in just a few seconds. If you go down the the file list and click on Plugin Extra there will be a link
Helicon Focus Stacking program way faster than PS.
I was playing with some flowers for our 40th anniversary, if married use variegated roses it tells her how hot she is to you. I did a capture with both the A7RM5 and A7SM3 and the A7SM3 was faster and with a smaller MP size of final image and with smaller image size of each image you do have a big file on your SD card also.
Only one thing to keep in mind is your shutter count doing a lot like 100+ or so after awhile you may need a new camera. Also if buying used ask for a shutter count before buying. It like capturing sports or birds a photographer wants that 10 to 20 frames a second just get that one shot out of 500 (long search) but also if buying used another reason to ask for a shutter count. It is like Pro rifle shooters that will burn out a barrel in one season, just saying!!
Focus Stacking and Focus Bracketing are mainstays with OM System cameras. I use it all the time with my OM-1. The user sets the differential and the number of images and the camera makes the exposures almost instantly. 3, 6, 10, even 15 photos at 1/125 takes no time at all.
And, better yet—no tripod needed!! The resulting JPEG is excellent or you can use the individual raw files to create your own in, e.g. Affinity Photo.
Best thing since sliced bread!