Flash portrait work lets you create clean, controlled light in places where ambient light fails, from dim living rooms to ugly office hallways. Even if you prefer natural light, knowing how to use a flash turns difficult locations into usable sets instead of missed sessions.
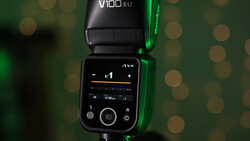
Coming to you from Ed Verosky, this thorough video walks through the core tools you need, starting with the difference between a shoe-mounted speedlight and a larger studio strobe. You see why a camera with a standard hot shoe and full manual exposure control is non-negotiable if you want reliable flash portraits. Verosky explains how compact flashes run on AA batteries, tilt and swivel for bounce, and even act as wireless masters for other units, while bigger strobes sit on a light stand with more power and heavier modifiers. He also introduces common features like TTL, high-speed sync, zoom heads, and basic sync modes without burying you in menus so you can pay more attention to where you place the light. The gear list is simple enough that you can build a working setup without guessing your way through spec sheets.
From there, the video gets into how you actually fire the flashes when you press the shutter, and this is where a lot of people quietly get lost. Verosky compares old-school PC cords and TTL sync cables to optical triggering and modern radio triggers, then shows why wireless is usually the smarter move once you start adding lights. You get a clear explanation of what flash sync really is, how line-of-sight optical systems differ from radio systems, and how groups and channels fit into the picture without feeling like networking jargon. He also breaks down TTL as an on-the-fly metering system that does a pre-flash, lets the camera decide power, and then fires the real burst, along with the tradeoff between convenience and consistency. The step he holds for later is how to tune these options for tricky locations where reflective walls or bright windows confuse automatic systems.
A big chunk of the lesson focuses on exposure, and this is where many courses either rush past the hard parts or dump theory with no connection to portraits. Verosky walks through aperture, shutter speed, and ISO as the base exposure controls, then shows how only aperture and ISO affect flash-lit areas while shutter speed mostly controls the ambient part of the frame. You see how manual flash power, expressed in stops, interacts with settings like f/4 vs f/11, and why ISO 100 at 1/250 s is a common starting point when you bring in an umbrella or softbox. He also touches on exposure compensation for ambient light and flash exposure compensation for TTL, so you can nudge the camera’s decisions instead of accepting them. The deeper, frame-by-frame problem-solving with real examples is saved for the video, where you can watch the changes happen shot to shot.
Later in the course, Verosky moves from “one light on a stand” to real portrait setups. You see how a single key light with a modifier like a strip light or octa can be placed in classic patterns such as short, Rembrandt, butterfly, broad, and split lighting, and how those patterns change a face without changing the gear. Then he adds fill with a reflector or a second flash, introduces hair and background lights, and builds up to three point lighting in a very literal “one light at a time” way. Along the way he shows actual tools, like a Godox AD400Pro as a key, a Godox TT685 as fill, and a Godox X1T on the hot shoe, so you can map his concepts to gear you already own or plan to buy. The more stylized looks, such as clamshell beauty lighting, rim-heavy setups with multiple strip boxes, blown-out white backgrounds, and wraparound glow, are demonstrated visually in the video rather than fully explained in words here. Check out the video above for the full rundown from Verosky.
If you would like to continue learning about how to light a portrait, be sure to check out "Illuminating The Face: Lighting for Headshots and Portraits With Peter Hurley!"
Join the Fstoppers community for free
-
Post comments and join in the discussions
-
Browse the site ad-free
-
Share your work and get featured in the community
-
Compete in the photo contests for fun and prizes
No comments yet