Everyone has heard the saying, "The eyes are the window to the soul." There is a lot of truth to this when it comes to photographs. The first thing many of us look at when we see an image are the eyes of the subject. In this article I'm going to teach you how to enhance eyes using the brush tool in Lightroom.
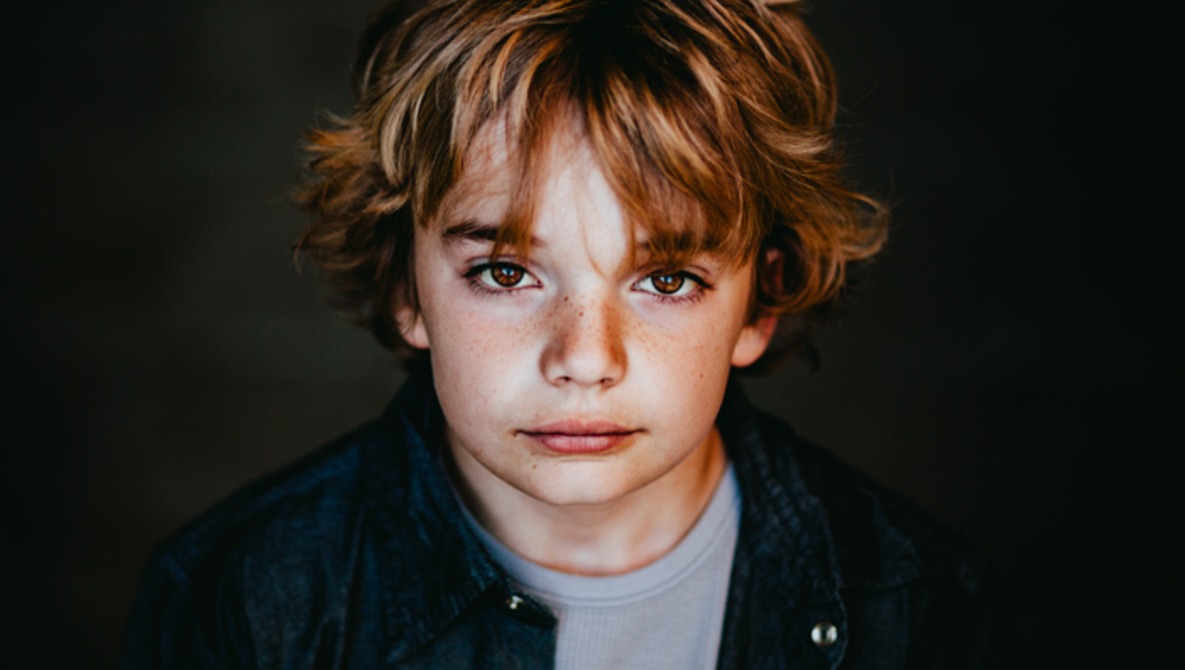
When I shot this image, I purposefully underexposed it to make sure I could bring out the freckles in his face. The down side is his eyes appear black.

The image on the left is before I enhanced his eyes, and the one on the right is after the eye enhancement.
To fix his eyes, I used three different brushes. The first brush I used was to brighten his eyes, and to bring out a little detail in them. The second brush was used to add a dark line around his iris, which makes the eye pop a little more. The third brush was used to lighten the whites of his eyes, and to remove some of the yellow color added by the edit.
Enhancing The Eyes
This is the first brush stroke:
Here is what the sliders on the brush stroke looked like. I increased the exposure to make him look less like a shark. I also decreased the highlights to soften the catch lights, as they were becoming a distraction. Every eye will require the sliders to be different. Sometimes it helps to add a little sharpness and clarity. Adding a little saturation, especially with blue eyes, can help as well. Be careful using saturation, as this can make the eyes look fake incredibly quick.

Brush sliders to enhance the eyes.
And here is what the eye looks like now:
Making The Eyes Pop
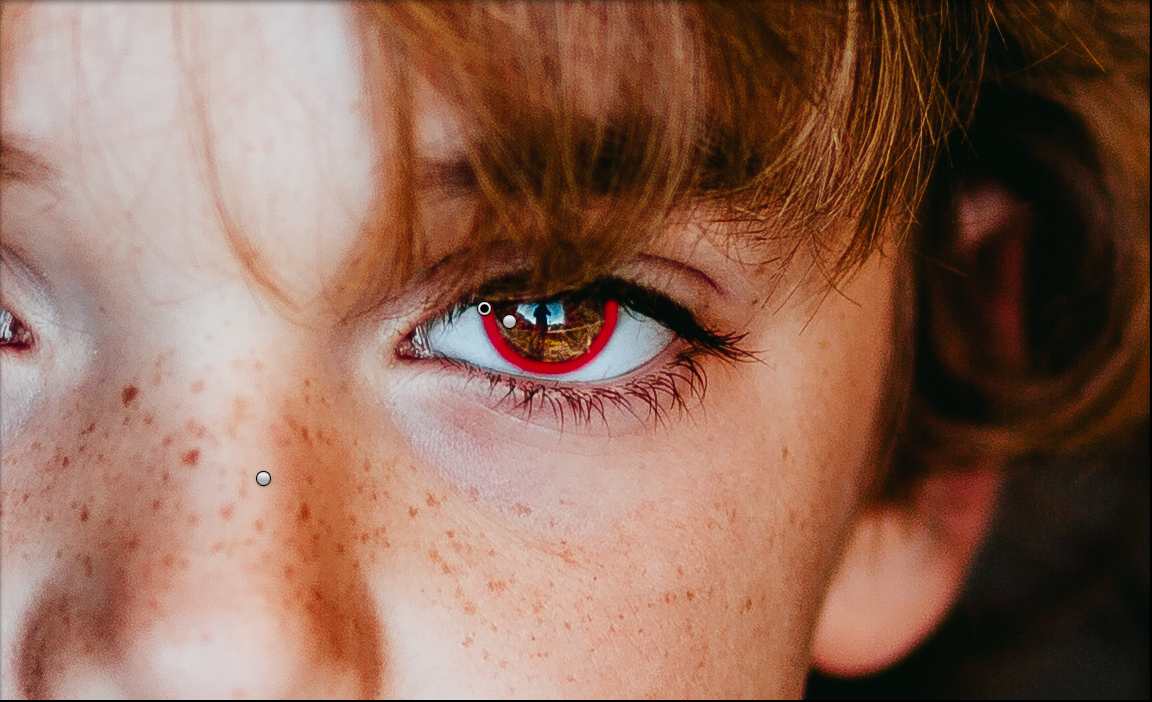
Adding a darker ring to the outside of the iris can really make the eyes pop.
Here is the screen grab of the brush strokes:

The exposure on these particular eyes didn't need to be taken down very much to achieve the desired look.
And here is the final image:
Fixing The Whites Of The Eyes
This isn't always a necessary edit, but if the whites of the eyes aren't looking so white, this brush can go a long ways in making your image look better. Sometimes the presets we use, or editing style we have, effects the whites and this brush will fix that. The VSCO edit I used on this image added a little bit of yellow to the whites of the eyes, so I used the brush tool to correct that.
Here is the brush stroke:
To correct the yellow, I added a blue temperature to the image, decreased the saturation, and increased the exposure.

The brush sliders to correct the issue.
And here is the final image:
Every image is different, as well as the eyes you are editing. Don't be afraid to experiment in order to find out what looks best, just remember to use these methods in moderation. It is very easy to cross the boundary between editing the eyes to make them look better, and editing them so much that they look fake.
Here is the before image, and the final image:


super helpful!
Off topic, Jason. You look a TON like my future brother in-law-in-law.
If you want me to marry your sister just say so.
Thanks for this, I hadn't been darkening around the iris but I think I'll start now.
I actually picked that trick up from watching some of Dani Diamonds editing videos in YouTube.
I just test your setting on a shoot and that's very nice
thanks for share it great job
You're welcome!
great article.... now I just need to be careful and not make people look like mutants with Cyclops eyes...hehehe... :) tks for the post !!
It's a fine line to walk. Just keep an eye on the exposure, or they look like they came from the set of The Host.
I think I preferred the before. Good tutorial though if you're into that kinda thing.
I can see how you'd like the original better. His eyes were super bright in person, and I wanted to represent him correctly in the image.
Great stuff dude. I'd pay to see the rest of the edit that went into this.
I started the the Vsco preset Kodak Ultra max 800 and took the grain away. I also adjusted to tone curve to flatten the blacks and a little. Then I adjusted the split toning to add orange to the shadows at full saturation and changed the balance to 98%
Wow...huge change for the small amount of time put into this. And it definitely takes the photo to another level. Gotta start doing this! I can see the fine line between being just right and horrible though.
Yeah, you definitely need to be careful to not make it look fake.
'
Dear Kenny Coverstone,
Thank you for this article. I am new to Lightroom. There is one thing that I don't understand. Between the three steps of enhancing the eye, at what stage do you save? After each step? I can not figure out after step one, where the whole eye is red, how do you go about adding the 'black ring'? I can't seem to remove only part of the big red 'mask' (to leave the red ring for the black) without deleting the changes to step one?
Or do I need to export the image first, then continue with step two on the exported image?
I hope this makes sense.
After each brush, I add a new brush. On the top right if the brush section there is a button that says new, if you click on that, it will allow you to add a new brush stroke and adjust only that one. Hope this helps!
nice wo
Nice Article
hmm. I think the whites of the eyes look really unnatural, I only ever colour balance them and maybe up the exposure or highlights very slightly. Dropping the saturation like you have just makes them look too doll-like
Great work!!!! Thanks for this it´s super helpful!!
I'm just learning how to use the brushes in LR. Was wondering which three you chose? I typically use sharpen or iris enhance... but in the photos above it just says custom. Can you explain which three you chose for each brush stroke? Thanks!!