Night scenes in near darkness look dramatic, but they are some of the easiest images to ruin with missed exposure, motion, and noise. If you shoot moving subjects at night, you probably have a folder of frames that feel too dark and too messy to bother editing.
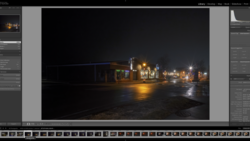
Coming to you from Gareth Evans with Park Cameras, this practical video walks through how Evans takes a severely underexposed Halloween train shot in Lightroom Classic and pulls it into a place you would actually be willing to share. You see the full process starting from a raw file shot at f/2.8, 1/250 second, and ISO 1,000, so you get a realistic look at what happens when you push exposure on a noisy file instead of a tidy demo image. The first moves are simple but crucial: brighten the exposure enough to see what you are doing, crop to a 16:9 frame that puts the train where the eye wants to land, and fix the horizon so the motion feels intentional instead of sloppy. By the time those basic steps are in place, you already see how much detail was hiding in what looked like a throwaway frame, and you start to think differently about "failed" night shots. The video keeps the pace brisk, so you are always on to the next problem to solve rather than stuck listening to theory.
From there, the tutorial leans into the real headache of this kind of file, which is noise and harsh texture after the exposure boost. You watch Lightroom Classic’s AI-driven Denoise feature clean up the sky and background, with a close look at what detail you lose and what you gain when you apply it to a high-ISO scene. Evans then uses global adjustments with restraint, nudging shadows, clarity, vibrance, and white balance so the scene feels moody without becoming muddy or neon. Where it gets more interesting is in the masking work, especially the separate treatment of the sky to tame remaining noise, deepen the blacks, and soften texture so it looks like night atmosphere instead of grain. The result is not a sterile, over-scrubbed file, and you see how far you can safely push a noisy frame before it starts to fall apart.
You also get a clear look at how localized light shaping changes the story of the frame. Radial and linear gradients are used around the train and along the tracks to gently raise exposure and contrast where you want attention, while a brush pass pulls saturation and texture back from the noisy foreground so it does not compete with the subject. A separate mask on the front of the train pulls highlights down and recovers detail, so that bright patch becomes a controlled focal point instead of a blown blob. Evans talks through the tradeoffs you accept when you shoot a moving subject in such low light and how careful masking can hide some of those compromises. The tutorial also hints at how far you can push style on a file that needed this much rescue, including built-in cinematic presets and HSL adjustments that shift yellows toward warmer oranges and refine luminance, but it keeps some of those decisions for you to explore. Check out the video above for the full rundown.



Join the Fstoppers community for free
-
Post comments and join in the discussions
-
Browse the site ad-free
-
Share your work and get featured in the community
-
Compete in the photo contests for fun and prizes
No comments yet