
The Rethink Landscape Toolkit for Adobe Lightroom and Adobe Camera Raw aims to transform the landscape photographer’s editing process and introduce a consistent workflow and an array of flexible tools to improve your photo editing. What is in the toolkit, and does it really help with the editing process?
As a landscape photographer, a challenge I have continued to face is in my photo editing process. My knowledge of the tools and techniques to edit photos has certainly grown over the years, and I understand the nuances of the tools available to me in Adobe Lightroom, Adobe Photoshop, and other photo editing software options.
But I continue to have no actual workflow in my editing sessions. I’m like a dog chasing squirrels, with my approach and tools used differently nearly every time, once I move past the basics. Weeks later, I often forget and overlook a technique I used. Or a technique that I learned gets filed away, and then I never remember to incorporate it into my editing workflow.
In comes the Rethink Landscape Toolkit, a fresh set of tools created by landscape photographer David Kingham to help define your workflow and provide convenient tools or presets to edit your photographs. I am going to start by highlighting what the Rethink Landscape Toolkit is and then share my experience having used the toolkit for several weeks now.
Rethink Landscape Toolkit
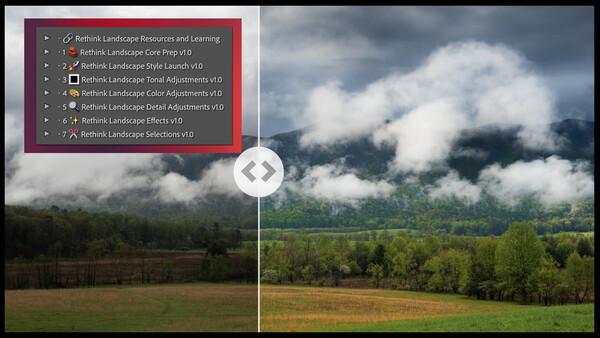
The Rethink Landscape Toolkit is a set of specific presets to both help your editing process and provide a consistent seven-step workflow approach to a landscape image. Kingham also has an in-depth course to pair with the tools to help detail what each tool does and provide examples of the tools in use to go beyond the web-based help that comes with the toolkit.
Presets tend to have a bad name, often associated with beginner photographers or not able to be applied seamlessly to every photo with equal results. The presets in the Rethink Toolkit are not the global presets we often think of, but finely tuned presets as specific tools.
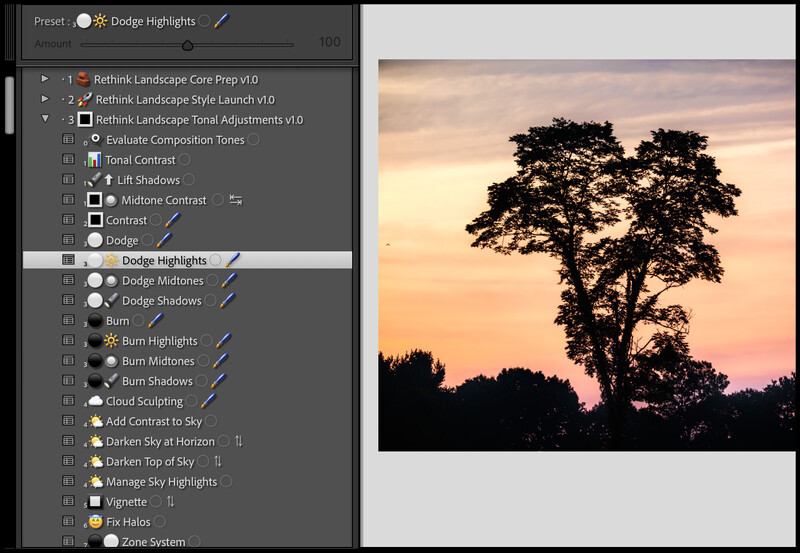
For example, a typical preset in the Rethink Toolkit could provide a brush set for dodging, or it could configure dodging specifically for highlights, midtones, or shadows. You can click the desired option, and the tool will configure a brush with those settings for that task. There are over 100 such presets like this that can help adjust tonality, color, detail, effects, and even help create a selection for you to apply your own adjustments to.
The Rethink Landscape Toolkit also provides a structured workflow to move through in editing a file. Each of the tools is put into specific categories of this seven-step workflow. These categories are:
-
Core Prep of the Image
-
Style Baseline
-
Tonal Adjustments
-
Color Adjustments
-
Detail Adjustments
-
Effects
-
Selections
The core prep stage is a mix of tools to help you do things, like visualize dust spots and white balance, or simply remind you to do certain things, like remove distractions, do any photo merging you might need, and so on.
The next stage sets a Style Baseline. Using the histogram, you determine if the image is a low dynamic range, mid dynamic range, high dynamic range, or extreme dynamic range and use a broader preset to give you a baseline to more precisely target later steps in the workflow.
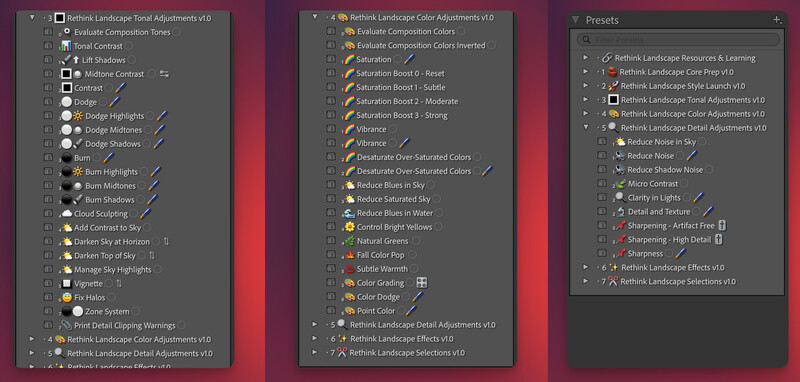
The next three sections give you tools to affect tonal adjustments, like dodging and burning, midtone contrast, and tools to work with the sky in the image. The color adjustments section provides presets to work on saturation, either more or less, vibrance, and even presets to help tame neon greens, add some warmth, color dodge, or even color grading. Finally, the detail section provides presets to help you address noise in the sky, sharpness levels, and microcontrast.
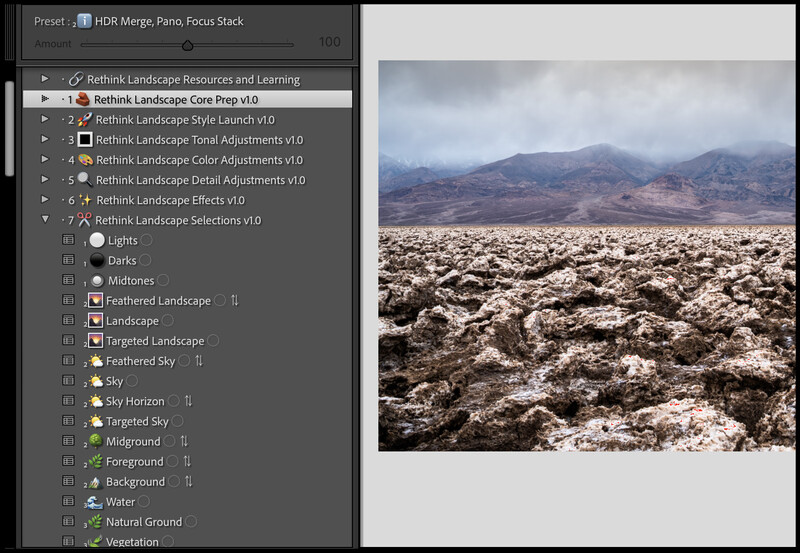
The effects section has a variety of effects to further stylize your image, ranging from adding light, removing light, various forms of the Orton effect, additional sky effects, and more. And finally, a section for selections, which gives you presets for pre-built selections that only make the selection and then allow you to make your own adjustments to tone, color, and detail.
When editing an image, start with the core prep, which includes reminders to do any stacking work, such as exposure or focus, removing distractions and dust spots, and correcting your white balance.
The Rethink Toolkit works with newer versions of Adobe Lightroom and Adobe Camera Raw. It relies on the newer masking and AI features in the more recent versions. Similar to other presets for these applications, they work on both Mac and Windows operating systems.
My Experience With the Rethink Toolkit
I received the Rethink Toolkit and accompanying course for review several weeks ago. I have used the Toolkit on a variety of images since installing it. For all my toolkit work, I used the latest Adobe Lightroom.
Let’s start with the seven-step workflow the Rethink Toolkit groups the preset tools into. I found the structured approach to editing a photo very helpful. One of my issues with my editing is that my order of doing things changes by the month or even more. Having a structured flow as I sat down to edit photos helped bring a sense of consistency to my approach.
From the core preparation of the file to working through tonality, color, and detail, and finishing up with any effects or custom selections I wanted to do, it was all right there. As the importance of the order of operations in Adobe Lightroom increases because of some of the AI tools, just the reminders in the Core Prep stage are invaluable.
The presets themselves are significant time savers, making more complex tasks easier and more efficient. Many of the presets are things I know how to do in Lightroom but would sometimes skip because of the time it took to create my mask, set my brush modifications, and so on.
With the Rethink Toolkit, with one click the majority of the work is done. Just adjust the brush flow and start your local adjustments. For example, if I want to bring up the highlights in part of the image, I can select the Dodge Highlights brush, set my flow, and brush in some highlights. Fast and easy.
Beyond the tools to help target tonal, color, and detail adjustments, there were several presets that had very convenient effects. I like my images a touch on the warm side, and one of the presets for color is called Subtle Warmth. Selecting that preset added just a hint of warmth to an image that I like. If I ever thought it was too warm or not enough, I could adjust its intensity using the Amount slider for the mask. Being able to adjust the strength of many of these presets through the Amount slider helped me make it mine.
That is what I really liked about the Rethink Toolkit. It wasn’t applying a preset to my image and making everything perfect, but it gave me a suite of tools to use in Lightroom that I could choose to use or not use. And then, if I used one and thought the result was too strong or not enough, I had the flexibility to make those minor adjustments.
There are two caveats to mention after having used the presets for several weeks. First, if you select a preset, say Midtone Contrast, and make adjustments to it, then come back later and click the Midtone Contrast preset again, it resets your previous changes. Keep that in mind as you work with the Toolkit. If you want to adjust your Midtone Contrast later after applying it, find it in your Masks panel and make the adjustments there. Don’t reapply the preset. And if you do accidentally reset it, just use the Lightroom Undo option to go back a step.
The second item is related to performance as I browsed the presets. By default, Lightroom applies presets to the main image as you hover to let you preview them. Since the Rethink Toolkit presets are doing some complex masking and selections, I found it could slow my scrolling of the presets if I was moving up and down a section as it tried to preview the effect while I was already moving to the next one. Disabling the “Enable hover preview of presets in Loupe” option under Lightroom Preferences was very helpful. You miss out on the larger image preview, but you can see the effect in the preview image under Navigator.
What I Liked
-
Guided seven-step workflow
-
Preset tools that made complex masks and selections fast and easy
-
Flexible, allowing you to increase or decrease the effect of a tool as needed
-
The toolkit approach provided a wide selection of tools to use when appropriate for your photo
What Could Be Improved
- Scrolling through presets was occasionally sluggish because of Lightroom's default preview (auto preview can be disabled, which made a big improvement)
Closing Thoughts
I had a very positive experience with the Rethink Landscape Toolkit and see myself continuing to integrate it into my editing workflow. Organizing the tools in the seven-step workflow will help me bring my editing into a repeatable process from one image to the next.
The tools David Kingham has included in the Rethink Landscape Toolkit help make tasks much more efficient. One click and I have a mask or brush ready to do what I want. From dodging and burning, brushing in contrast, adding warmth, color grading, sharpening, and more, the toolkit is full of presets ready to help me draw what I want out of an image.
The Rethink Landscape Toolkit is available for $39 at rethink.photo. This will get you the seven-step workflow and the 100+ presets. If you are familiar with Lightroom and just want the structure and efficiency of the Rethink Landscape Toolkit, the help instructions provided with the Toolkit should get you up and running without issue.
If you are newer to Lightroom or not entirely comfortable with it, there is an option to get the Rethink Landscape Toolkit and Course for $197. The video course goes in depth on the methodology of the Rethink Toolkit, the seven-step workflow, how each of the presets works, and so on. I found the course very helpful, even though I consider my Lightroom knowledge to be at an advanced skill level.
If you are unsure if the Rethink Landscape Toolkit is for you, there is a sign-up to get ten of the presets for free to give them a try! I highly recommend you try them out and see if they will help your landscape photography photo editing.
Join the Fstoppers community for free
-
Post comments and join in the discussions
-
Browse the site ad-free
-
Share your work and get featured in the community
-
Compete in the photo contests for fun and prizes
7 Comments
I have seen this article linked VIA Google news this week and no comments yet so I read it! First let me say is in the last 15 or more years with other editors and PS/Lr other photographers have sold presets (to make some $) and all one does is just scroll over to see how it changes the image and WOW you can spend a while doing that and because so many will be there you will have to redo most times.
First I am just a Hobbyist with time to play and edit for what is recommended getting up and walking away for a day or two then do more or even redo all over. Next no one will believe this but you can restart on an image several times and never ever get the same result and add other editing programs you just add to more different results.
Next years ago say film days the images say Kodak printed when color was harder to develop it was like today using the camera Auto Mode, yes all cameras have it and some like Sony have two. If ever you wanted to do a portrait of someone at night with night city landscape behind yes your camera will take two captures one with the flash and another without and combine in camera, and give you a raw and or Jpeg.
What many Pros, I believe fail to enjoy is the Edit, due mainly to speed needed to get to a customer.
To me the edit is the same as finding or waiting for the right lighting by nature her self. I myself will wait for a bad weather day to edit the reason is I am out mornings and evenings and most nights all night. So where ever the front of my car goes and stops for a while I am all over. So like my old film days all these images on a SD card are like getting a pack of photos in the mail several weeks after. The greatest thing is the going back in time and using the newest software of the day, remember the first time you could get rid of dust spots or even see you had them hidden in the sky, also the hours in a bathroom after a shower had gotten the room dust down and using a light to see the dust and try as you could to clean the sensor and how dare you change a lens out of doors, we still do it but not like going to church all cleaned up. Few even know how to find the dust with the right settings and camera movement.
Confession I am a Introvert and alone time is my friend and I believe most all photographers are especially landscapers both day and night type, you see them in every YouTube video all alone behind that camera and view of the trip to it.
So with a perfect color set monitor I have spent years getting right and waiting for the first Photography laptop and desktop I either sit in silences or listen to no words music I start MY editing and with no help from others, yes I do watch every editor video to find the latest options to use. Lrc is like the old Capture ONE with all the editing of areas in an image or PS where you edit each area in a selected layer and merge all into one. Yes so many editors and commands today.
You see how your education is limited with all the fast editing parts, It is like only knowing manual mode, yes you put your own self into the capture but there is that auto mode you paid for what will that capture.
I guess the apps that you could download and put on Sony Mod 1's and 2's that edited also in camera both raw or jpeg or both would be a welcome thing for all the photographers needing a fast result but for me they were an education into how and what could be done with the little magic box.
https://www.playmemoriescameraapps.com/
Lastly how much in an image makes a landscape?
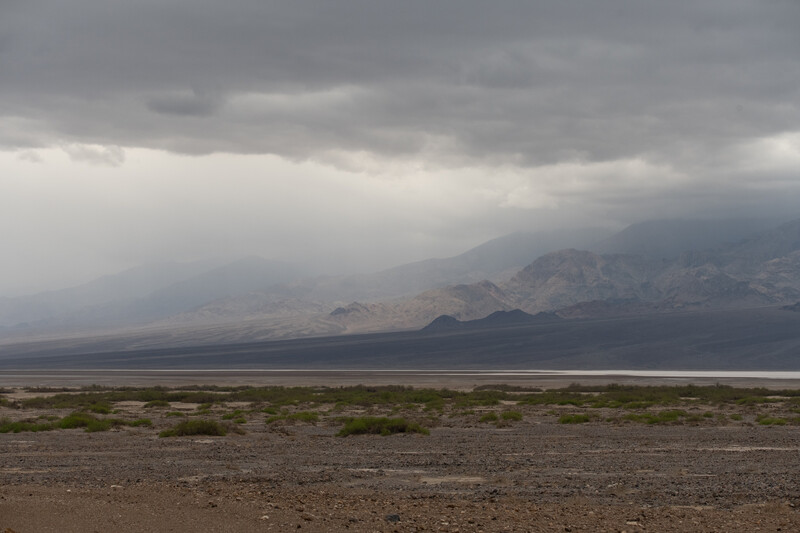
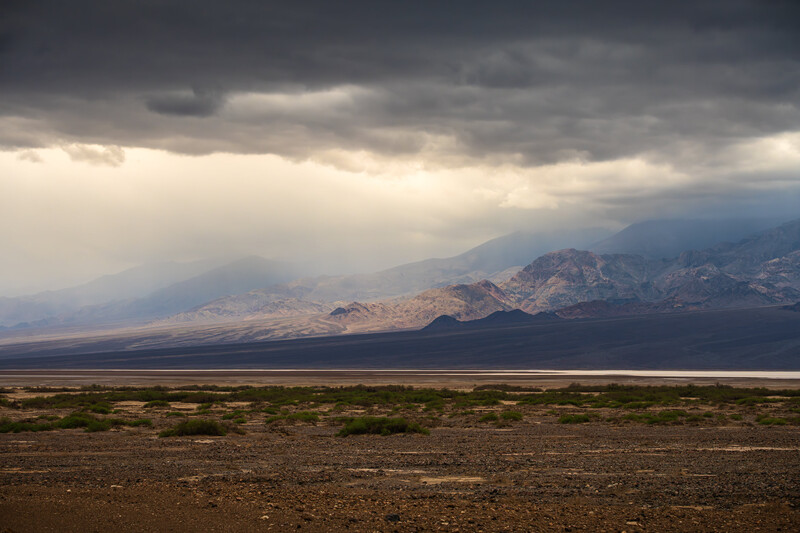
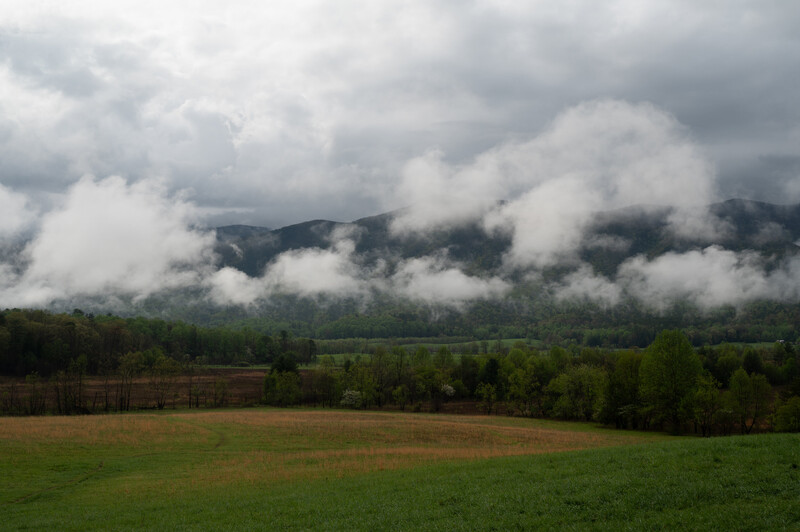
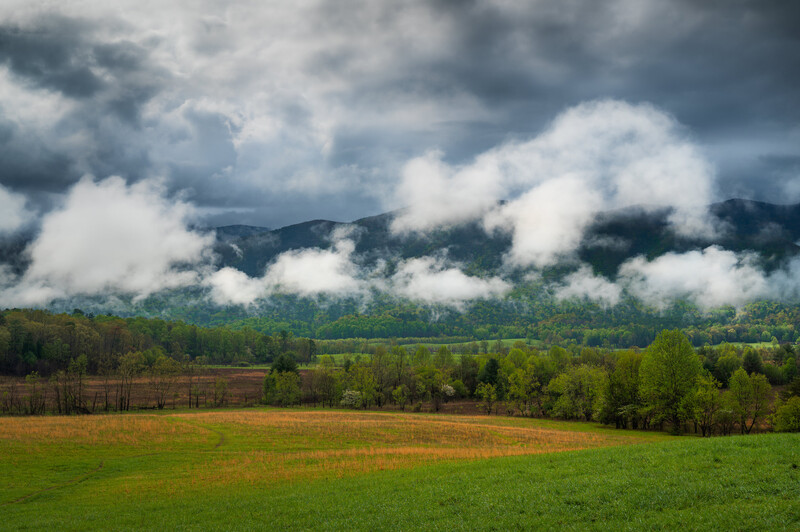
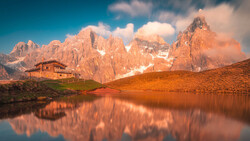
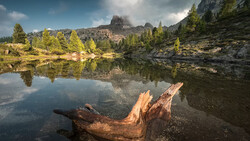
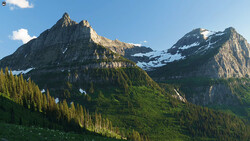
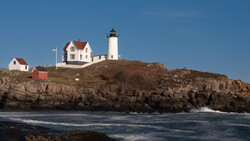
#1 and 4 10mm #2 24mm #3 a panorama with a 12mm in portrait view
Hi Edwin, I really appreciate you sharing your philosophy on editing. You've hit on something important that I think many photographers feel, that the edit is a creative act just as much as the capture itself.
My goal with the Rethink Toolkit wasn't to replace that creative discovery, but to handle some of the more repetitive, technical steps. The idea is to build a solid foundation quickly so photographers can spend more of their time on the fun, creative parts of the process that you describe so well.
Thanks for adding your voice to the conversation.
Jeffrey, wow, thank you for such a thorough and thoughtful review. It's one thing for me to talk about the methodology, but it's another to see it connect so perfectly with someone.
Your dog chasing squirrels analogy for editing is perfect, and it's the exact feeling of unstructured frustration that led me to develop this system in the first place. My entire goal was to bring consistency and efficiency to the process, so reading that the 7-step structure was very helpful for you is fantastic.
I'm especially glad you highlighted the flexibility of the tools and the ability to "make it mine." That's the heart of the toolkit. It’s not about a single look, but about providing the components to build an image with intention.
Thanks again for the incredibly kind words, knowing the toolkit is staying in your workflow is the highest compliment I could hope for. Thanks for noting the tip about turning off develop preset previews, I cover this in a new performance section I added recently along with many other tips.
If anyone has questions about the toolkit, I'm happy to chime in.
It's a great tool! Definitely helped me be more efficient with my own editing, especially the structured workflow which helps me not forget things!
Editing can sure be tricky, but I also believe in trying to keep these changes to the bare minimum. I have had people come up to me at exhibitions and said to me "come on these images are photoshopped right"? They cannot be like that out of the camera! To which I reply, I only used lightroom, and then only the basic sliders and I try to minimize the changes. So I try to keep changes to just whats needed, and not overdo, I also like to try to not do anything that I could not reasonably do in a darkroom (had I shot on film).
I try not to go too far with edits, but I do think anytime you are photographing RAW there is going to be editing necessary.
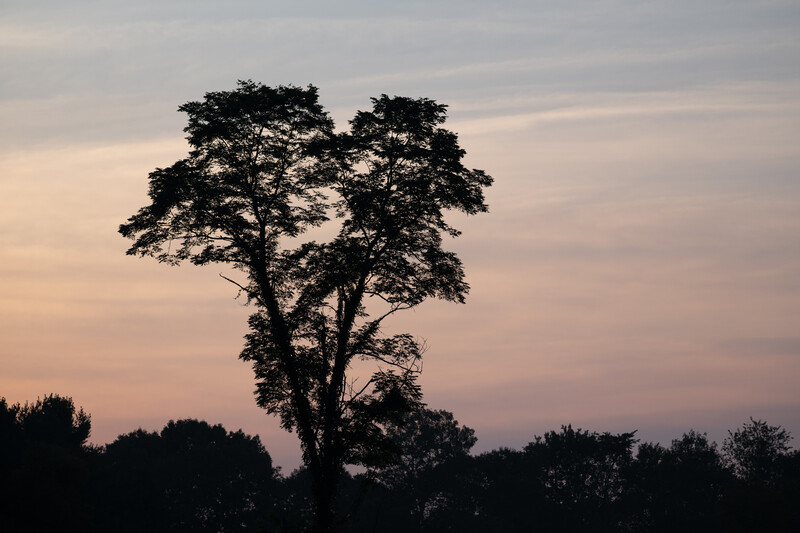
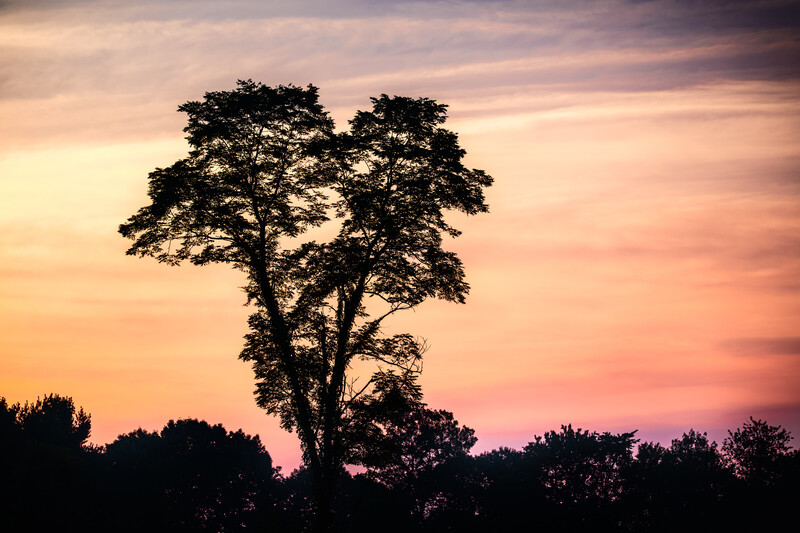
In my before and after samples above I would say overall the final is much, much closer to what my eyes saw than the before was. Between being flatter due to being a raw file, and me watching the histogram to avoid blowing highlights, the straight out of camera image often lacks contast and will be on the underexposed side.
It can be tricky finding that line though!
I think you are quite right about comparing the raw image to the final edited output. Some get really wound up about editing, but are more than happy to share how well their "non-editied" iPhone photos look.
I've had, usually non-photographers, tell me that no photo should ever be edited, that what the camera captured is the only "real" photo.
I also try not to go too far with own edits, but I think that everyone should be able to express themselves artistically however they wish, as long as they are not intentionally trying to mislead you, especially so in certain genres such as photojournalism but it can apply elsewhere as well.