Adobe just added a small control in Point Color that quietly changes how you shape color. If you hate blotchy skies, uneven skin, or muddy water, this solves problems that photographers run into every week.
Coming to you from Mickey Pullen with Eastern Shore Photo Instruction, this practical video sticks to the Variant slider inside Point Color and shows where it earns its keep. You start by sampling a target hue with the eyedropper, then use Variant to either pull nearby hues closer together or push them apart. Slide left to tighten the color family so a patchy sky settles into one cleaner tone. Slide right to separate neighbors so blues, cyans, and teals gain contrast without wrecking the rest of the frame.
The demo makes a strong case for masking first, then using Point Color. Sky masks keep adjustments off buildings and trees. Vegetation masks let you refine yellows and oranges without nuking skin. Water masks help you tune reflections where color spreads unpredictably. Range still matters, but Variant gives you a second axis of control so you can narrow the selection, then decide whether those selected hues should merge or stand apart.
Pullen opens with a coastal scene where the top of the sky is dark and the horizon is pale. He selects a mid blue, moves Variant left, and the sky evens out fast. A small nudge to hue and saturation finishes the job without halos. Push Variant right and you get the opposite look, a dramatic deep blue upper sky against a brighter horizon that still avoids banding. Range can separate clouds from sky edges so the cloud detail pops while the blue stays smooth.
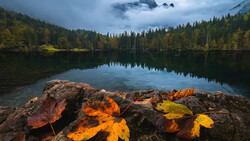
Vegetation gets the same treatment. Sample a yellow leaf, move Variant left to pull stray oranges into line for a uniform fall palette. Prefer more color separation. Move Variant right so the golds stay gold and the oranges lean warmer, then lift luminance to freshen the scene. A subtle hue tweak shifts green foliage away from neon and toward a believable yellow green. The point isn’t to chase a preset. It’s to use Variant like a precision dial for how tightly grouped those tones should be.
Water benefits when reflections look flat. Sampling a blue in the cove, moving Variant right, and adding a bit of luminance and saturation brings back shimmer. Try a second sample lower in the frame for areas that need different treatment. If Range doesn’t help, don’t force it. Variant often does the heavy lifting while Range cleans the edges.
Skin is where the feature earns trust. With a People mask on facial and body skin, sample a natural mid tone and move Variant left to pull reds and yellows into a calmer, even base. Tiny tweaks to saturation and luminance restore life without adding orange cast. Hot spots on the nose and cheeks get cleaned with the blemish tool as a quick pass, which pairs well with the color fix. The result is consistent skin without the plastic look that global adjustments can cause.
Landscape shooters using a polarizer filter will recognize the uneven sky problem when the filter darkens corners. Mask the sky, sample the desired blue, move Variant left, and the gradient smooths out while leaving sunset tints intact if you trim Range. It’s faster than brushing and avoids color contamination around structures. Check out the video above for the full rundown from Pullen.

Join the Fstoppers community for free
-
Post comments and join in the discussions
-
Browse the site ad-free
-
Share your work and get featured in the community
-
Compete in the photo contests for fun and prizes
No comments yet