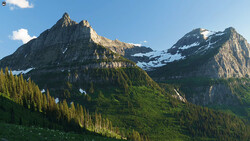
The right edits can turn a dull sunset into a showstopper. Color, light, and local adjustments all work together to create warmth and contrast that feel alive. This tutorial walks through how to transform a flat raw file into a vibrant sunset image with rich tones and clean detail.
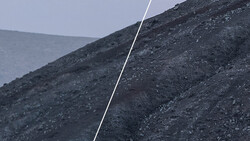
Coming to you from Christian Möhrle – The Phlog Photography, this detailed video breaks down every step of enhancing a sunset image in Lightroom, starting with correcting vignetting caused by a wide angle lens. Möhrle uses a Canon 16-35mm f/4 and shows how enabling profile corrections removes heavy corner darkness. With a lens adapter in play, Lightroom can’t always detect the correct profile automatically, so he sets it manually. He also checks “Remove Chromatic Aberration,” a quick move that prevents color fringing around edges. Once the issues are gone, the frame looks balanced and ready for more creative work.
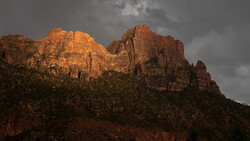
The next step focuses on mood and exposure. Möhrle switches to the Adobe Landscape profile, then drops exposure and highlights to reveal hidden mountain details. Shadows are lifted and blacks raised to add glow and softness. Whites are nudged up to bring back contrast without blowing out details. The histogram is key to keeping those highlights in check. From there, he adds texture, clarity, and a touch of dehaze to sharpen the scene and define the midtones. Adjusting white balance warms up the shot dramatically. One small move gives the whole image the warmth of an actual sunset rather than a washed-out dusk.
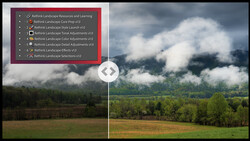
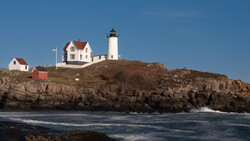
Masking takes the edit from solid to cinematic. Möhrle builds several masks: a color range mask for darkening the blue sky, another linear gradient for balancing reflections, and a selective mask to brighten a small hut. For the mountains, he uses Lightroom’s new “Select Landscape” feature, subtracting vegetation and cleaning edges with a brush. Each adjustment adds separation and depth: darker blues above, richer oranges and detailed textures below. The water gets clarity and texture boosts to emphasize natural streaks, while cooler tones in the shadows maintain color balance against the warmth.
Color work brings the scene to life. Using the color mixer, he shifts yellows toward orange and slightly deepens oranges into red, creating that classic blue-and-orange harmony. Saturation gets a bump where it counts, especially in the warm tones. Luminance tweaks make the sky moodier and the foreground glow. Then, split toning ties it all together: warm oranges in the highlights and midtones, a hint of cool blue in the shadows for balance. Möhrle adds subtle global warmth to finish the color grade. The calibration panel gives the final punch, adjusting the blue primary slider for a controlled yet intense red glow on the mountains.
Before wrapping up, Möhrle fine-tunes sharpening. Lower radius, higher detail, and careful masking focus the effect on key textures without over-sharpening the sky. The end result is a rich, detailed, dramatic sunset—proof of how thoughtful local edits and color control can reshape an image. Check out the video above for the full rundown from Möhrle.

Join the Fstoppers community for free
-
Post comments and join in the discussions
-
Browse the site ad-free
-
Share your work and get featured in the community
-
Compete in the photo contests for fun and prizes
2 Comments
I understand the author was demonstrating Lightroom techniques for editing landscapes, but the final image, IMO, was extremely over-edited and unrealistic. This is a good example on how not to edit images in post processing.
different strokes for different folks