Masking is where Lightroom edits either look clean and intentional or start to fall apart at the edges. If you have ever nudged Exposure and realized you changed the whole frame instead of a small area, this topic will save you from that kind of mistake.
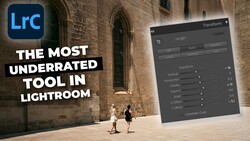
Coming to you from Mickey Pullen of Eastern Shore Photo Instruction, this methodical video walks through the Masking panel in Adobe Lightroom and shows you how to stay oriented once you start stacking masks. Pullen starts with the most basic move: opening Masking from the icon, plus the Shift + W shortcut to pop the panel open and closed. He also calls out a point that trips people up: the sliders in the Masking controls affect only the masked area, while the global sliders below affect the entire photo. That sounds obvious until you are moving fast and your eyes are on the image, not the panel. He uses a sky mask as the first example, partly because it is familiar, and partly because the panel tools do not fully reveal themselves until a mask exists. You also see how the floating mask controls can be moved around the workspace so they do not block other adjustments.
Once the first mask is in place, Pullen shifts to the overlay, and this is where the video gets practical in a way that changes how you work. He shows how the overlay can toggle on and off with the O key, so you can check edges without hunting for a checkbox. He also demonstrates the “amount” slider, which scales every adjustment inside that mask at once, letting you back off an edit without undoing your individual slider choices. If you have ever built a strong mask adjustment and then wished you could reduce the whole thing by 20% without rebalancing everything, this is the control that makes that easy. He also spends time on Solo Mode, which keeps panels from piling up and forcing you into constant scrolling when you are working on multiple local adjustments. The point is not speed for its own sake, it is reducing the small interface mistakes that quietly wreck good edits.
The overlay section goes deeper than most quick tips, especially around visibility and precision. Pullen shows how to change overlay color when the default blends into the scene, and how overlay opacity can make edges either clear or hard to read depending on the subject. He also demonstrates setting custom overlay swatches and cycling through them with Shift + O, which is the kind of shortcut you will actually use when a mask disappears into foliage, sand, or a warm sky. Then he opens the overlay mode menu and flips through options like cover overlay, color overlay with black and white, image on black, image on white, and the “white on black” view that treats the mask like a true reveal map. He also demonstrates Option + O to cycle overlay modes, which is useful when you are cleaning up a selection and need to see exactly what is included. The video also touches the behavior that automatically hides the overlay after you start making adjustments, which can either help you evaluate the change or confuse you if you expected the overlay to remain visible while you work.
Where things start to get interesting is how Pullen handles mask management once you have more than one mask. He shows creating additional masks from the plus button, and how to rename masks so you are not stuck with “Mask 1” and “Mask 2” when you return to an image later. He explains the difference between inverting a mask and duplicating and inverting it, and why that distinction matters when you want a sky and a foreground adjustment that stay separate. He also demonstrates how the eyeball icons work at two levels: temporarily previewing all masks versus toggling a single mask off so it will not apply when you export. The video sets up more advanced tools too, like intersecting masks and building submasks with Add and Subtract. Check out the video above for the full rundown from Pullen.




Join the Fstoppers community for free
-
Post comments and join in the discussions
-
Browse the site ad-free
-
Share your work and get featured in the community
-
Compete in the photo contests for fun and prizes
No comments yet