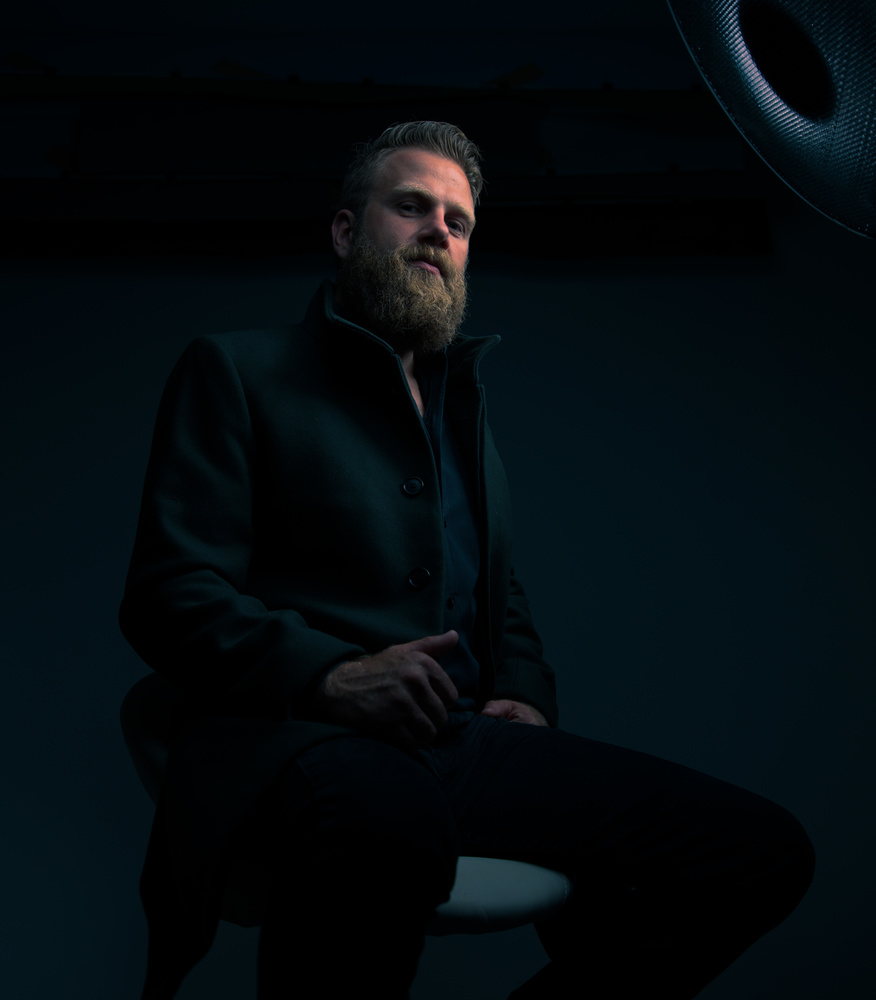
ACDSee recently asked to sponsor a video where I use their new Photo Studio Professional software. I thought it would be fun to do an entire portrait session from start to finish.
My buddy Nick Milak currently has a glorious full beard and I thought he would be a great model for this shoot. I asked Nick to show up with a few different coats with large collars. I wanted to create something that looked like a classic painting/portrait.
Gear Used
I started by setting up my key light which was a Profoto Beauty Dish on a boom stand. The "spill" out of the side of a beauty dish is much brighter than the reflected light coming from the front and it was throwing way too much light on my background. To contain the light I added a grid to the dish.
At this point, the light was far too contrasty and I added a large softbox directly next to the key light. Most photographers add a fill light on the opposite side of their key light and I think this is almost always a mistake as it kills the directionality and mood of the light. By placing my key and fill light on camera right, I was able to make it "feel" like a single light source.
Once I had my lighting set, I didn't change it again. I simply worked on posing, composition, and getting the right expression out of Nick.


To edit the shots I used ACDSee's Photo Studio Professional software. It's basically a replacement for Adobe Lightroom for a flat $60. In some ways Lightroom is better, but in others, ACDSee was a clear winner. Loading raw files was extremely fast and culling my images was a breeze. I also found many extra options and filters in Photo Studio that are not natively in Lightroom.
Luckily you don't have to take my word for it, ACDSee is 100% free to try.
Big thanks to ACDSee for sponsoring this video and if you'd like to learn more about portrait photography, check out our full-length tutorials at Fstoppers.com/store.


I don't get the skin retouch, it's not like he has any problems with it and after the retouch he looks fake. The other stuff neat but I'd like to mention https://www.darktable.org/ which does the same stuff but is free software (free like in liberty, but also beer).
This is the least skin retouching I've ever done on a photo. I just took out a few extremely small blemishes, no dodging, burning, blurring, desaturating, frequency separation.
Always good to see Lightroom alternatives. Just downloaded the Mac version and hope to have a play in the next few weeks.
I'm unsure if it's a ACDSee issue, but colours seems pretty off and inconsistent between each other :(
glad im not the only one thinking this...
Between the images I posted above? Well ya, I did something different to each one.
Excellent tutorial – As a long time user of the ACDSee pro line of software, it was as nice to see your workflow and how you handle portrait retouching. I hope ACDSee sponsors you doing a tutorial with their Photo Studio Ultimate program on creating a complex image using layers. It is a powerful program and a great alternative to Adobe products.
You did not use a Canon EOS R.
You would have noticed ACDSee can not read CR3 files :-)
Oh ya? Why is that? Are they just behind?