
Four years ago I purchased my first set of studio strobes in an attempt to learn how to shoot portraits like the ones I saw in my favorite print magazines. Having shot most of my portraits using available light at f/2 and under, I thought this would translate over easily when I switched to shooting with strobes. As I snapped my first frame and realized that even at the lowest power setting on the strobe the image was overexposed, I set out to find a way to be able to accomplish the effect. The answer was high-speed sync.
High-speed sync (HSS) allows you to shoot beyond your camera's shutter speed limit when shooting with off-camera flashes. For most cameras, the max is 1/250 s which isn’t enough when shooting at lower apertures like f/1.4. A strobe with HSS will allow you to shoot at a shutter speed of up to 1/8,000 s, which is typically more than enough to get the job done for studio work. The key is to have a studio flash that allows the use of HSS, which typically cost a little bit more than your garden variety studio strobes.
In the video above I share my technique for shooting shallow depth of field portraits using high-speed sync. The setup is pretty easy, but I’ll break it down in detail so you can achieve similar results on your own.
Gear
As mentioned earlier, you’ll need a studio head that allows you to shoot with HSS. I have been using the Phottix Indra 500 for almost two years now and it’s treated me well. HSS functionality has been available for Canon and Nikon shooters for some time, and now it’ll be available via a firmware update and a new trigger (Phottix Odin II) for Sony a7 shooters. There are other HSS strobe heads on the market that will also work, but for me these have offered the best bang for your buck. You’ll also need a trigger like the Odin II in order to get your flashes to work with HSS.
The other thing you’ll want to consider is your background. While I’ve done portraits using HSS with standard colored seamless paper, my personal favorites are the ones that have some sort of texture. For that I typically use Savage collapsible backdrops. They open up and close quickly and easily, and give you a lot of flexibility to change the color in post. Some of my favorites they offer are the “Lakeside,” “Morning Haze,” and “Indigo Nights.” There are other companies that offer textured backgrounds as well so find one that you like and have fun.
Settings
This is the part of the equation that takes a little bit of thought. When you’re shooting in your desired location, the first thing you need to do is negate the ambient light that is in your room. Let’s say you want to shoot a portrait at f/1.4. First, turn off your strobe. If you dial in that setting and put your shutter speed at 1/500 s to start with ISO 100, your goal is to see an image on the back of your screen that is completely dark (literally a black box). If you take the shot at those settings and still see a bit of ambient light bleeding into the image, then you would dial your shutter speed up a few clicks until you achieve that result. Once you have the right settings dialed in that give you a black box for an image you can turn on your strobes and adjust the power from there. I typically start at 1/64 power and go up or down from there depending on my desired look.
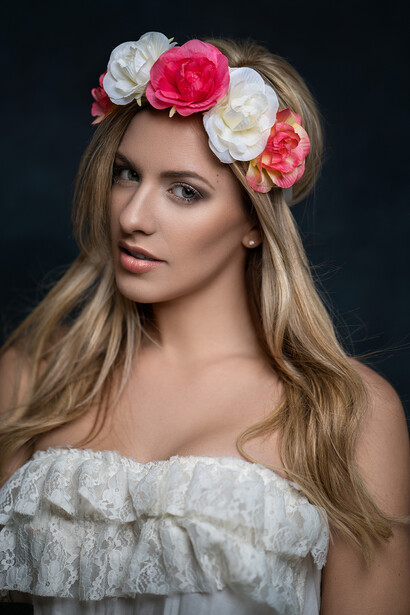
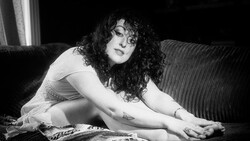
Examples
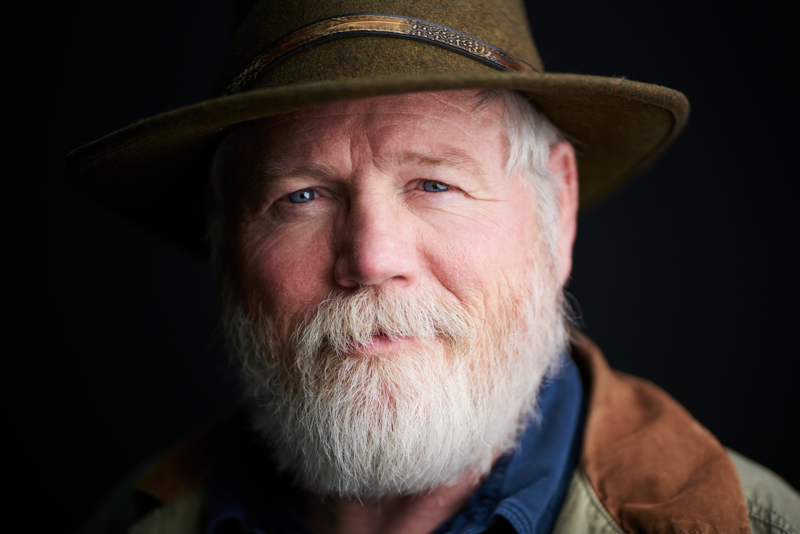
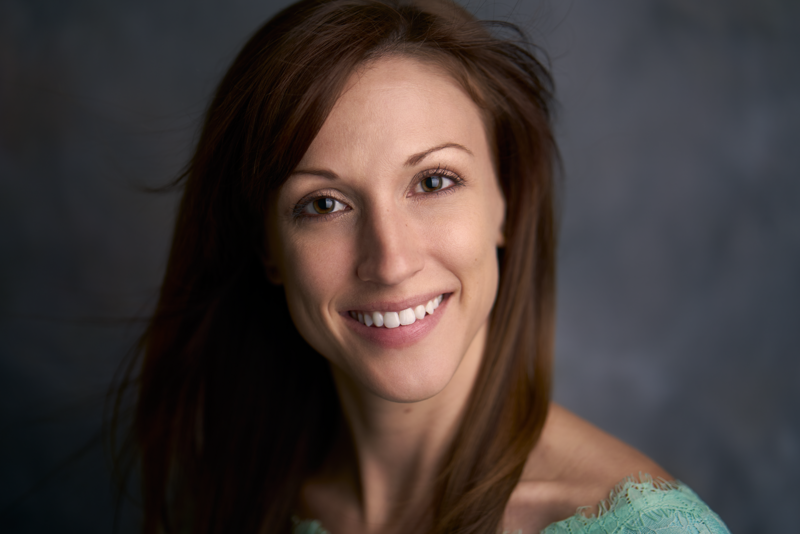
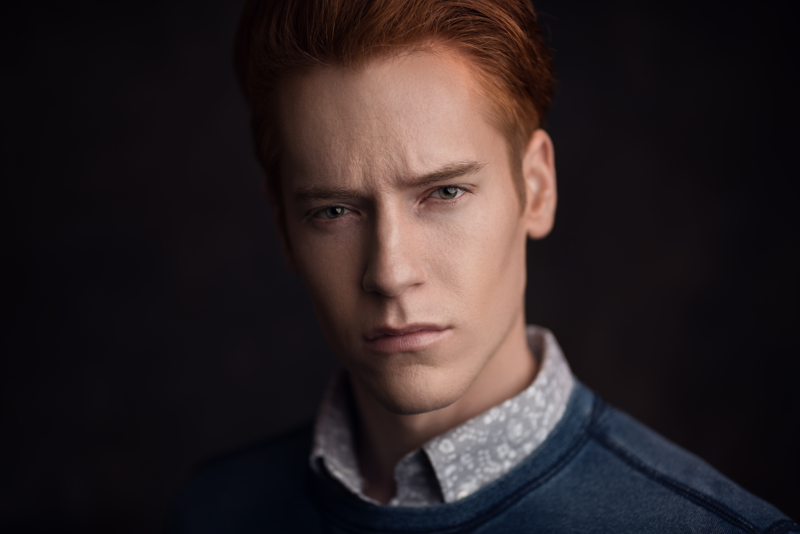
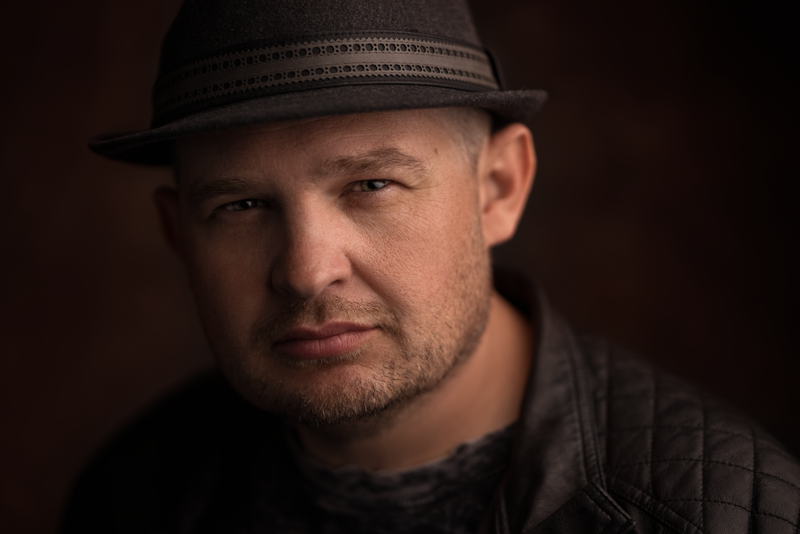
Here are a few examples of the type of portraits I’ve shot using HSS over the last few months:
Other Methods
What if you already own a studio strobe that doesn't offer HSS? You may be wondering, how can I shoot at a shallow depth of field too? One option would be to use a hot shoe flash off camera that offers HSS. While this could work in most scenarios, there is one downside: no modeling light. Without a modeling light you may have to add your own lighting (maybe via a cell phone light) in order to achieve proper focus on your subject. The other method would be to use an ND filter, which will drop the overall exposure so that you can shoot at your 1/250 s or under shutter speed without overexposing your image. This is the method I used for years prior to using HSS which also works great, however, you will notice that a number of your images may be soft due to the difficulty of trying to focus through a dark piece of glass. To work around that I picked up a set of ND filters from Vu Filters along with their filter holder. It allows me to slide the filter out so I can get the camera in focus, and then slide the filter back in place quickly so I can take the shot. I have an ND2 and ND3 filter that I keep on hand when shooting this style, both of which should work fine for anything f/1.2 or above. Using either method, you still want to make sure your starting image before turning on your strobes is a completely black image, and then go from there.
When To Use It
There are many applications where I would use this. For me I’ve noticed that the dark background, shallow depth of field look works great when photographing older men. If you work with their expression you can get a very interesting portrait look that will hold people’s attention. If you’re photographing a woman and want to get a dreamy, flowy-hair look, add a fan and use the technique described to give you a whimsical, beautiful look like the image in the example section above. While this isn’t a style that I use every time in the studio, it’s definitely one to keep in your back pocket in the event the right person is standing across from your camera.


51 Comments
A bit late with my comment, actually 4 years late ;-). There is a way to use HSS with standard Studio Strobes and that is to use a flash-light on your camera shoe, which has HSS, to set off the strobes with its flash.