
As you've learned in a previous article, a great time to photograph cities is during blue hour. But the blue hour often lacks dimension and depth in the sky. If you're lucky, you'll have some clouds that provide structure. But if you have a clear blue sky, it'll often appear flat. In this article, I show you a trick you can use to make such a sky more interesting and improve your blue hour photos.
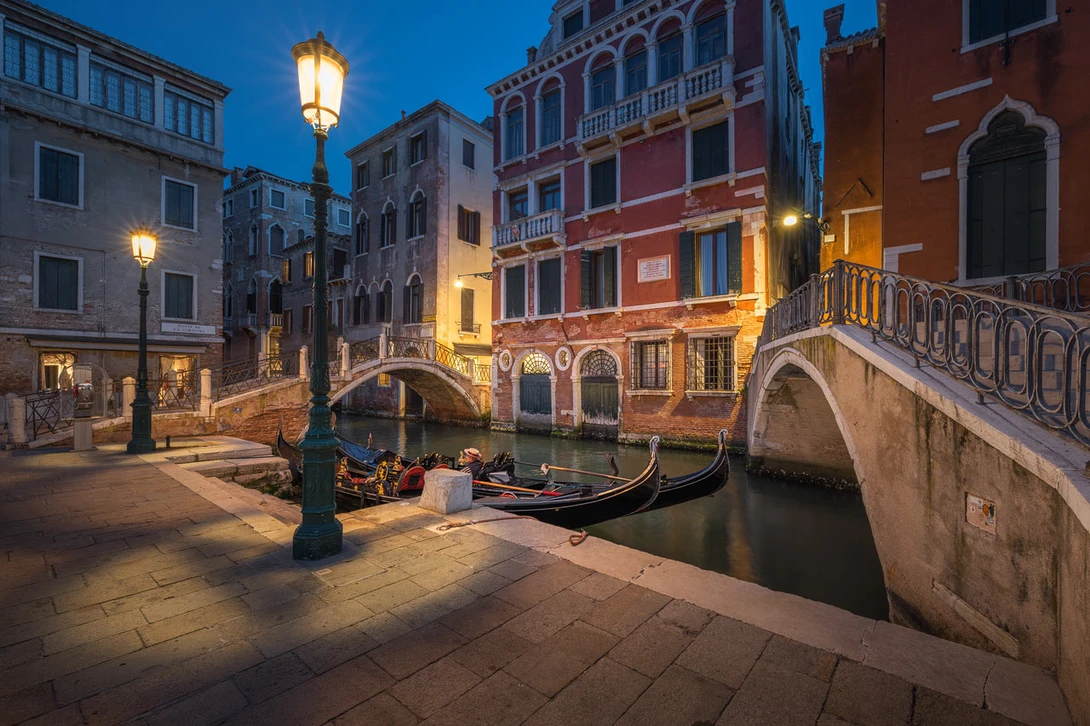
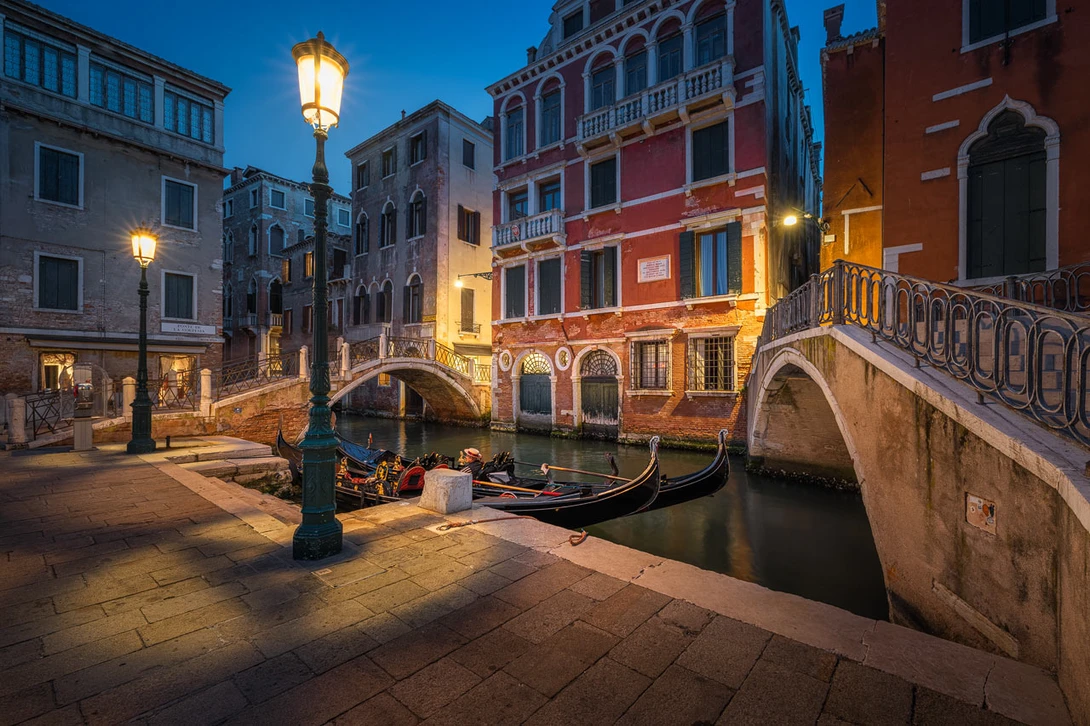
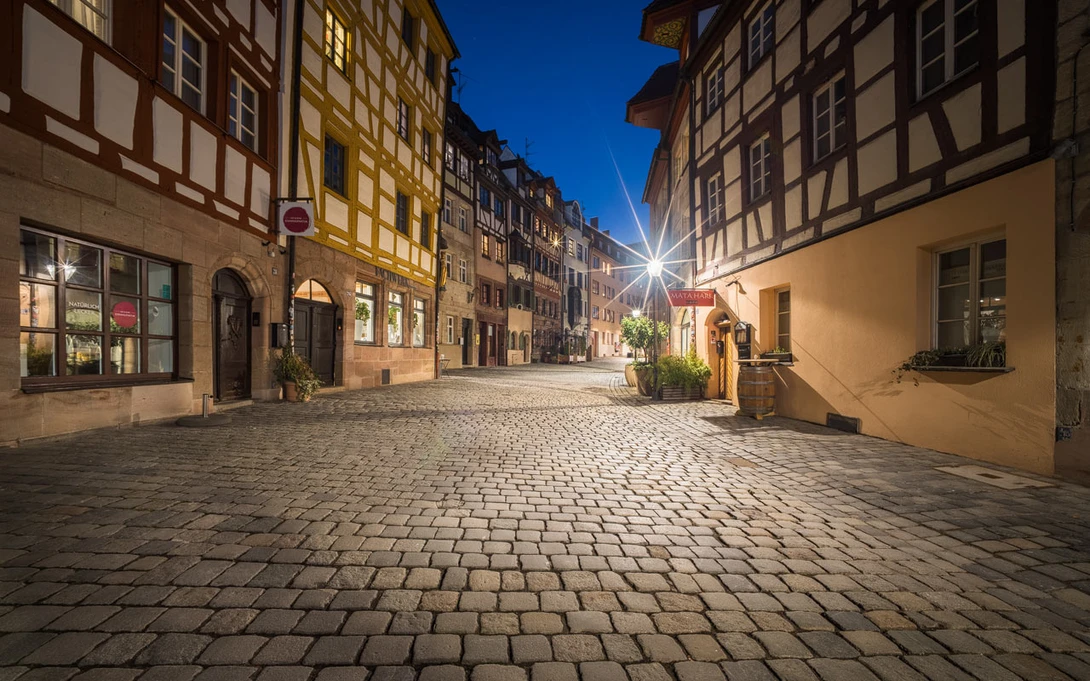
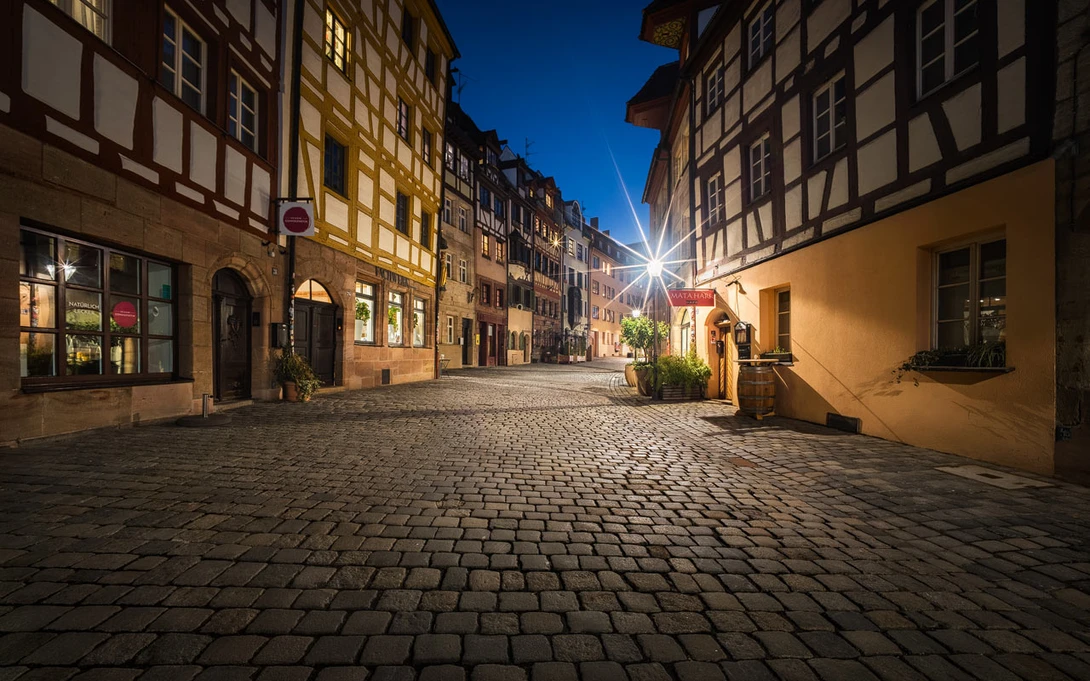
When you look at the before and after comparison of an edit I did to a photo from Venice, you'll notice several changes: the contrasts were tweaked, the colors optimized, and the lights enhanced. But there's one other important change. In the before photo, which was processed in Lightroom and then brought into Photoshop, the sky is quite dull. The final image shows a gradient in the sky. It creates more dimension and serves as a vignette that keeps the viewer in the center of the frame.
Before I show you how to create this effect in Lightroom and Photoshop, let's first specify it a bit more: what you see applied only to the sky is a radial gradient of brightening. This definition already contains everything you need to know to recreate it.
Blue Hour Trick in Lightroom
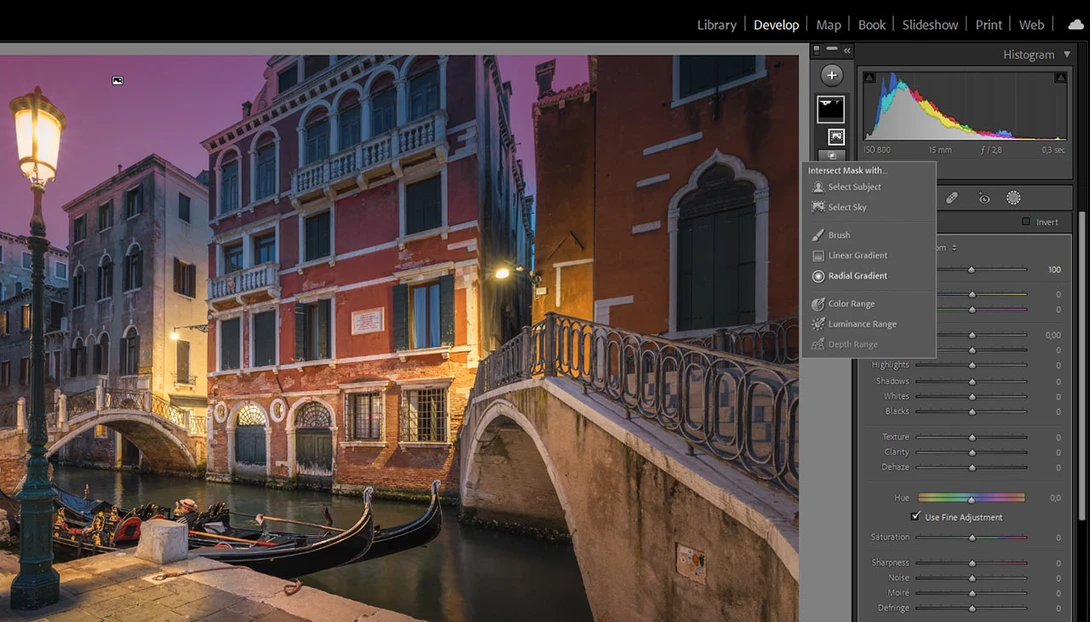
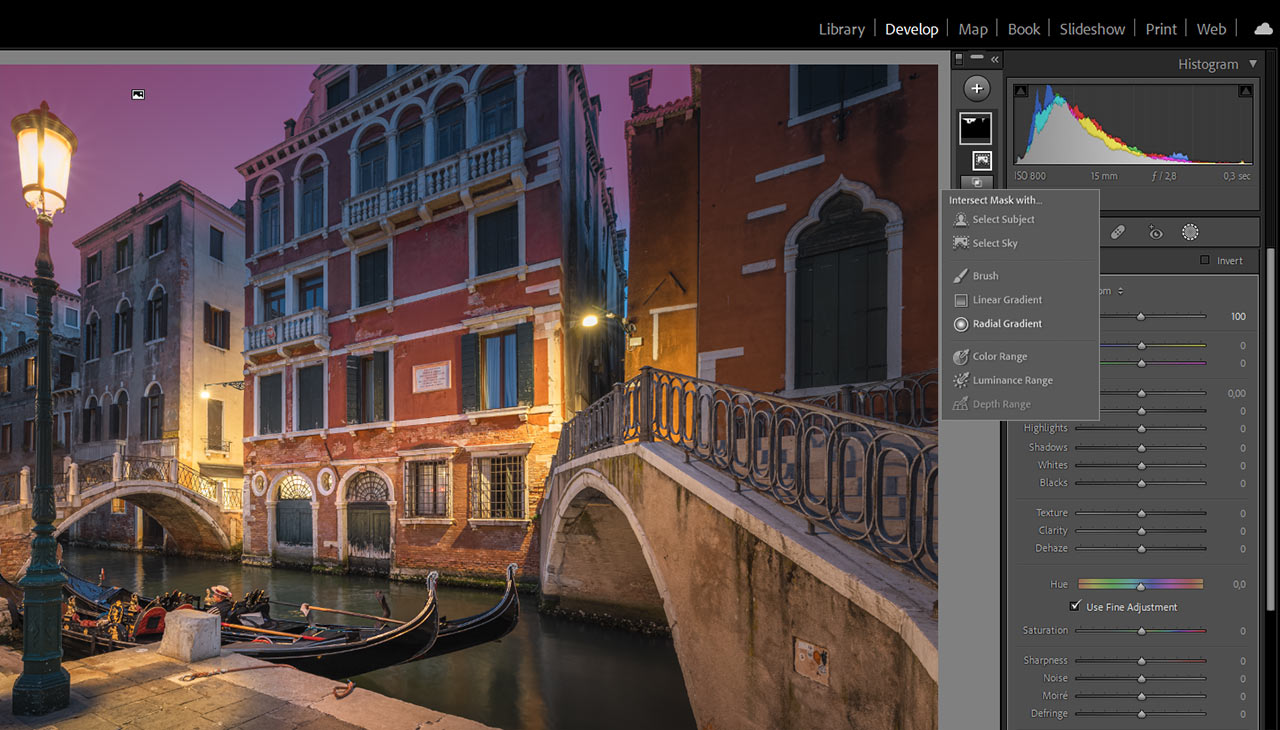
The new masking feature that's been introduced roughly a year ago to Lightroom allows us to create this effect in Lightroom:
-
Go to the masking tool and click on Select Sky. It should produce a pretty good selection, especially for clear skies.
-
You can now increase the exposure setting, play with the white balance, and add or reduce the saturation. Those settings are done to the whole sky.
-
To create the gradient effect, you can intersect the selection for the sky with a radial selection. In the mask panel, move your mouse over the plus or minus and hold down Alt. The plus and minus buttons will be replaced by the rectangular intersect button. Press it and select Radial Gradient.
-
Use the Radial Gradient to create a vignette in the sky.
Those adjustments help you create the illusion of fading light behind the city. They also increase the contrast between the skyline and sky. Note that it adds visual weight to this area, so be careful when adding the effect. If you make it too strong, it can draw the viewer's gaze away from other important elements in your photo.
Blue Hour Trick in Photoshop
You can already do a pretty good job in Lightroom. So, why would you want to use Photoshop? The simple answer is that you have more control over the selection. While the AI selection tools have gotten better, they are not perfect. In Photoshop, you are able to tweak those selections. The rest of the workflow is similar to Lightroom, as I show in the feature video.
- Create a selection for the sky. There are two ways to do so: Use the Magic Wand Tool to make an initial selection and refine it under Select - Select and Mask. If you are using one of the creative cloud versions of Photoshop, use Select - Sky and refine the selection. Improving a selection that way is something you cannot yet do in Lightroom.
- Create a group and apply a mask to it, using the refined sky selection.
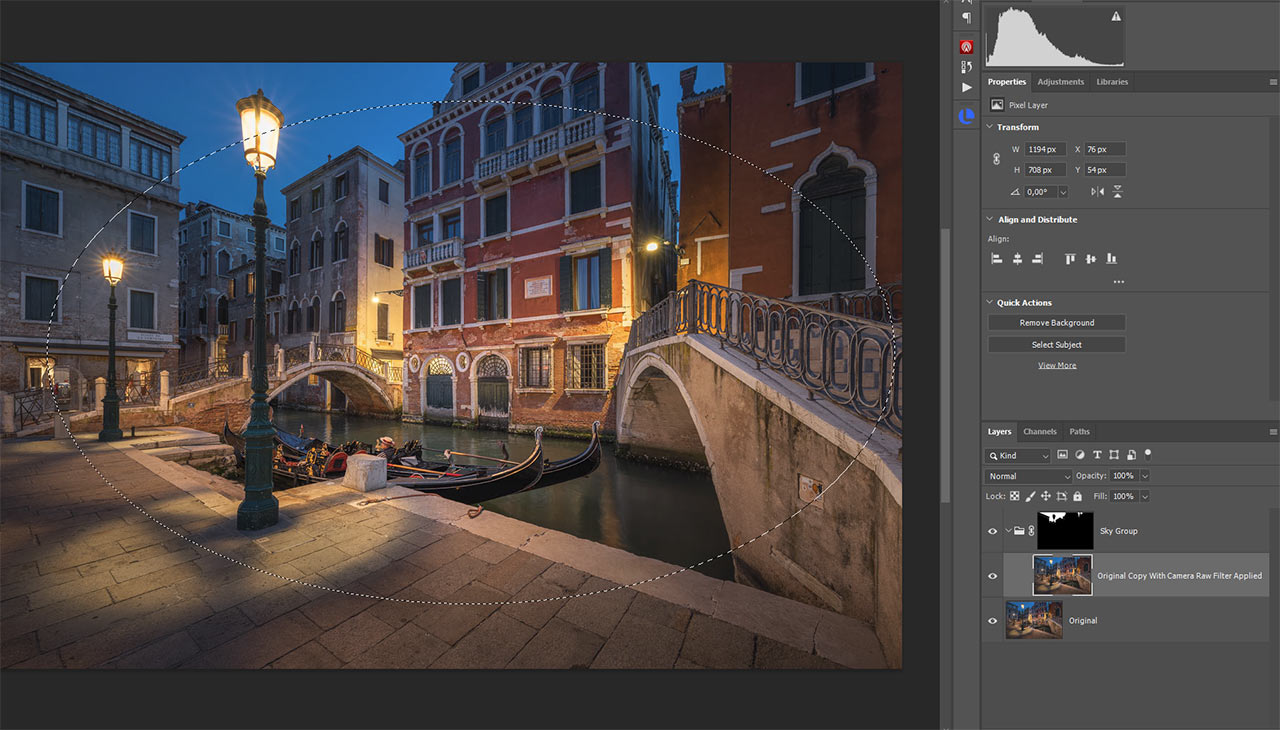
- Same as in Lightroom, you can now make changes to the sky. You can either add different adjustment layers to the group or put a copy of your current edit inside the group and go to Filter - Camera Raw Filter... You can now apply settings to brighten the image in Lightroom fashion. After pressing OK, those will be confined to the sky area via the group mask.
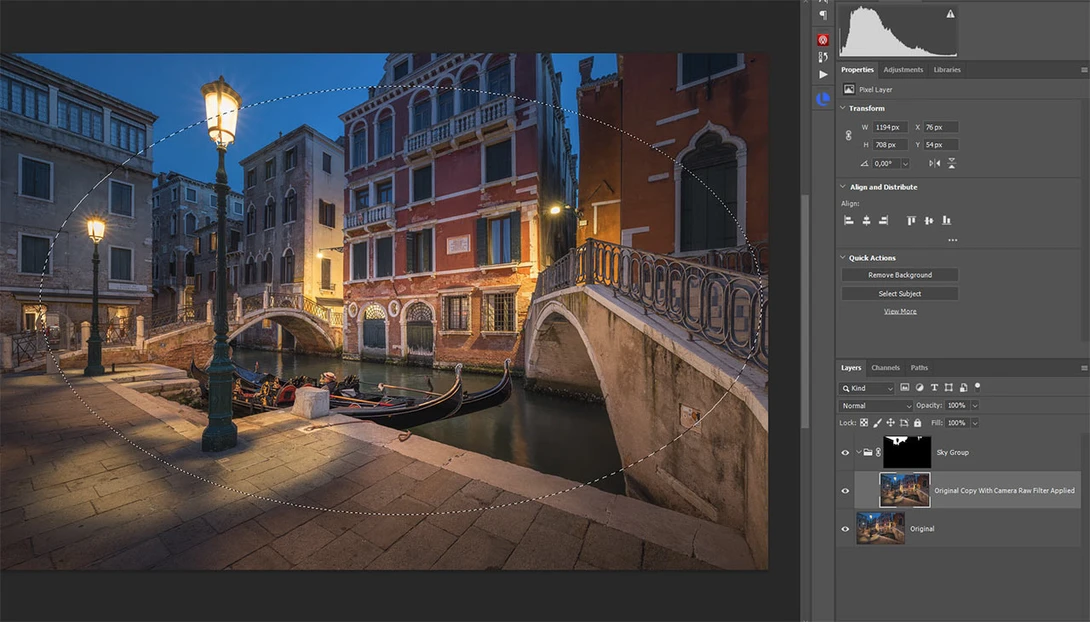
-
Grab the Elliptical Marquee Tool and create a large circular selection that includes parts of the sky. Go to Select - Modify - Feather or press Shift + F6 and insert a high radius. Depending on the resolution of your photo, you might have to use a value of several hundred pixels.
-
Apply a mask to the effect layer using the selection. If you have several effect layers inside the group, you can create a second group inside the first group with the adjustments inside. Apply the mask to this new group. This stacking of several groups is a great way of combining different masks.
Getting the radius right might involve a few tries. Alternatively, you can apply a black mask to your adjustment and draw in it with a soft, white brush to create the gradient in the sky.
Conclusion
This effect is one of the more subtle changes you can make to your photos, but this doesn't mean it's not effective. Quite often, a combination of small changes leads to a great edit rather than one huge adjustment.


Join the Fstoppers community for free
-
Post comments and join in the discussions
-
Browse the site ad-free
-
Share your work and get featured in the community
-
Compete in the photo contests for fun and prizes
No comments yet