
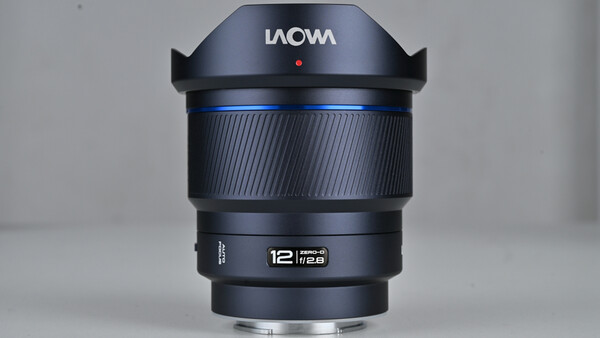
This week, I got to try out a brand new lens from Laowa, the 12mm f/2.8 Lite Zero-D FF. A lot of the perks in the lens are right there in the title, but let’s have a closer look to see if it might be right for you.
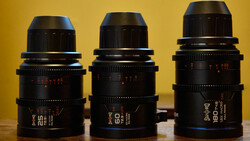
First off, let’s get through the basic specs. The 12mm f/2.8 Lite Zero-D FF is a full frame lens. At launch, it will be available for the Nikon Z mount (which was the version I tested) and the Sony E mount, with plans for additional mounts coming soon. At 12mm, the lens qualifies as a fisheye, but the Zero-D part of the name reflects the company’s goal to make a lens that gives you extreme width but with limited distortion. I’ll share my thoughts on that momentarily. But 12mm gives you a 122-degree field of view on a full frame body. The closest focusing distance is 14mm, and the maximum magnification is 0.021x. The filter thread size is 72mm, and the lens weighs a paltry 377 grams. Add to all that the top-line feature that this lens also offers autofocus, and it seemed worth looking into.
Of course, deciding how to best test this lens—or any lens, for that matter—is half the battle. I try to use products in the way they are likely to be used by end users, and many of the clear benefits of this lens, in my humble opinion, go to content creators and gimbal enthusiasts who want to travel light while still capturing dynamic imagery. Let’s dig into what I mean.
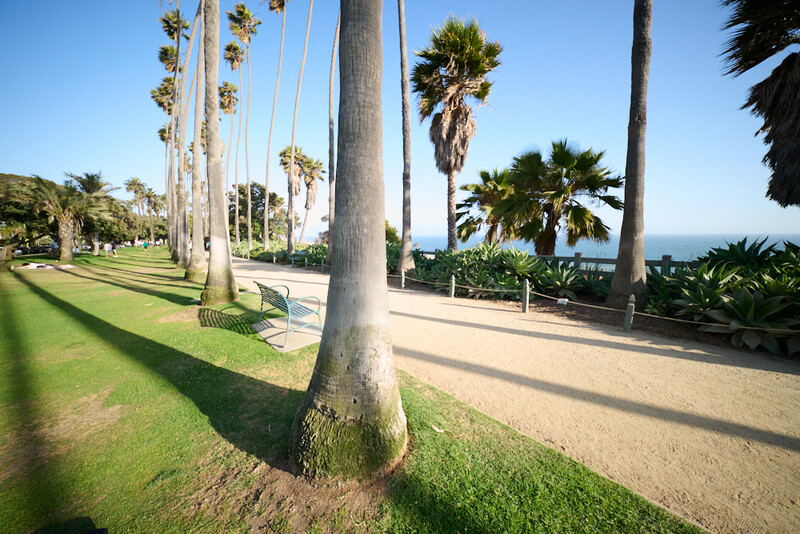
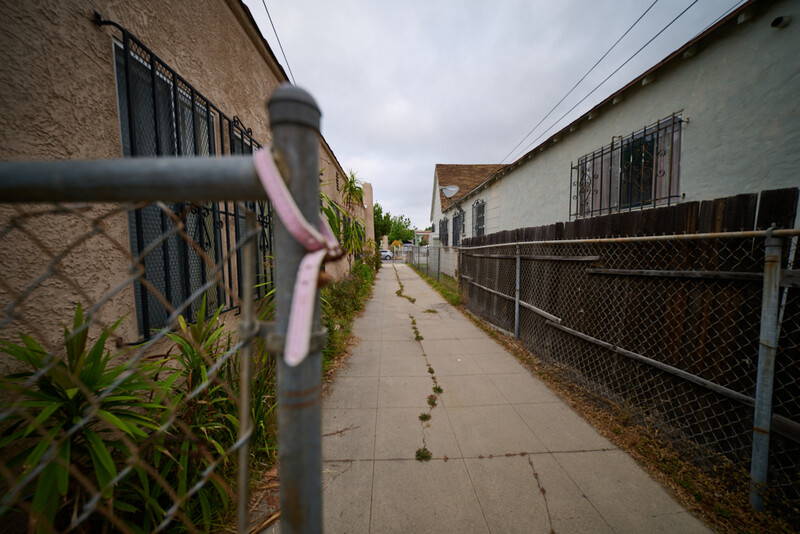
First thing to know is that this lens is extremely compact and extremely light. I attached it first to a Nikon Z6III and quickly found the package instantly portable and easy to carry. If, for instance, you are a landscape shooter and want to pack light when scaling the mountain to reach the optimal location, this could be a big plus for you. But that size also is what motivated me to break out my gimbal to see if the autofocus could keep up. It did. The compact package of the Z6III and the 12mm Zero-D balanced easily. Even for me, a man who has probably bought more gimbals over the years than has put any of them to actual use due to my hatred for the gimbal balancing process. But I took the unit with me to the park and played the part of run-and-gun shooter with it mounted to my Ronin, and that combination made again for a light and portable setup for that type of shooter. That is only enhanced by the wide 12mm lens. With the 122-degree field of view and the power of autofocus, this is the type of setup you can mount to a gimbal and essentially let it capture the full width of a scene, even in a tight space.
That would, of course, be the next point I’d like to make. The width of 12mm makes this a very useful lens for tight interiors. While I love my home of the last 22 years, I’ll admit that the rooms in my house are a bit, shall we say, “tight.” To the point where I very rarely bother shooting anything at home due to my inability to back up far enough to get anything beyond a medium shot with most lenses. But even in my house, the 12mm was enough to make my small rooms look downright cavernous.
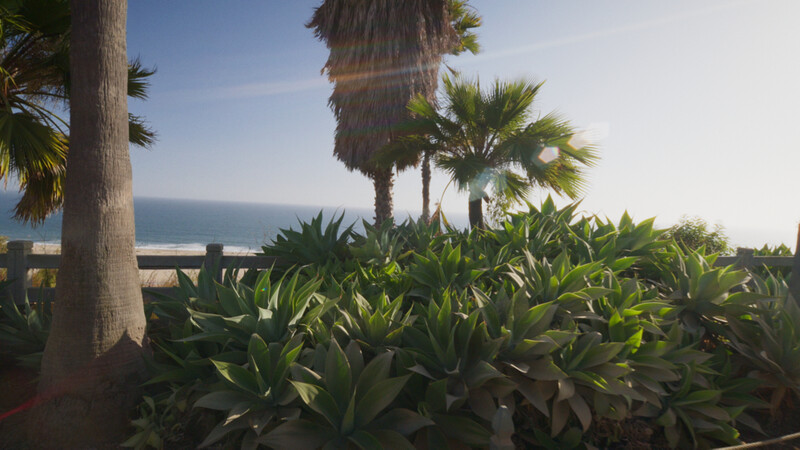
Now, of course, the added width of the lens does come with some bowing at the edges (easily correctable in post). But for 12mm, the distortion of this lens is tremendously well contained. But it is still 12mm. So I don’t know that this is the lens you would want to use if you were planning a series of tight close-ups of your beautiful leading lady or handsome leading man. Well, maybe you would if you were going full Terry Gilliam. But for my taste, I found mostly medium shots and wider to be where I’d want to live with this lens when shooting a person. That said, keeping your subject closer to the center of the frame reduces many signs of distortion if that option is available.
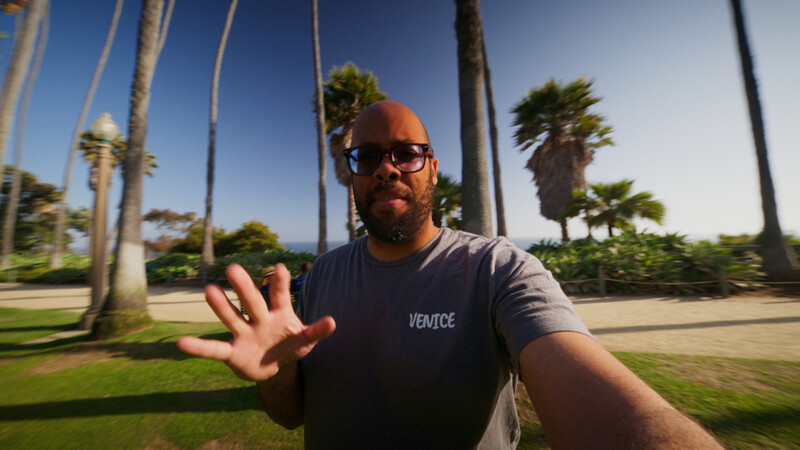
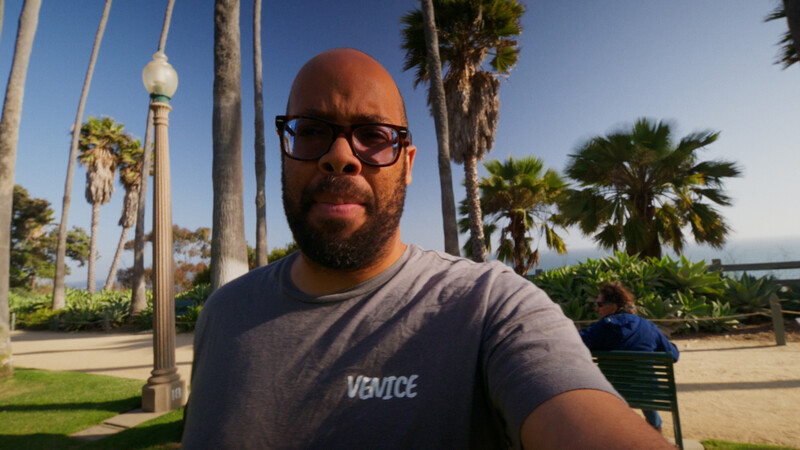
Speaking of center framing, because of the size and weight of this lens, my next thought was that a content creator who might want to both capture the width of a full scene but also turn the camera around on themselves may also like a lens like this. We already discussed the smaller payload at 377 grams and the autofocus feature. I tried a few walk-and-talk, direct-address style passes with the lens and found, at arm’s length, the distortion wasn’t too bad for shooting vlog-style content.
One option that full frame shooters have is the ability to shoot in crop mode as well. On my full frame Z9, I can shoot in crop mode, which essentially makes 12mm around an 18mm equivalent. This quick in-camera change is probably something I would use a lot with this lens when the full width of the 12mm isn’t required.
This is also important, as I found, as you might expect, that the lens is much sharper in the center than toward the edges. I set up my usual decidedly non-scientific brick wall test to see what texture the lens was able to resolve. I noticed a tiny bit of vignetting at the edges when mounted to my Z9, as well as a little curvature at the very corners. But again, as this lens is a fisheye that comes in at $699, some of that is par for the course. The vignette seems to gradually decrease as you stop down the lens.
With a minimum focusing distance of 14mm and f/2.8, it’s pretty easy to get shallow depth of field when you want it. But shooting this lens at a deeper stop does really allow you to take in the full scene, and 12mm, in general, is a lens you’re probably going to use when you want more depth of field rather than less. Focus breathing was present, but reasonable. Here are a couple shots near and far so you can see the amount of shifting at the edges.
Speaking of focus, I’m sure you have the same question I did: Does it actually work? I’ll admit, I am always skeptical of third-party lenses versus having a camera and lens made by the same manufacturer, but the AF held up well during testing. I didn’t do a side-by-side speed test against native Nikon glass. But I did do a number of tests to see how well the Laowa lens would track a subject in similar modes such as AF-F that I might use with other native lenses in similar situations. I think, when it comes to autofocus with a fisheye lens, you are often likely going to be granted a bit of leeway due to the likely wide depth of field as well. Even shooting at a lower f-stop, it didn’t have any trouble getting a high hit rate doing high-speed bursts while moving the camera.
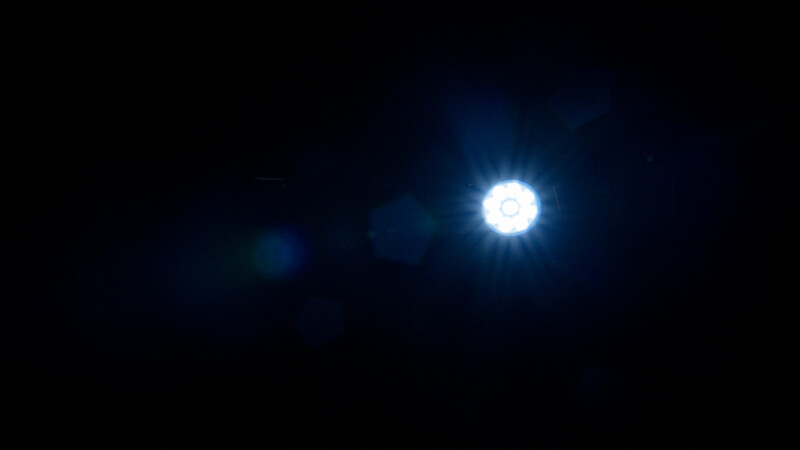
I did find the pentagonal flares to be interesting. I noticed this in some strongly backlit shots and then sought to recreate it later with an interior light source. This is a result of the 5-aperture-blade construction and gives a unique look to the footage.
Pros
-
Small size
-
Affordable
-
Autofocus
-
Lightweight
-
Controlled for distortion
-
Wide field of view
-
Versatile
Cons
-
Some vignetting in corners
-
Sharper in center than edges
Conclusion
So, is this a lens you should add to your kit? That would depend on what and how you shoot. But I will say that the word that entered my mind the most while testing the lens was “fun.” Because it’s so light and so wide, it inspires you to get close to the action and explore. As I said, it made me bust out the gimbal for the first time in forever simply because the width of the lens paired with autofocus provides a sense of freedom. I loved the way the light lens balanced on the Z6III, and I imagine it would be a good fit for any similarly sized body. Compared to other options in the price range, the lens provides plenty of quality. Even in a kit that contains a variety of higher-cost lenses, I can see this being a product that you may want to have around to use when specific tasks arise—for instance, shooting in tight spaces, gimbal work, and when needing to capture a lot without carrying a lot of weight.
But what do you think? Is the 12mm f/2.8 Lite Zero-D FF the kind of lens you’d like to have in your kit?


Join the Fstoppers community for free
-
Post comments and join in the discussions
-
Browse the site ad-free
-
Share your work and get featured in the community
-
Compete in the photo contests for fun and prizes
3 Comments
First not a Pro just a hobbyist and not a video taker with a arms length view of me, just a stills photographer. I also already have the 10mm f/2.8 version.
The first thing is not to use for indoor architecture reasons are things will appear to be too small and far away leave it to the 16-35mm lenses for 16mm is the sweet spot for indoor and using also mm's up to 35 is the work horse part.
Like the 10mm the 12mm is great for landscapes as what you capture is a panorama but with top and bottom parts included but remember things far away will be faraway but in focus as also the near, a 12mm landscape lens. The key is to have a NEAR story and a FAR story in a image.
What THIS 12mm /2.8 does is replace the (in my case as a Sony user) is the 12-24mm f/4 and f/2.8 lenses that big and heavy as well as needing front filter holders plus the big glass filters as most Landscapers like to use filters to make interesting images that can not be done in post. A word of warning for both 10mm and 12mm is if using a CPL filter or polarizing filter is there is a 90 degree rule of thumb in relation to where the sun is that you must keep in mind otherwise you end up with that nasty upside down blue hump. But today there are rear filters that are not affected by the sun for they are between the lens and sensor but fit in a holder on the back of the lens like Haida Rear Lens ND Filter Kits, just for example back in the day of orange vaper lights you needed a filter for. I had one instated on the back of 12-24mm f/4 and was doing a scouting mission to see where I should stand for a Milky Way panorama and forgot to take it out - but learned that with a filter at the back of a lens it does not matter where the sun is and with that filter you get nice baby blue sky even when pointing right at the sun.
A long read but info when using if you get.
What most will want the 12mm f/2.8 lightweight and small lens is for Astro Milky Ways. In landscape mode you can place Pegasus and the Galactic Center at the right and you will get the trail in the stars going horizontally to the left, yes and no Arch just horizontally.
What is really wanted is getting a Milky Way Arch which has to be done with a panorama rig with the camera mainly in portrait view and capturing a number of image side to side and editing in post. First the important thing with a 10mm, 12mm, 14mm, 16mm, 20mm or 24mm f/1.4-2.8 is how much of a stary sky you get mainly above the top of the arch and can do it in a one row session many like a big Pegasus and Galactic Center with lots of detail using a tracker and doing say 3 or more rows, a lot work/play with lots of gear to carry to a site.
The problems with using a 10mm to 20mm is the overlay of the images and that is your degree setting of your Panorama rig which my rig (PH -720B $100+ on Amazon) is 15, 30, 45, 60, 90 degree choices only my old VR SYSTEM SLIM had help with 16, 30, 36, 48 degree setting with lens mm using where FF 8-12 use 90 degree, 13-16 use 60 degree, and 14-21 use 45 degree and the great thing is how many clicks to count to make those settings the key is the clicks to count where as using the back LCD screen using the rule of thirds or harder is looking at the very small degree numbers on your rig.
There is an app called Planit Pro where you can use the scene view and select your lens mm and it will give a overlay of each image with selected a degree sitting.
I give all this learned info for I just used 15 at first then 30 in one time out the 30 setting worked good with all but 10mm lens. At 30 with a 12mm images was less and Lrc merged all very well.
Getting away from all this tech stuff and getting to the Arch and its capture using a Panorama rig vs other ways is the number of clicks like only one if 45 only one click and if using a 24mm you get two images in a 200+ degree image equaling time wise if doing a 200+ degree basically from southeast to northeast and using 12 images at 15 degree setting and using a 12mm lens on a A7SM3 at 13s each and using the accurate NPF rule and using Camera NR and moving to next click when in NR you get one row less than 90 sec. meaning more panoramas in different locations.
1. using orange vaper light filter in daytime
2. 12mm MW Arch one row 12 images at 15 deg.
3. 12mm MW Arch one row 13 sec. 12mm f/2.8 A7SM3 8 images at 15 deg setting getting lots of sky and pin point stars above and a full image like result vs a pano like with top and bottom missing.
4. Path to heaven one image with A7M3 and FE 12-24mm f/4 tilted up for more sky, yes things tall get smaller the further away you are.
I will ask the obvious question. "Why AF on a 12 mm lens"??? Also, disagree with the "affordable" tag, costing $699
Well AF on either the 10mm or 12mm, the 10mm DOES AF on the stars very well BUT I use the MF with yellow color for AF can sometimes AF on different stars for some reason as well as when using MF. For MW I MF on the stars in Pegasus/Galactic Center. I think the wideness of the lens and the bowl like in the sky from side to side makes the sky of stars to be at different closeness like. But when out at night a MF is best for you will see different stars show in focus as you barely move the MF ring at 4.9x zoom also that narrows the view of the lenses.
Another focus thing is focus at night is way different than day, when focused on the stars which is most exactly at infinity but if on a beach sea shells will also be in focus as well as buildings on the horizon if in post you crop 200%+ to see. The Sigma 14mm f/1.8 will not show clear focus on close things as seen on a YouTube video. I sold my Sigma 14mm f/1.8 due to bigness and being heavy not good for use on a pano rig or even a tracker, Sony's way smaller and lighter.
1.Voigtlander HELIAR-HYPER WIDE 10mm F5.6 MF lens close and far in focus.