
Do you edit video in Adobe Premiere? Have you customized your keyboard with your favorite tools and shortcuts yet? If not, you're not editing as quickly as you could be. Check out our favorite tools and shortcuts to get the most out of Premiere.
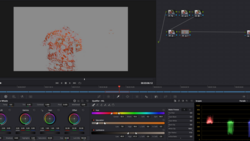
Editing video is a bit more sporadic than editing a photograph. When I am editing footage in Premiere, I am constantly changing tools and using shortcuts every few seconds. Knowing your keyboard shortcuts will save you a ton of time, but most of the shortcuts require that you look down at the keyboard to move your left hand or they require you to use both hands. If you have to look down at your keyboard every 10 seconds, you're wasting a lot of time. I've reassigned the keys on every computer in our office so that the most used tools and shortcuts are under my left hand. Now, I never have to take my eyes off the screen, left hand off the keyboard, or right hand off the mouse.
How I Have Reassigned My Keyboard
A/S: Zoom Out and In
When you reassign zoom out and in to easy-to-reach keys, you will use it more than ever before.
D: Clear
"Clear" doesn't need to be all the way across the keyboard at the "delete" key. I keep it right under my middle finger.
F: Ripple Delete
Ripple Delete is probably the most used and powerful tool in Premiere; put it somewhere that you can reach without hunting for it.
Q/W: Step Back and Forward
Playing your footage back frame-by-frame isn't necessary often, but when it is, it's nice having it nearby.
E: Shuttle Slow Right
I NEVER edit in real-time anymore. Use this feature to speed up your footage's playback speed.
Z: Track Select Tool
Use this tool to easily move everything past a certain point on the timeline.
C: Cut Tool
The cut tool is natively assigned to the "C" key and we decided to leave it there.
V: Pointer Tool
The pointer tool is also natively assigned to the "V" key; so, we left it as well.
Space: Play/Pause Footage
Just in case you were using your mouse to start and stop playback, you should know that using the spacebar is far more convenient.
Other Shortcuts You Should Know
1. Hold "Control" and "Alt" while dragging one clip over another to "swap" the footage.
2. Highlight a clip and hold "Alt," then drag the clip to copy that clip to a new location.
3. Hold "Alt" and click on a video or audio track to grab ONLY that item (if audio and video are linked).
4. With the Cut Tool selected, hold "Shift" and click to cut down the entire height of your timeline. This will save a ton of time if you have multiple video and audio files stacked.
One Final Shortcut I Forgot to Mention in the Video
5. Instead of deleting audio or video tracks, use "Shift" + "E" to "disable" the track. This allows you to basically turn audio or video files on and off without the potential of losing them and needing them later. We use this when we are filming with multiple cameras. We don't delete video tracks to reveal the tracks below; we simply "disable" the tracks above and it makes editing later much easier.


Join the Fstoppers community for free
-
Post comments and join in the discussions
-
Browse the site ad-free
-
Share your work and get featured in the community
-
Compete in the photo contests for fun and prizes
11 Comments
I'm doing all of this tomorrow...after this Under Armour edit.
Oh great! Thanks :::)
"S" by default is the Snap tool. I toggle this function On/Off ALL the time in my workflow b/c every frame counts. Zoom In/Out is a simple Alt + Scroll Wheel.....
thank you!!!
Very useful, I'm sure it will speed-up my editing work-flow. Never took the time before to change the short-cuts like I usually do it in photoshop/illustrator & co. Time saving, thanks !
This has been the most useful bts video ever on Fstoppers I kid you not. Ho-ly-crap! More premiere tips and tricks videos in the future for the love of GOD!! =) Thanks for this, you have no idea how appreciative I am right now.
You need to up your wardrobe budget for these videos :)
I need to up my wardrobe budget for my life
I guess I know what I'll be doing this afternoon.....great topic Lee.
I have a 2nd keyboard that I remapped similar to the mappings in the video. I took it a step further and pulled many of the keys not used.
I find some of this puzzling. Some of these 'tips' are pre-programmed into PP. Why is mapping a function to the 'Z' key better than using the "A" key where it already resides (track select)? Even a cursory glance at the manual would have clued you in to the existence of Track Select, and where to find it. I do understand the left-hand preference, though.