
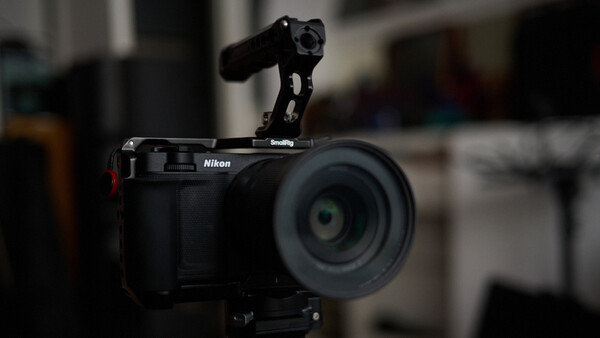
Here is how to load RED LUTs into your Nikon ZR.
Today, this will be a super short blurb, but reading it will save you an amazing amount of time, so let’s get to it.
If you just bought the new Nikon ZR, there is a strong likelihood that you are purchasing it in order to utilize the R3D raw video files. If you are used to (or new to) the R3D workflow, you will also probably be using the Log3G10 format in order to maximize the results of your footage. I won’t go deep into how LUTs work in this article. But, for those not familiar with LUTs, the term stands for “Lookup Table.” In the simplest sense, a LUT tells your camera or NLE how to interpret footage shot in a particular type of Log. So there are LUTs specific to Log3G10 in the same way there are LUTs specific to N-Log or C-Log 2 or S-Log, etc.
You will load these LUTs into your camera while exposing to ensure that you are consistent through your pipeline and getting the results you expect. RED and Nikon provide premade technical LUTs, which you can download for free, and the new ZR allows you to load up to 10 of them in at a time.
The process is usually simple, but I did run into a few bugs when setting up my ZR, so I wanted to share how I set mine up to hopefully save you potential headaches.
Step One: Download RED LUTs
This link will take you to both the technical transform LUTs and the creative LUT packs that will work with your Nikon ZR.
https://onlinemanual.nikonimglib.com/download_red/en/
Click the links and download the zip files to your computer.
Step Two: Format Your Card
Put your card into the Nikon ZR and format it. I’ve seen some suggest that this only works with a CFexpress card. In my case, for whatever reason, my CFexpress card didn’t work, but my MicroSD did. Go figure. But put your chosen card into the camera and format it.
Step Three: Put LUTs On The Card
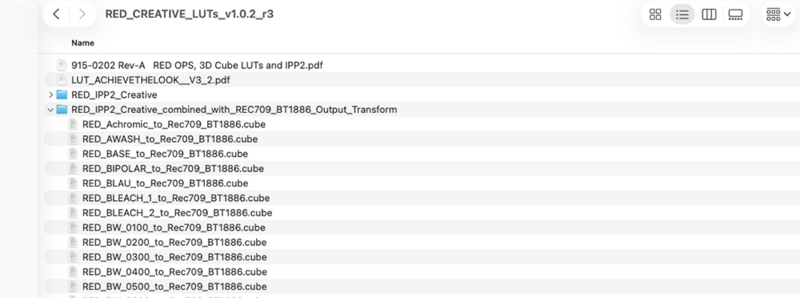
Put your formatted card into your computer. Make sure the LUT folder you downloaded has been unzipped.
Inside the unzipped folder, you should see a series of .cube files. Inside the RED_CREATIVE_LUTs folder, you will see a couple of folders. Select the one that says RED_IPP2_Creative_combined_with_REC709_BT1886_Output_Transform. Open it.
There are several LUTs you can add inside that folder. But keep in mind that you can only add 10 LUTs at a time into your ZR.
Also, this is where the first bug that tripped me up came in.
While you can load 10 LUTs into your ZR, the process of transferring them into the camera can only happen five at a time. Here’s why. You can copy as many of the .cube files as you want onto the card. But, in the next step, when you go to import them into your actual camera, the camera itself will only display the first 10 as options. On top of that, the camera will see doubles of each file. So RED_Achromic_to_Rec709_BT1886, for instance, will also have a second file called .RED_Achromic_to_Rec709_BT1886 show up on the ZR screen. That . will show up first. One thing that took me darn near an hour to figure out was that I was loading 10 LUTs onto the card, but then the camera was only showing me the ._ versions of those LUTs as options to import, so I kept assuming this meant the normal versions weren't there. On top of that, the ._ versions don’t import. Only the non ._ versions. So, while the non ._ versions were, in fact, on the card, I couldn’t see them because the camera was only showing the ._ versions. Confused yet? Now you have some idea how my Friday morning was.
To avoid that madness, only load five (at most) .cube files onto your card at a time. The result will be that you’ll see two versions of each file displayed on the ZR: one ._ version and one non ._ version. Select the version without the ._ and you’ll be set.
Step 4: Importing The LUTs
But we’re getting ahead of ourselves, so let's rewind a bit. You have now loaded up to five LUTs from your computer onto your formatted card. Now take that card and put it into your ZR.
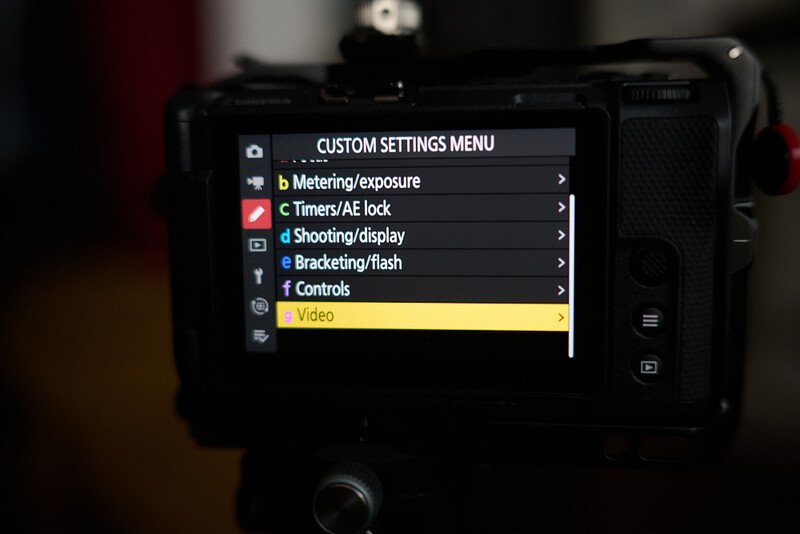
Go to the custom settings section of the menu. The icon is the third one down and looks like a pencil. Scroll down to the G (Video) subsection.
Go to G14 (View Assist) and turn it on.

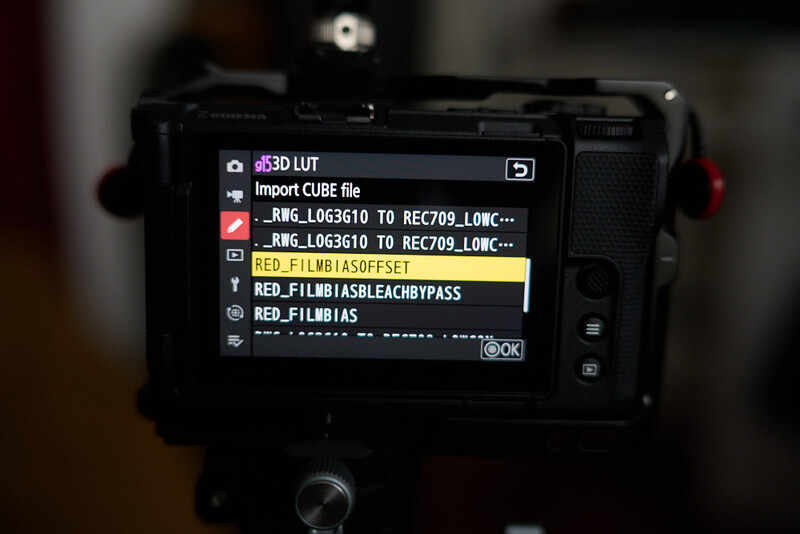
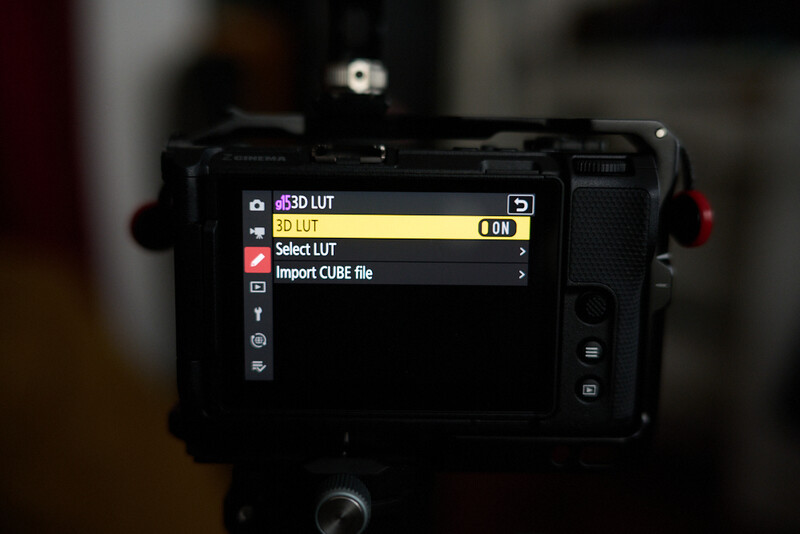
Then go to G15 (3D LUT) and push right on the joystick.
Turn 3D LUT to on.
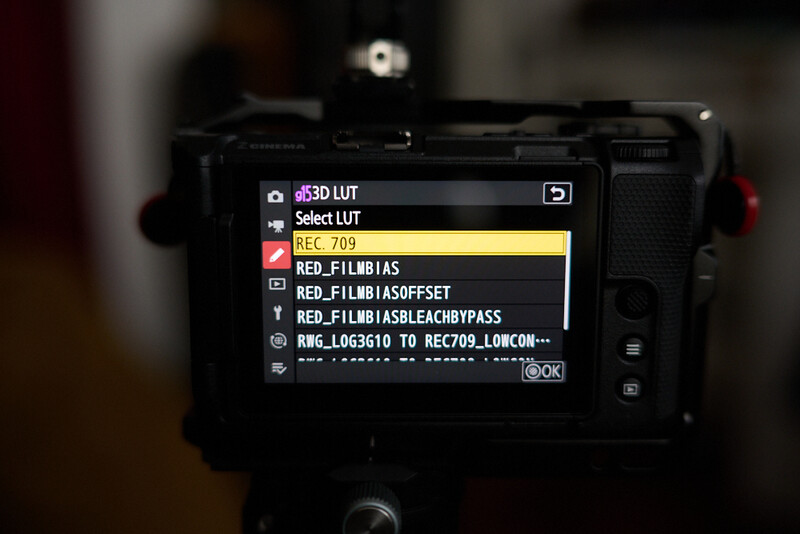
Then go down to Import CUBE File and push right on the joystick. Here, you should now see a list of the .cube files you just saved to your card. This is where you’ll note the issue I mentioned above with the ._ versus non ._ versions of each file. Select one that doesn’t have the ._ and push OK.
That will take you to a Save As screen. On that screen, select a slot that says Unused (or overwrite an existing LUT) and push OK. That will save the LUT to your camera.

Back on the G15 3D LUT menu, you can now hit the second option, Select LUT.
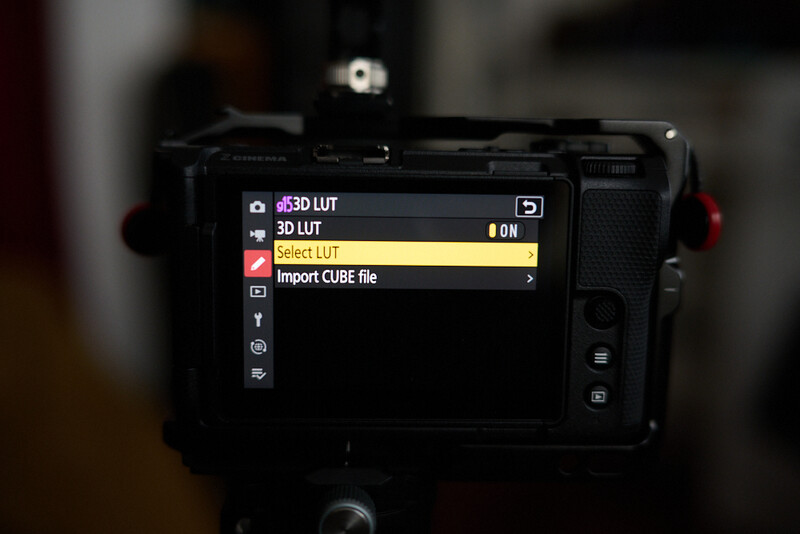
You will see all the LUTs you have imported listed there. Select whichever one you want, and you are all set.
Quick note to those unfamiliar with the workflow. The LUT is just a set of instructions for the camera. Once you bring the footage into your NLE, you’ll need to give it those instructions as well by applying the same LUT inside Resolve, Premiere, etc. Once you do, what you see on your computer should match what you saw on the LCD while shooting with the LUT turned on.
Hopefully that saves you a bit of time in getting set up for success.


Join the Fstoppers community for free
-
Post comments and join in the discussions
-
Browse the site ad-free
-
Share your work and get featured in the community
-
Compete in the photo contests for fun and prizes
2 Comments
I'm so confused by log vs raw. If you're shooting raw video, why do you need a lut? Can you shoot in raw and in log at the same time?
Yes. You definitely want to shoot in RAW and log at the same time. The difference is just in how the it is encoding the gamma. So, with NRAW you'll want to be in N-log and with R3D, you'll want to be in Log3G10. If shooting on something like the Komodo, by default it goes to the RED IPP2 color pipeline and uses Log3G10. The ZR set to that ensures a similar workflow and maximizes dynamic range and grading possibilities in post.