
It hasn't been long since I reviewed that Dwarf II portable telescope/camera combo. I found it reasonably priced, ($595 with filters, tripod, extra battery and carry bag), easy to use, and something that was going to excite people of all ages who have longed to take good astrophotographs without spending a fortune or having to learn a lot of complicated science and processing skills.
Now, here comes another similar product, the Seestar S50. At $499, it is at least comparable to the Dwarf II and in some ways, a bit more advanced.
Here's What You Get
Open the box and you'll see:
- ZWO Seestar S50 All-in-One Smart Telescope
- A slip-on solar filter
- A sturdy tripod
- A travel case that holds all of the above
- A USB charging cable (but no AC connector)
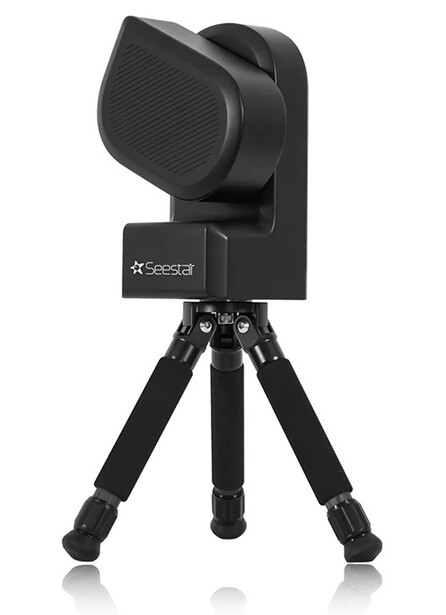
The Seestar S50 is an f/4.9 triplet design with a 250mm focal length. It takes images that are 1,920x1,080 resolution. Connection and control of the scope is through either an iOS or Android app or tablet. The telescope itself weight 6.6 pounds and is easy to travel with.
Using the Seestar S50
This telescope is a breeze to use. I've been in the amateur astronomy hobby for many years, and setting up a scope, especially for photography, is no fun. You've got to get the mount level, do a rough alignment on the North Star, then refine it so the telescope will track properly. If you can't track, long exposure photography just won't be happening, and getting good images with a telescope is all about good tracking.
The Seestar S50 has thrown almost all the difficult parts of setting up out the window. It has an internal rechargeable battery with a claimed six-hour life. Set the Seestar down on a table or even the ground outside. Turn it on, and connect your phone or tablet to it. It uses both Bluetooth and Wi-Fi, and it creates its own network. No matter how you set the telescope down, no matter where it is facing, the Seestar will align itself with its internal compass and GPS. When it's ready, it will ask you to connect your phone. And I do mean "ask," because the Seestar has a voice.
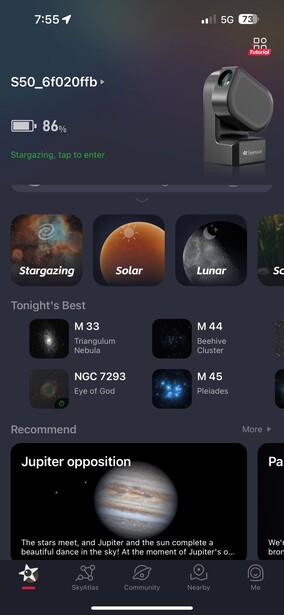
You'll get a nice screen on your mobile device with some current weather info (which Seestar grabs from the internet), moon phases, and it will make some recommendations of the best things to view the night you are out. That includes the moon and planets. During the day, you can view (on your phone) and photograph the sun, as the Seestar comes with a solar filter that will protect your scope.
Finding something to photograph
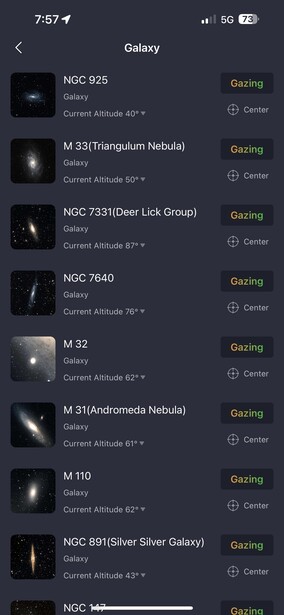
This time of year there are hundreds and hundreds of objects. The Seestar will make some suggestions, or you can choose your own target. It will let you know if your object is above the horizon.
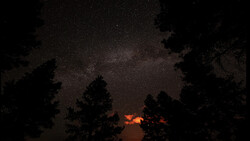
Here's a 28-minute exposure:
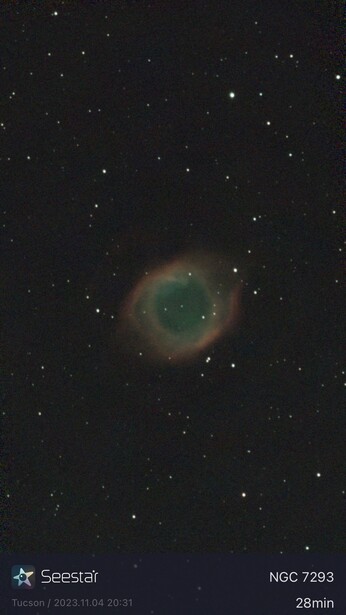
It's a little noisy, but I was amazed it was there. A little noise reduction in your favorite image processor, and it will look quite good, but I wanted to show the images right out of the Seestar.
One neat feature is an internal light pollution/deep sky filter. If the target requires it, the Seestar software flips the filter into place. It can also be manually controlled from your mobile device screen — very clever and well-thought-out.
The way the Seestar works is similar to a big pro or semi-pro astrophotography setup. It takes a quick image of the sky, so it knows where it is pointing. Then moves appropriately to get in the vicinity of the target, and takes another image to see how it's doing. Astronomers call these photos plate solves, and the telescope software compares what it sees to an onboard database of the sky.
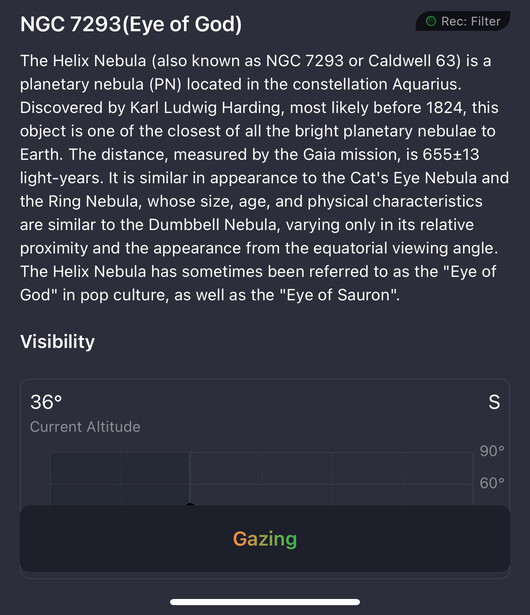
In my experience, Seestar found the target in under two minutes, and it was exactly centered. It also provides a page of information on your target.
Then Seestar starts taking a series of 10-second exposures, and you watch this process in real-time, seeing the nebula get brighter and more colorful at each iteration. The short exposure time is to avoid blurring as the sky rotates. The Seestar is basically processing your image in real-time, stacking the image, and enhancing the image, which is different from the normal practice, where astro imagers take a series of images and stack them on their own with special software. The Seestar makes the process a lot simpler, and it's going to be fun if you are demonstrating the Seestar to people and they can see the photo coming in.
I live in pretty dark skies away from a big city, so within 10-15, minutes I had a good clean image. You can go as long or short as you want, and when you stop the process, you'll have the image on the app screen, and it will be in your mobile device's library as well. It's saved as a JPEG, and you can share it as you would any photo.
I also took a shot of the Pacman Nebula. Again, the Seestar found it with no trouble. This is only 15 minutes of exposure, and the Pacman is pretty faint, so I was surprised to see this good quality coming out of this little scope.

There some niceties built into the system that I appreciated. When taking images, your phone or table it not tied up with the process. When you've decided on a target, it's all sent to the telescope and its internal electronics. So, you can check your mail or whatever, then tap the Seestar app, and you'll be up to date. Also, the Wi-Fi network of the Seestar is quite robust. Seestar puts the range at around 30 meters, depending on conditions. I left the backyard and sat down in my living room and could still see what the Seestar was doing.
Is There Any Bad News?
A little. The Seestar, just like the Dwarf II are not equatorial mounts. That means as designed, the telescope doesn't duplicate the rotation of the sky. The Seestar tracks the object, but the image itself is automatically rotated in software so each subsequent image matches at the same angle. This keeps the price down (no fancy mount needed), but you will likely see some artifacts of this process at the edges of your photos caused by the rotation of the image.
Also, the Seestar is a pretty small telescope, so it's not going to match bigger telescopes that have more light-gathering power. On the other hand, It's also priced way below these bigger scopes, and it's going to make astrophotography available to many people that are eager to give it a try.
Summing Up
The company behind the Seestar is ZWO. They are a company from China, and they have helped revolutionize pro and semi-pro astrophotography with camera, focusers, mounts, and software that have found favor in the astronomy community for their innovative designs. I use some ZWO products in my home observatory.
Because the Seestar is software-based, new features are coming out all the time. They've promised a mosaic mode, so you can image objects that don't fit in the Seestar's field of view.
As it is, the Seestar also saves images in the format pros like, FITS, which can be processed in dedicated astronomical software. They also will give you the individual files before they are stacked, so you can do it yourself.
The Seestar compares favorably to the Dwarf II I reviewed recently. The Dwarf II has a wider field of view, good for larger objects in the sky, like the Andromeda Galaxy, but you won't get the detailed views the Seestar will give you. And if the mosaic feature appears as it supposed to do, you can solve the wider field problem.
I sense the Seestar software is a bit more advanced, because in many ways, it is similar to the well-regarded ZWO software the company produced for advanced amateurs and pros.
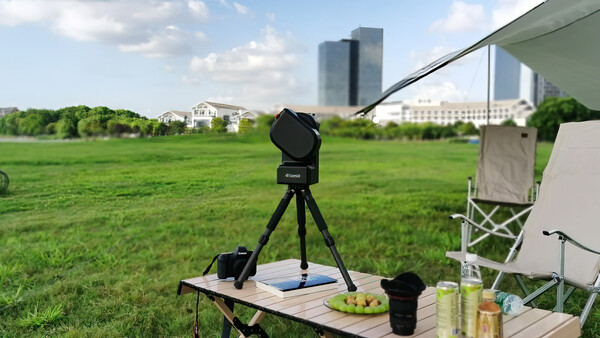
I should also note that the Seestar, like the Dwarf II, is a good terrestrial telescope. You can zoom in for bird watching or landscape photography. I shot the tops of some mountains three miles away, and even through turbulent air I was pleased with the image. This straight out of the camera again, no post-processing or sharpening.

The Seestar also does well with the moon, but planets like Jupiter will be a bit small. I took a shot of Jupiter and could see its four little moons, but the surface of the planet was too small to see any details.
What I Liked
- Reliable clever software and easy to use. Kids will love it.
- Well built, with a sturdy tripod. Many small telescopes skimp and include flimsy tripods.
- Pictures of distant nebulas and galaxies come out well with enough exposure time.
- Carry case makes it easy to travel with the Seestar and keep it protected.
What Could Be Better:
- There should be an AC adapter included.
- I think I'd prefer landscape ratio over portrait format.
- Would love to see a pro version with larger aperture and higher resolution camera.
How to Get a Seestar S50
Some bad news on ordering one. People have been so impressed with the Seestar S50, they are literally flying off dealers shelves. If you order one today, you probably won't see it until after the first of the year.
If you're ready to get in line, you can buy from Seestar directly from their website or various online dealers like Starizona or Highpoint Scientific.
The Seestar S50 is a very exciting product. I wish I'd had it when I was a kid holding my box camera up to my Tasco telescope and getting nothing.
Don't expect to get National Geographic or Hubble type photos from the Seestar, but for the low-cost investment, the pictures are really terrific. I don't think any other investment close to $499 will get you more than you'll get with this product.


3 Comments
Cool. Does either the Seestar or the Dwarf shoot RAW? What about the Dwarf do you think is worth $100 more? Thanks.
Yes, both shoot jpeg and FITS (astronomical format that is RAW). The Dwarf II also can deliver TIF files. I think they are similar in capabilities. The Dwarf II has a wider field of view, the Seestar has more detail and slightly better optics. I think I have a slight preference for the Seestar. The problem is getting one.
This is pretty cool! As someone that had a backyard observatory with a large equatorial mount and several telescopes at one time or another, this is a good way to take pictures and not end up spending a down payment on a car to do so.