
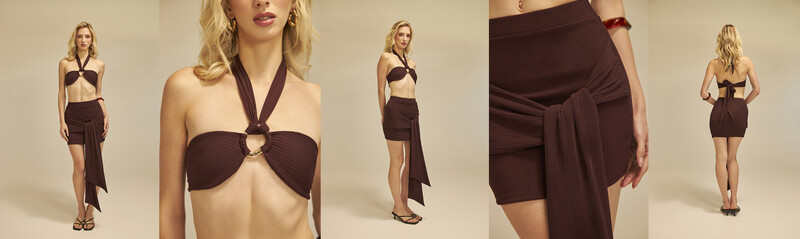
You all see the classic e-commerce shots on any fashion designer's website, but seldom do you get to see the full behind-the-scenes of what it takes to make them. Recently, I did an e-com photo and video shoot for a brand that I work with. Here is the process, how I lit it, how I shot it, as well as the overall behind-the-scenes look at what goes into a relatively simple shoot like this.
Even when we're keeping it simple and just shooting e-com on a plain background, I still aim to keep things efficient and organized. For this, that means we had a printed-out shot list with detailed information for each look, the shots we needed, the angles, and any details we had to capture. This also allowed us to have the shooting order and schedule, to cross things off the list as we went, and to monitor how on track we were. To light this, I was going between a couple of setups, and this is eventually what I landed on.
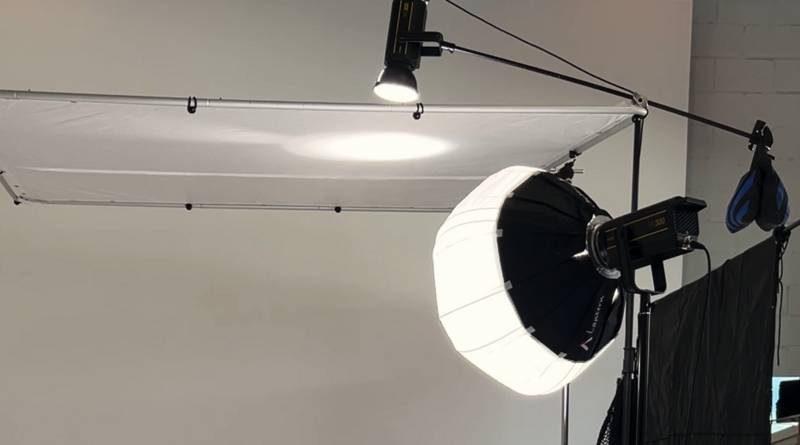
My key light was a Godox VL300 with an Aputure lantern to give a soft, diffused, full-body light that still created a bit of shadow along the floor, as that was something that was key to the look we were going for. Then, I wanted there to be a bit of a gradient between the subject and the background, where the subject was a little brighter than the background itself with a bit of light falloff.
For me, the best way to do this was to put up a diffusion frame above the model and then put another VL300 on a boom arm over top of that, essentially top-lighting the model from there. This would act like a hair light/fill, and my key was the lantern. I did not need a fill in this instance, as I wanted a bit more shadow and dimension on the face. But also because of the light from above, it created enough ambient light that there was still dimension, but it worked to have a lot more light in the frame. So, the shadows were lifted, and the highlights were just slightly pronounced in comparison. Then, there was some natural light spill coming in, which I controlled with an 8x8 black fabric, otherwise called a solid.
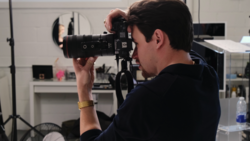
I was shooting the stills on the EOS R with the RF 24-105 f/2.8, and I was shooting the video on the Canon C50 with the 24-105 f/4. The reason I opted for the f/4 for the C50, rather than just switching the lens back and forth between cameras, is that I often had the C50 on a gimbal for smooth motion as I would be dancing around the model. Putting the f/2.8 variation on my gimbal created a more difficult balancing situation and also reduced the range of motion on the gimbal. You could still do it, and for some shots I still did, but your range of motion was more limited and you could tell the gimbal was struggling. So, because of this, I opted for the lighter f/4 version and was able to execute the shots just by doing so.
I could have used primes for this, but in the effort of efficiency, I was able to just tuck in and out on the zoom quickly and not have to worry. Additionally, I was naturally stopped down for this shoot anyway and was sitting at about f/4.5, so I didn't really need the added stop of the f/2.8. Then, for the overall look, I did warm it up a little, as the brand has an identity of being very warm, beachy, and having a travel aesthetic in nature. So, a warmer background was something that we went towards.
I was tethering into Capture One for the stills. As for the video, I was shooting open gate so I could both crop in vertical and have a horizontal cut of the shots as well. If you've been in the e-commerce space, or even if you just shop for clothes every now and then, you will have seen that many brands have started implementing video into their e-commerce content. I first noticed this with websites like ASOS, and since noticing it, I've only seen it pop up more over the years. I have most of my e-commerce clients now asking for video as well.
Hence why I opted for the Godox VL300, as it gave me the ability to shoot both photo and video without having to alternate between lights or have flash for one setup and try to emulate the look with constant light. So, this just became the best of both worlds, and the light gave me the output that I was looking for. As I did warm up the overall tone of this shoot, I'm still making sure to get a gray card white balance to make sure that the garments still look how they should in reality.
When you start playing with colors, it's something that can shift, and naturally you want the color of a photo of the clothing to look like the actual color of the clothing itself. We had a team of hair, makeup, a client on site, as well as behind-the-scenes socials, styling assistants, and a photo assistant. Between two models, we got individual shots with each as well as a couple of overlapping shots with the two that are better for socials than the individual shots that will live on the client's website.
Also, the studio shot on a cyclorama wall, so we had the flexibility to be able to bring the diffusion frame out farther, thus having less light on the background and creating that gradient that we were more so looking for. If you want to dig deeper into this kind of work, The Hero Shot: How to Light and Composite Product Photography is a great resource. The shoot went very well, and everybody was fantastic to deal with.
I can't wait for the next one. I hope you reading this enjoyed the behind-the-scenes look as well as the photos taken with the Canon C50 paired with the Canon EOS R and lit by the Godox VL300.


Join the Fstoppers community for free
-
Post comments and join in the discussions
-
Browse the site ad-free
-
Share your work and get featured in the community
-
Compete in the photo contests for fun and prizes
No comments yet