
I recently noticed that a handful of photographers were producing images that had a look as if they were stills captured from films. A couple of the most well known photographers of this genre are based here in New York so I got them together and challenged them to not only come up with a dynamic personal project on the fly incorporating this cinematic look, but to share with us how it is achieved. Read on to find out how it all went down...
The power of the Fstoppers community is IMMENSE. I wanted to try and utlize it to do two things for this article. First, see how a number of experts who produce the “cinematic” look do it, and share that learning for the community. The interesting thing about this look is you can apply this look to any image, from a street portrait to a landscape shot. The content is far less important than how the image is processed or “treated” (color correction and grading, much like film footage is processed before we see it in theater).
Regardless of your love or hate for this look, I really enjoy the intersection between stills photography and motion, so this was something I found interesting to look and thought others might too.
Secondly, I wanted to use the power of the community to bring some photographers together for a unique project and challenge.
I came across the work of local New York City based cinematic shooters Dennis Cacho and Andrew Mohrer. If you have any doubt about the type of work I’m describing when I talk about cinematic style shooting, check out some of their work here:
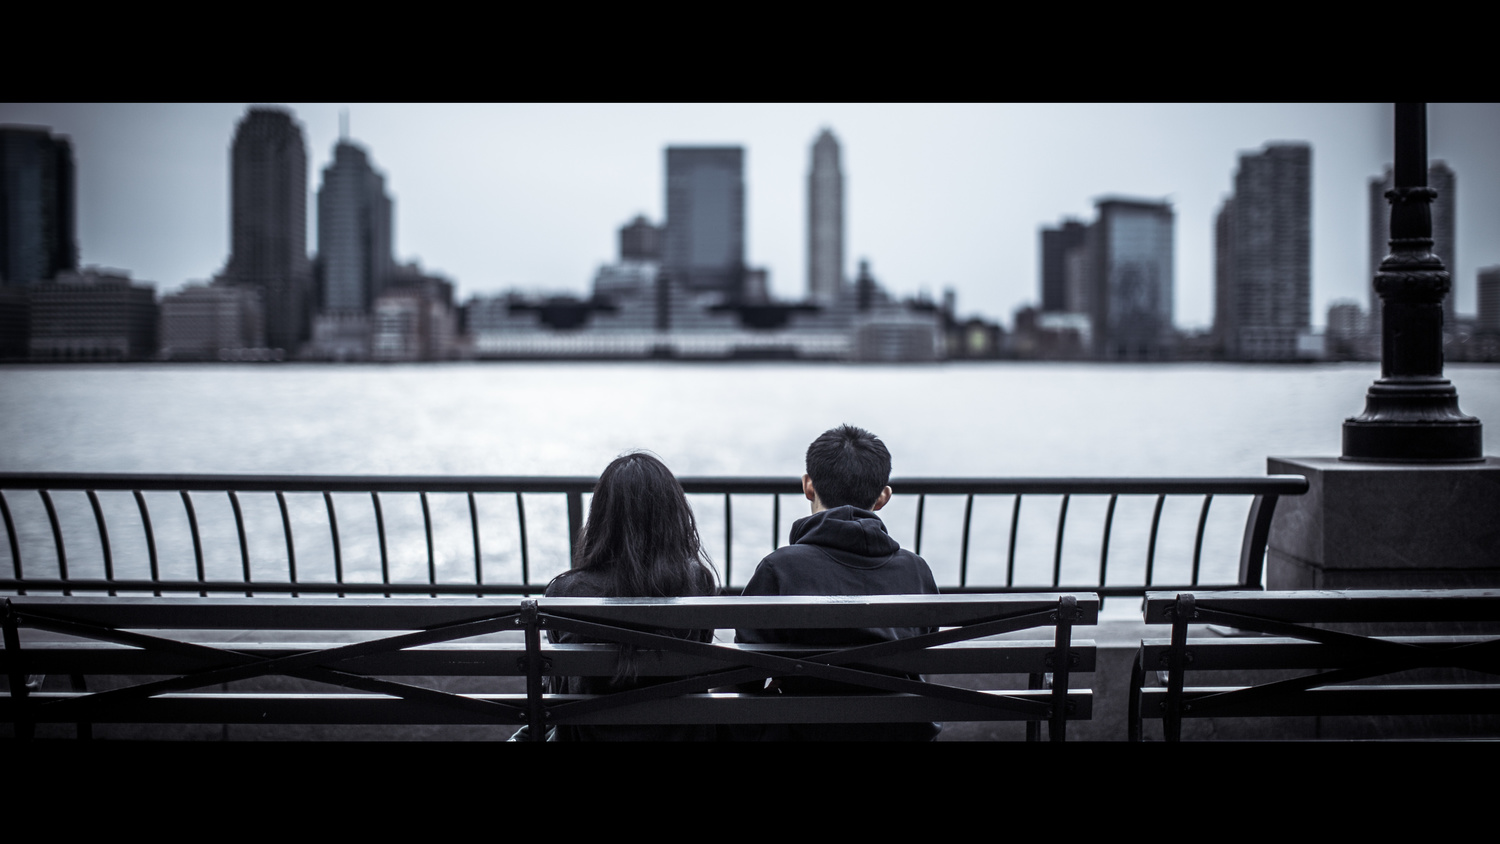
Some of Andrew's shots:


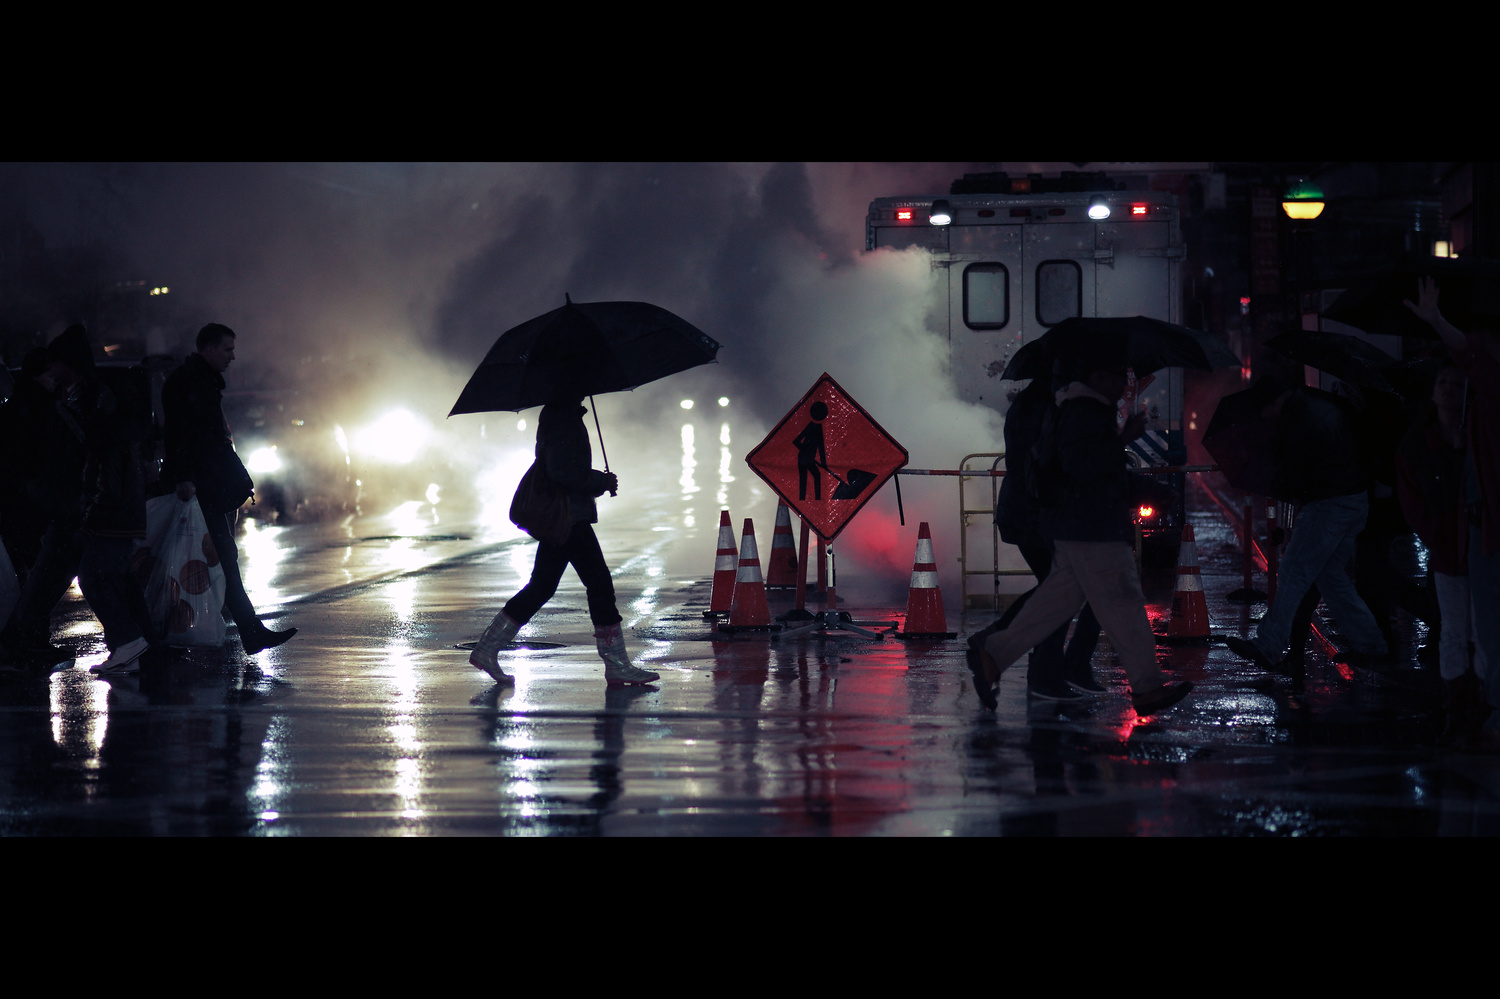


Andrew, a Brooklyn native born and raised, and widely regarded cinematic shooter, explained how he got started with this look, “After wanting more and learning how to compose a better frame, I really got interested in the process of coloring my pictures and making these scenes look like frozen frames out of movies”.
For more info on Andrew, you can watch this short interview that was recently put up by Notion Boulevard:
Dennis, a native of the Bronx, also demonstrated a knack and eye for cinematic style shooting as can be seen in his shots here:


Andrew and Dennis both share a love of story telling. When I asked about their motivation to shoot this look, Dennis chimed in, “I loved seeing how much a single image could convey and tell a story that doesn't exist. The thing that caught my attention with cinematic photography was the framing and the dramatic lighting in most of the images.”
So How Did It Work On The Day?
Dennis and Andrew both shot with similar cameras on the day, but in very different ways. Andrew shot mainly with a fixed Zeiss lens, manually focusing using his LCD. Dennis switched up lenses and shot much more traditionally, through hthe viewfinder.
I was curious to see if I could build (even a some small way) something new in the photographic community. So our story began.
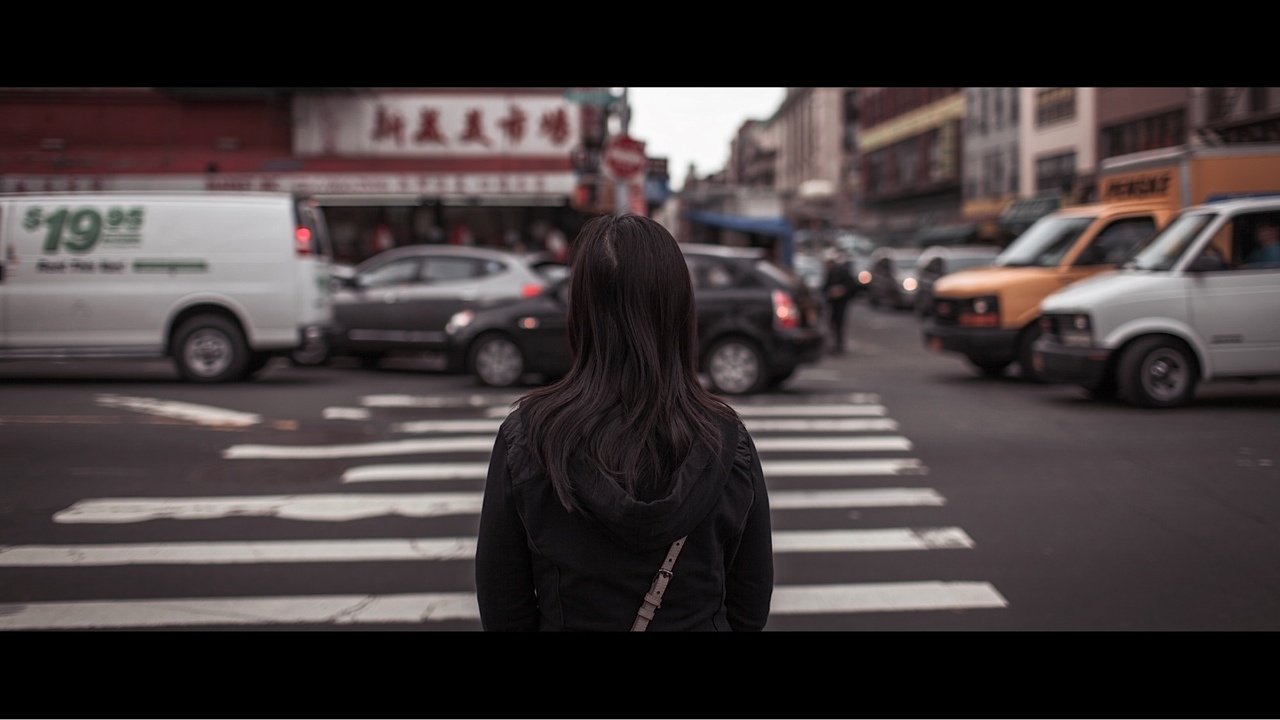
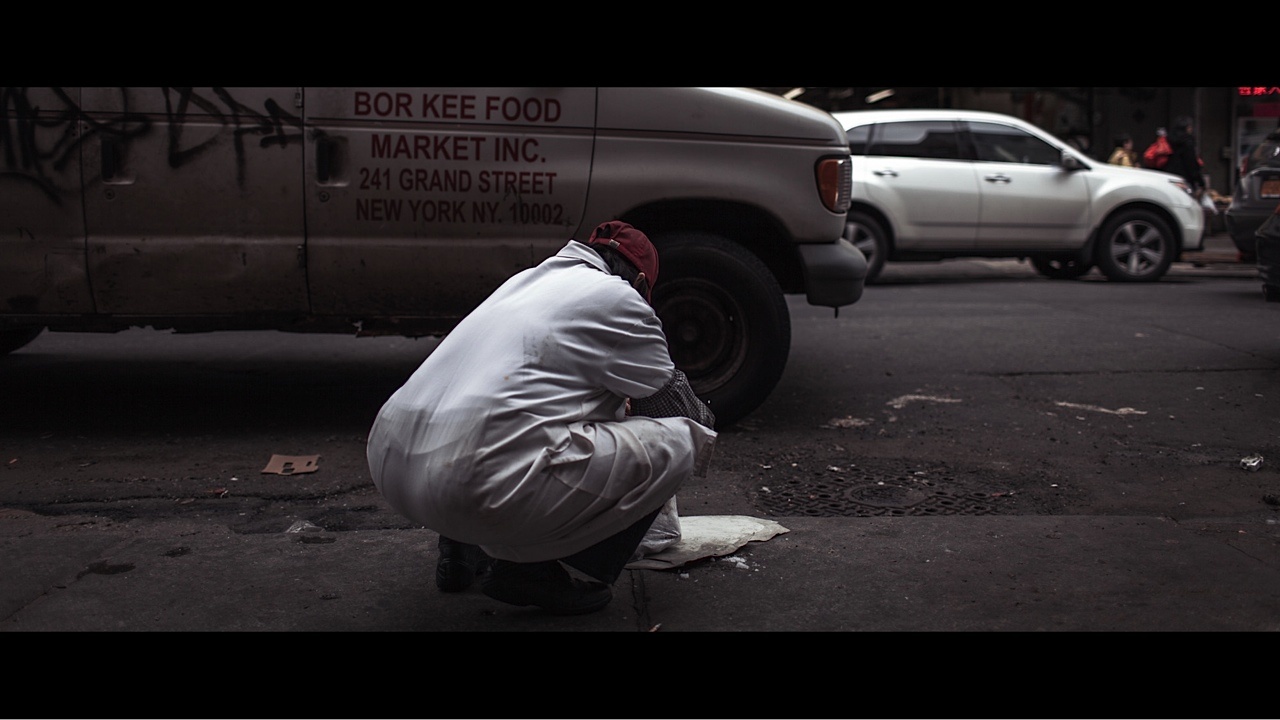
I set out with Andrew and Dennis and we spent a couple of hours walking together while they shot the streets. The challenge was to basically tell the story of the city, but interpreted through their own eyes and to see if we could tell a cohesive story with both sets of images.
This was a friendly challenge to them both to see how two photographers could work together, inspire each other and use their own vision and style to interpret the same scenes in different ways. While the results might not be fully cohesive, it was great to see them working together and inspiring one another.
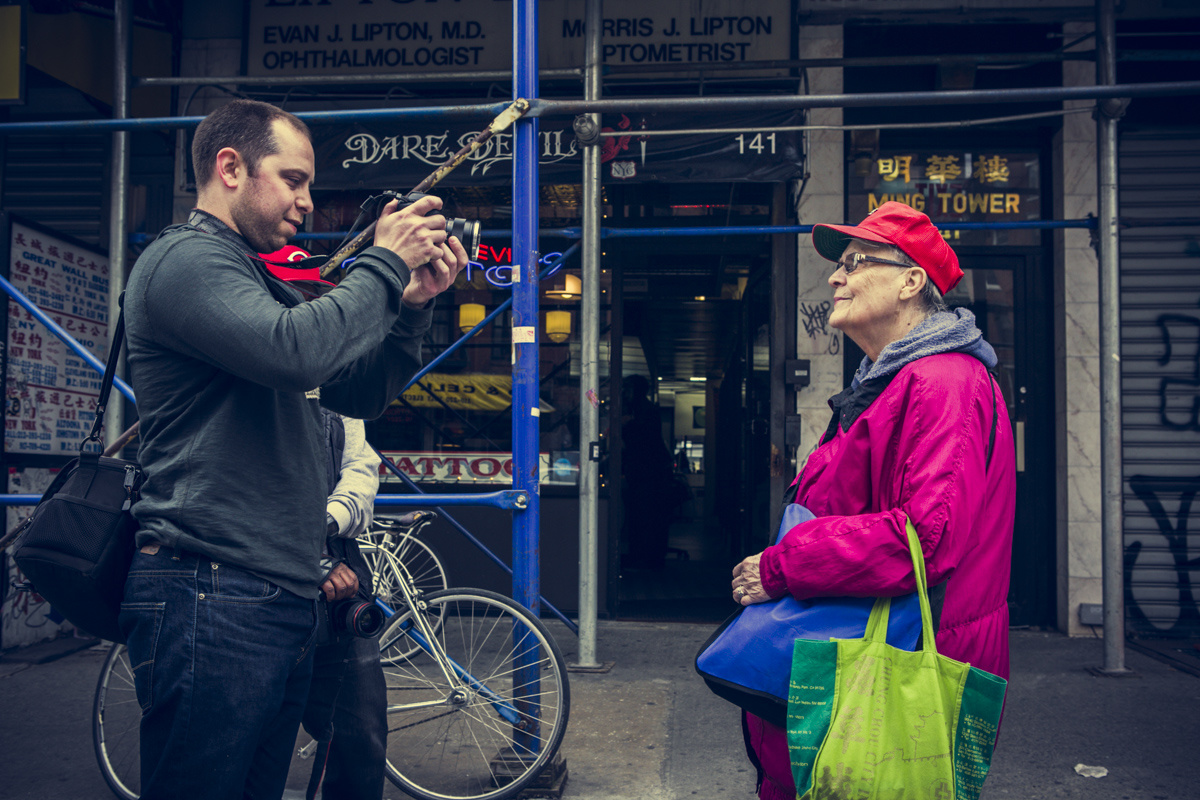
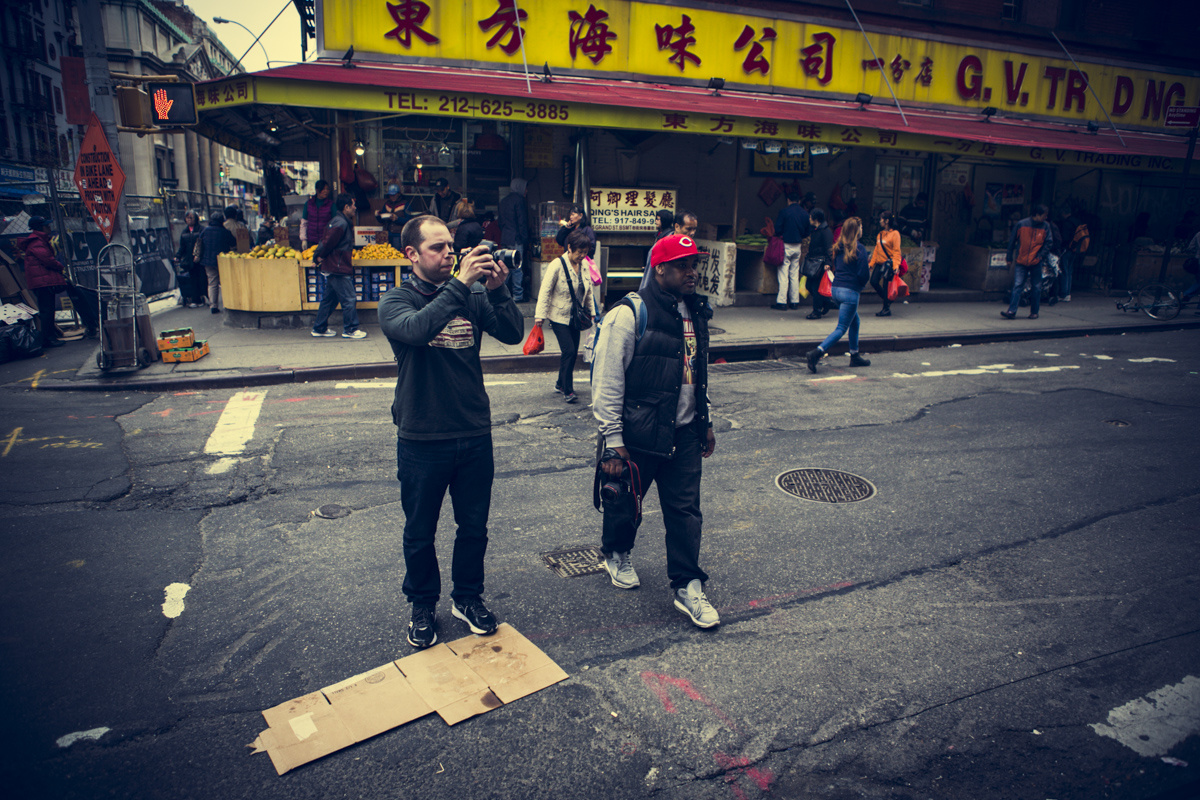
Here are some shots of the guys on the day of the challenge:

Andrew (left) and Dennis (right) set off to capture the city

Zeiss manual focus with the LCD is Andrew's preferred style


Sam "The Tailor", a veritable Lower East Side institution. After posing for some street portraits, he promptly tried to invite us into his store to try on suits.
Helen was a character. She'd lived in the neighborhood for more than 50 years. She had a story or two!

Andrew shares his shots of Helen with her as Dennis steps in to shoot
Chinatown, where our challenge ended
As Dennis notes it’s way more than just picking an interesting subject. “It’s not just the person but the environment too. You sometimes have to study a person’s movements for a while before you take a shot. A good starting point is definitely knowing how to frame a shot”.
Andrew shared a similar view point. I asked him about the challenges of shooting like this. “Giving the viewer an interesting point of view is important as well. Composing an interesting shot can be difficult on the street. You hope your subjects fall in to place and sometimes they don't. It's out of your control but maybe that's part of the fun when it all comes together.
Some of Dennis’s shots from the day:
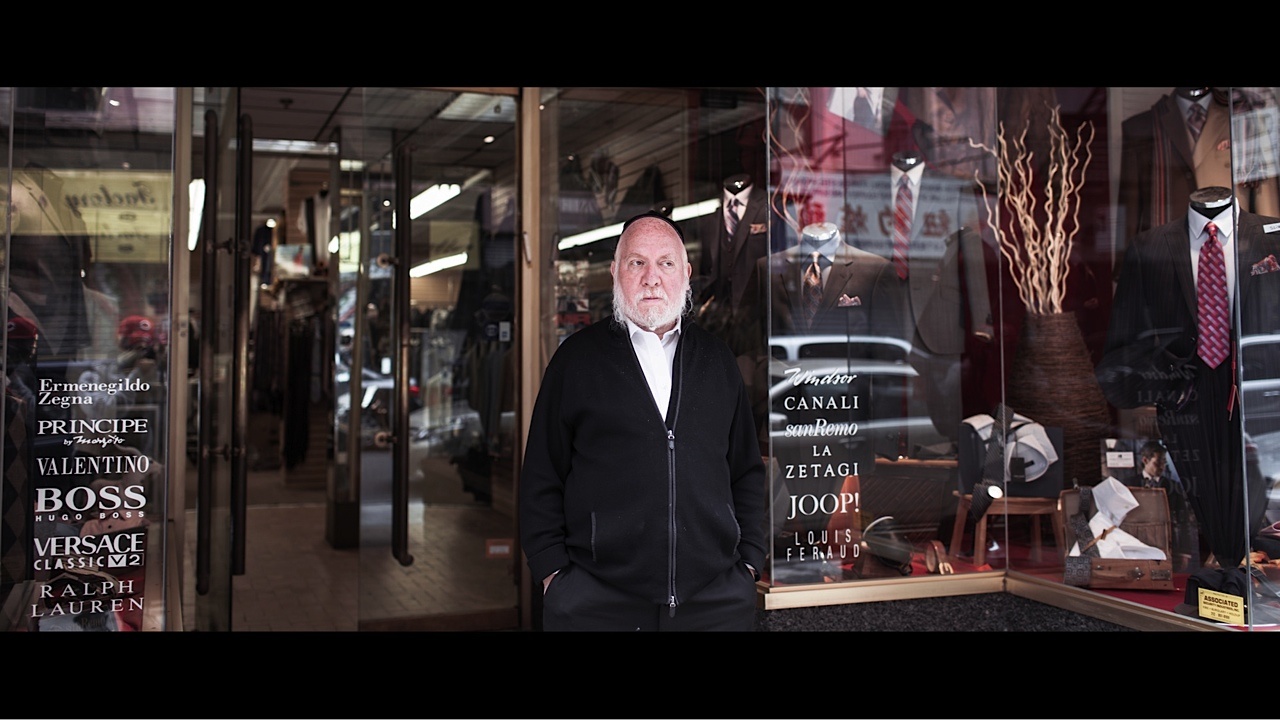
Sam poses while trying to sell us about 3 suits a piece.

Helen captured while talking about how the neighborhood used to be back in the day

And a few shots from Andrew:


Helen poses for Andrew

Andrew grabs portraits of Sam while he scans the street to see if there is anyone he might be able to sell a suit or three to

Did the guys tell a cohesive story? You can decide. Regardless of how successful or not this challenge was, it definitely brought three strangers together and allowed us to have fun and bond over photography for a few hours.
The Benefits To Client Work
Interestingly this look to his images had really helped both their client work too. Andrew explained:
“I have met some of my favorite photographers from around the world who have come to visit me in NYC. Got to be a part of ad campaigns for the gear I shoot with (Canon - Asia), (Carl Zeiss Lenses - Germany). Iv'e done commercial work for major hotels and businesses across NYC. Currently I'm working with Dj Premier on a video series called "Bars in the booth".
Dennis has also used this cinematic look in his client work:
“This style has helped me land a few paid gigs. I just was asked to do an engagement shoot which was different from most traditional engagement shoots.”
How To Achieve The Cinematic Look
I asked both Dennis and Andrew how they approached achieving this look. While they both agreed there is no one magic formula for every shot, as each shot has it’s nuances, there was a general approach.
Andrew explained his approach as follows:
I start in DPP (Digital Photo Professional) this is where I process the RAW file. I correct tones and I play with the curves then I import to Lightroom. When in Lightroom I do more coloring and correct the perspective and crop. Off to Photoshop where I do some final touches and polishing, that's where I add the letterbox.
Dennis prefers to use Lightroom for his color and grading work, then like Andrew, uses a few simple steps to apply the widescreen look and details his way of achieving his look through these steps, making global adjustments to the image:
Step 1 – Take the RAW image and import to Lightroom

Step 2 – Play with split toning to achieve the start of a color look (see example where the warmth adds to the feel of Fall)

Step 3 – Adjust color saturation and luminace to suit
Step 4 – Adjust blacks, color temperature, shadows and saturation
Step 5 – Add a slight vignette and grain, to make it more “film-like”, less digital and clean
Step 6 – Export out to PS. Click the padlock to Unlock (Option (Mac) or Alt (Windows) on the padlock.
Step 7 – Add a black solid layer underneath the background layer

Step 8 – Use the Marquee tool to choose a fixed ratio for width and height. Enter 16 for width and 9 for height to geneate a 16:9 widescreen image. Drag the marquee to cover the 16:9 crop area. The go to Image > Crop in the menu
Step 9– This time select a fixed ration of 2.35:1 for an anamorphic fee. Don’t crop – rather, add an Adjustment Layer and click the small "link" symbol between the image and the adjustment layer to Unlink them from one another
Step 10 – Back to Layers panel. Right click on mask and select Apply Layer Mask to apply the mask to the image
Step 11 – To align the image perfectly inside the black letterboxes, hit Cmd (Ctrl in Windows) and A to select the entire document, then right click on the Adjustment Layer and Apply Layer Mask to apply mask the image.
Step 12 - Select the entire document, then Go to Layers menu and select Align Layers to Selection and then select Vertical Centers to align the layer vertically
More details and a full walk through for the cropping can be seen in this video courtesy of Brodie Butler:
Final Thoughts
Hopefully this article has been useful for you to see how you could apply another look to your images. I find it fascinating look to have still photographs look like they could have been taken from a film. As the worlds of ultra HD and cameras that can shoot at ever higher frame rates continue unabated, I’m sure we’ll be seeing more of this sort of look on other projects in the future.
This exercise was also testament to this website and the community. Whether you’re a reader or a writer, all of us have the power to connect with one another in new ways, I can highly recommend it, we had a great time and all made some new friends. If we all take some small step to reach out and bring other members of our community together, we’ll all be a lot better off for it.
Special Thanks to Both Andrew and Dennis. More of their work in the links below:
Andrew:
https://www.flickr.com/photos/djpoe/
Dennis:
https://www.flickr.com/photos/denn-ice/
If you're passionate about taking your photography to the next level but aren't sure where to dive in, check out the Well-Rounded Photographer tutorial where you can learn eight different genres of photography in one place. If you purchase it now, or any of our other tutorials, you can save a 15% by using "ARTICLE" at checkout.


Lovely images and a great write up :)
In every post production technique it is true that every picture/movie clip/sound needs approach based on its personal characteristic. But it would still be amazing to see one image taken from raw format to finished product in a voiceover screencast for example. Just to see the thought process of colouring in one example.
great article of two of the best for sure! a bunch of us started a facebook group a year ago, drop by if you guys have any questions at all, we're a friendly bunch, mostly :P https://www.facebook.com/groups/cinematicphotography/
Thanks Shuji, that looks like a great group you have there!
Is there a tutorial somewhere on how to get this look? I know some of the points for Lightroom are covered here, but others like the vignetting, colour saturation etc, need a little more detail in order to follow.
I love the look, and once I have an idea on how to achieve it I know I will play around witht the settings to make it my own, just need a place to start.....
Hey Phillip,
Check out these links where I show some before and after's and share some recipes!
https://www.flickr.com/photos/djpoe/4381365671/
https://www.flickr.com/photos/djpoe/6835675525/in/photolist-dBbFeU-nxhGT...
https://www.flickr.com/photos/djpoe/6729306731/in/photolist-beJ7EF-bfDug...
That was an awesome post. Love discovering new photographers....especially in my NY. Just started to follow Dennis and Andrew now. Hope to bump into and maybe shoot with them sometime in the city. As for this cinematic look thing....it's freakin' bananas! I love it. I've actually been watching films lately and as I'm watching, I'm visualizing the scenes as stills. (probably no greater film to do this with than FIncher's Se7en!) Anyway.....will no doubt be looking to try some of this look soon. Thanks for the info and a great read!
Enjoyed this article! As a film student who decided to switch to being a photographer, it's cool to have this as a way to blend the two worlds together. Tried out the technique today, this was the result:
great job... I like it a lot
Thanks Andrew! I really appreciate it!
A bit of off-topic but what was your thought process and motivations behind switching to photography? It would be really interesting to hear since most people go from photography to motion pictures nowadays.
Honestly, I just found more enjoyment out of conceptualizing and taking stills versus shooting video. I still love cinematography, but I found that I was only shooting other people's ideas since I'm not great at coming up with scripts and shorts. My creativity was suffering and my motivation to shoot was lacking, not to mention I wasn't shooting nearly as much video as when I started in the field. But I was taking more photos. And was excited to take them, energized creatively and more motivated to plan out shoots for stills. When I realized this, I decided that photography was really where I was meant to go.
Awesome
Thanks guys, great article! By the way, I found that if you blur the 2.3x1 mask just a little, final image will look even more like a movie still. When black field borders are too sharp, whole image looks like edited in photoshop for me.
brilliant article!
https://www.youtube.com/watch?v=GL-dPt22BVU&feature=youtu.be Film look tutorial
This article has been one of the best for advice on the cinematic look of still photography. I love the look of films...the grain, and bokeh in the background....all of that. And I have been attempting to create this same look, but on still photography. A still picture that looks like a still shot from a movie!!! This article has given me inspiration and some great tips on how to achieve that look. I took the photograph below near Lake Buchanan, Texas using my Galaxy S5. I added a little "blur" to it, a dash of grain, and then added the letterbox, and I must say, it does appear to come from a movie! Thanks to this article, my pictures will only get better! Thank you!!
I am using Mobdro as an application to watch my favorite movies. Mobdro APK is the free and best version for Android: https://mobdrovip.com/mobdro-for-android/