

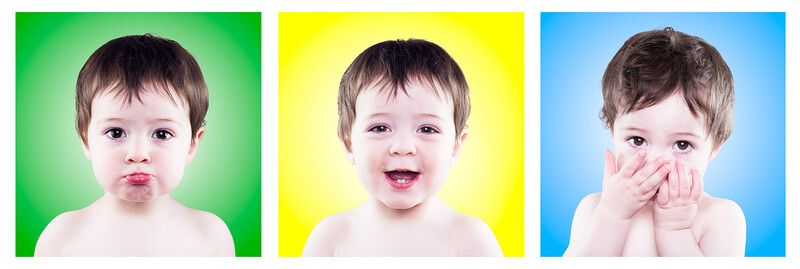
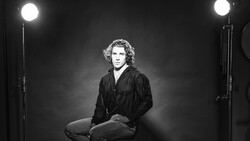
One of my favorite setups for studio portraits of children was inspired by Jill Greenberg’s photos of crying babies. These portraits are fun, simple, and focus on teasing out a variety of natural expressions of children as they are being photographed. This tutorial demonstrates how to photograph and edit this particular style of a three-light children’s portrait.
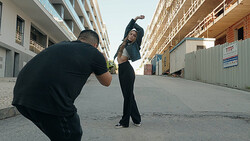
The lighting setup consists of two lights on either side of and just behind the subject and are modified by shoot-through umbrellas. A large softbox is positioned directly in front and above the subject. The power from the main light should be about one stop less than the light coming from each of the lights on either side. Either a white or grey backdrop works well for this style of portrait to make it easy to replace the background.
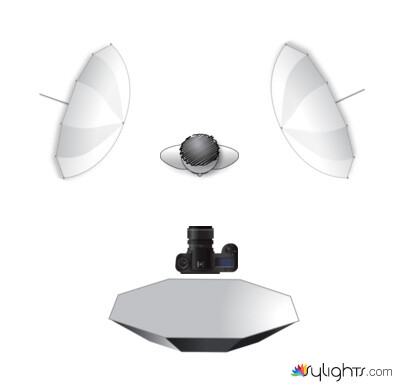
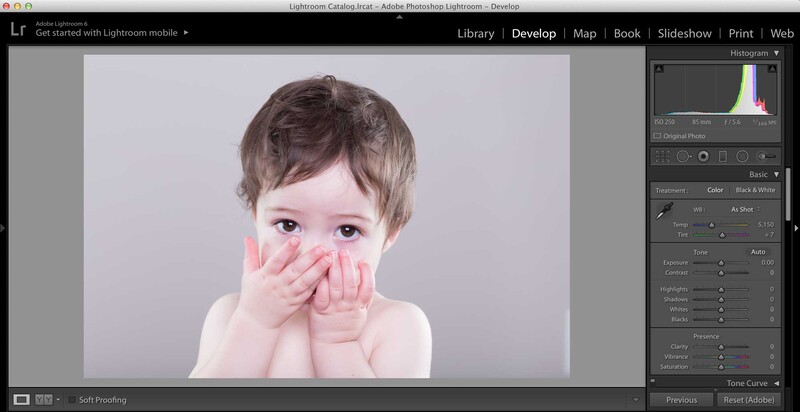
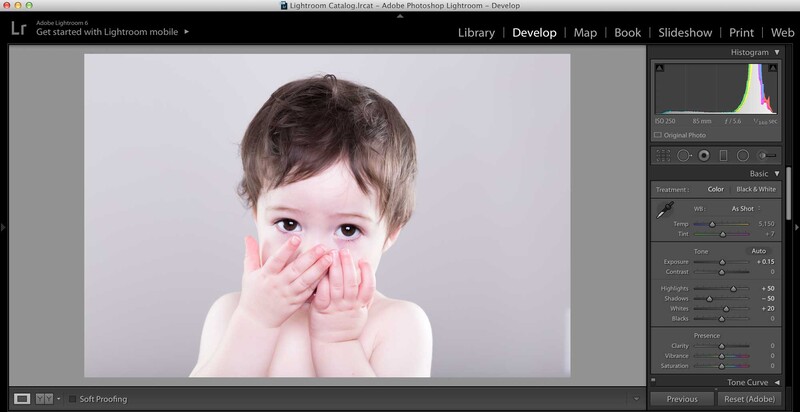
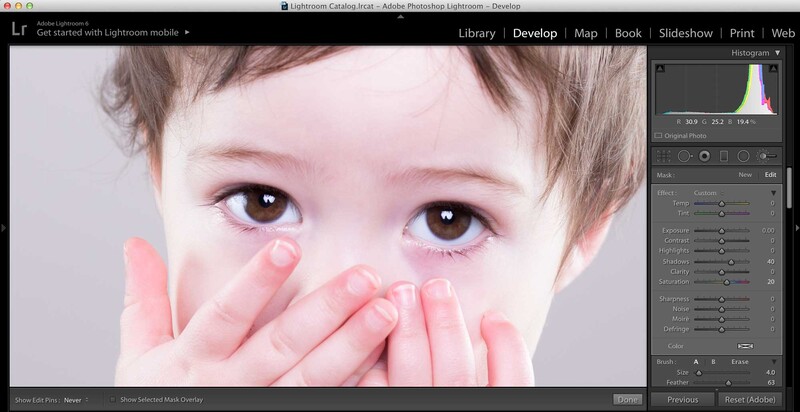
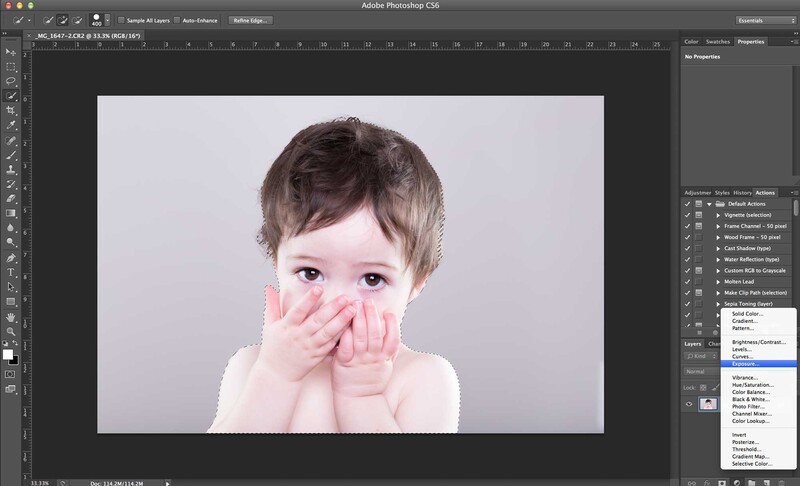
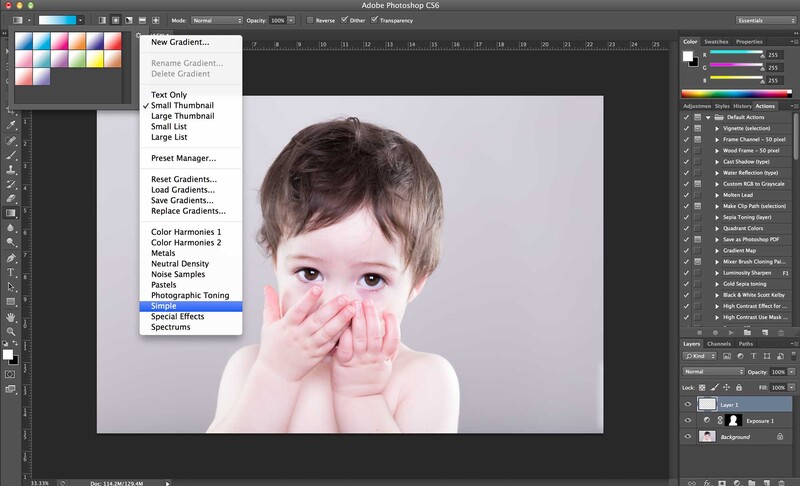
To take the photos, position yourself in front of the main light so that it’s just above the back of your head. I like to photograph these portraits at a medium focal length such as 85mm and keep only the head and shoulders of the subject in the frame. Some tricks to encourage a variety of expressions from your subject include playing peek-a-boo, singing songs, and giving your child subjects something to eat. For post-processing, follow the steps below using either Lightroom or Adobe Camera Raw and Photoshop to complete the portrait.
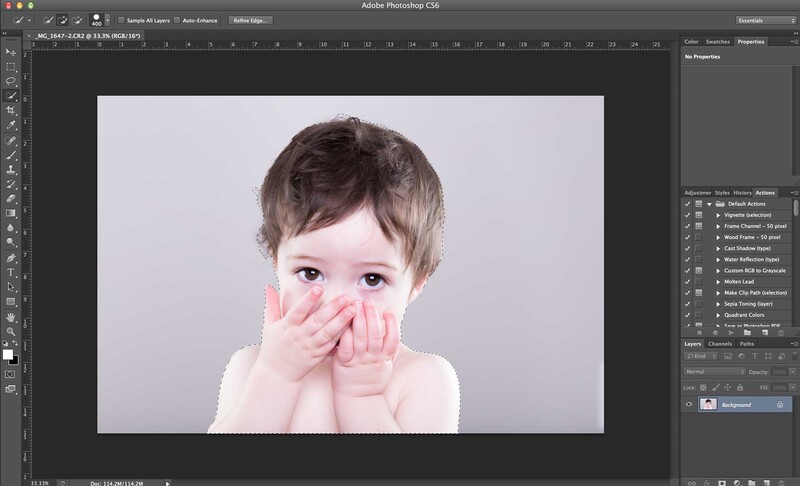

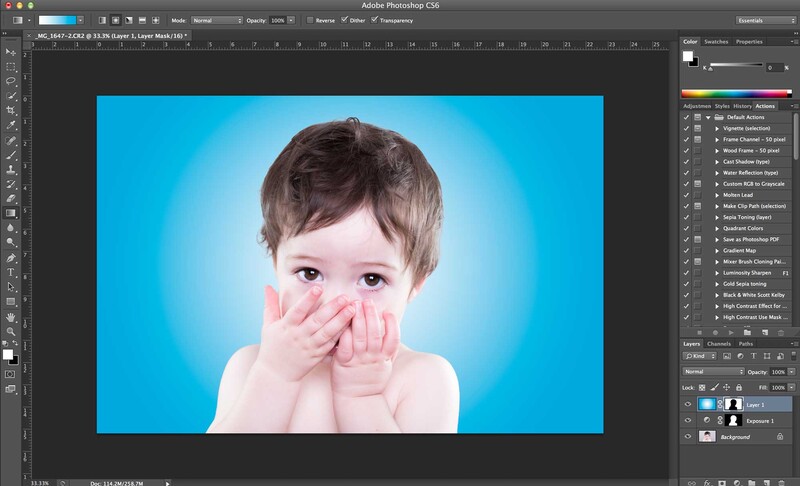
These portraits are always popular with parents because they emphasize the child, rather than props, and once you have made your selection, the sky is the limit on what you choose to use as a background.

Join the Fstoppers community for free
-
Post comments and join in the discussions
-
Browse the site ad-free
-
Share your work and get featured in the community
-
Compete in the photo contests for fun and prizes
6 Comments
I can only imagine how many dozens of hours of work would be saved if colored paper backdrops were used instead? Striplights/snoots/flags would have to be used since the umbrellas would spray light everywhere
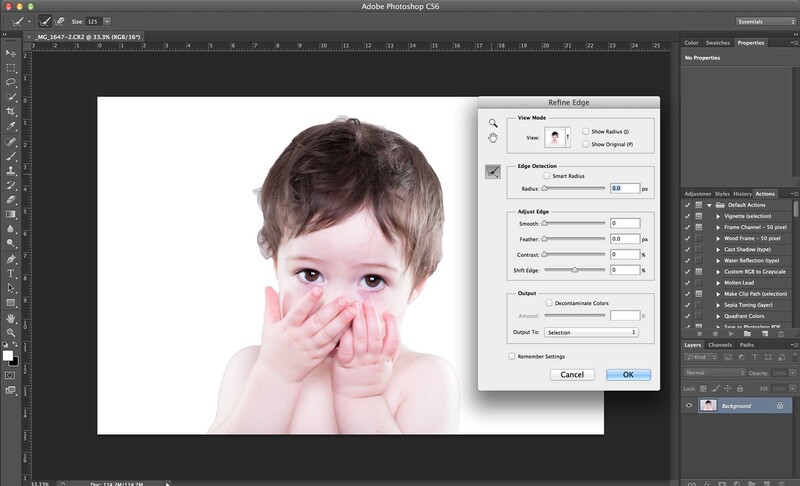
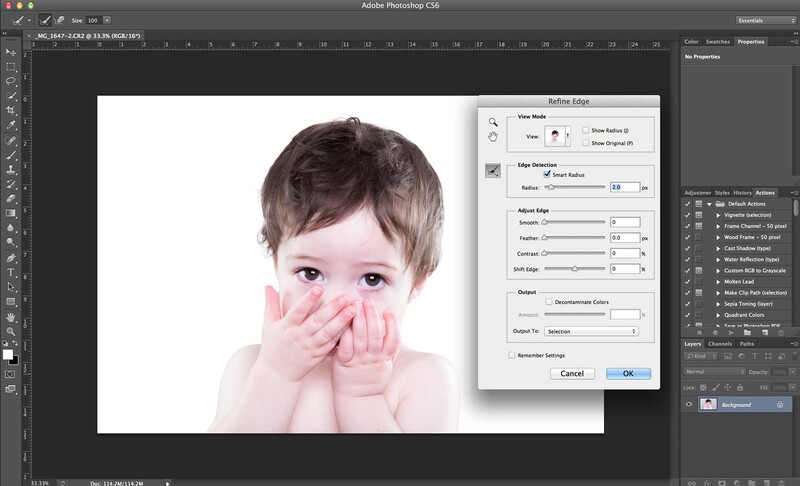
Since I photograph these at 85 mm and getting in close to the subject, I don't need to use any striplights, snoots, or flags - the setup was exactly as shown. After practice it takes about 60 seconds to make a pretty good selection and replace the background. This way the colour can be chosen afterward, and the gradient effect can be incorporated.
Since I'm a brain-dead robot, I had to follow your link to the "End Times" photos. :-)
I really liked the photos but my admiration turned to disgust upon reading the photographer's comments regarding the intent. Not your fault; just sayin'.
I will, however, be trying this on my great grand nephew. I don't think it'd go over well for the corporate portraits I usually do! ;-)
What about just putting a light on the backdrop, and putting a gel over it? Just as easy to change in post, and would save a punch of time.
I think this is way easier, because you have a big softbox in front of the subject. A gel would lose its effect rather fast when the backdrop is filled with that much light.
But of course it depends on the distance between subject, softbox and backdrop. In a smaller homestudio i think i prefer the photoshop work.
I definitely use the coloured gel-lit backdrops as well, but as Christoph has indicated, with the large softbox in front of the subject it can be difficult to get good saturation unless you have a ton of room between your subject and the background. Making a decent selection takes about a minute, depending on the subject's hair. But you're right, if there's ever a way to easily achieve the same effect in camera, I'm all for it!