
Since the beginning of my adventure into photography, Photoshop has been the go-to tool for cutting out a subject and creating complex masks. With ON1 Photo RAW, this process has become so much simpler.
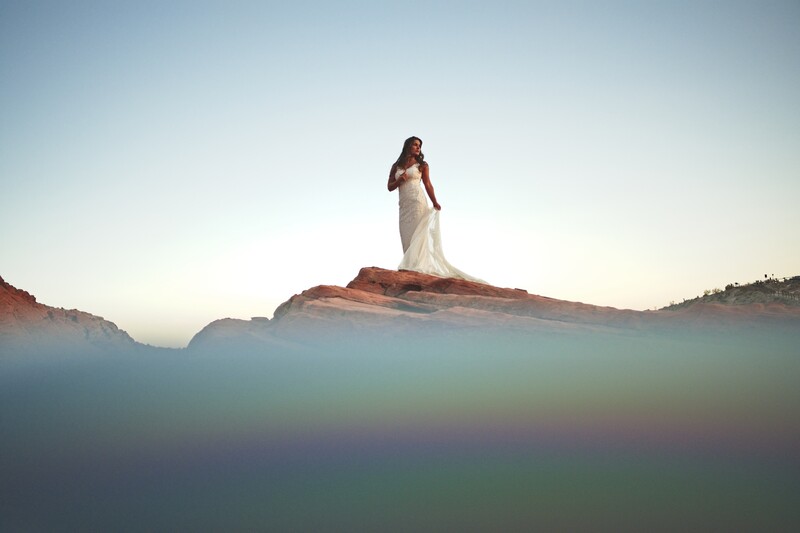
In an effort to explain all the various tools that ON1 Photo RAW has to offer in terms of masking, I thought it would be good to just walk through a specific image where I used all the tools. To start, this image was shot at Red Rocks in Las Vegas during WPPI. The sun was setting so the model still had some light on her, but not enough light to give me the drama I was looking for. So what I did was expose for the scene in an effort to maximize my dynamic range. Because of this, the image straight out of the camera is far from impressive.
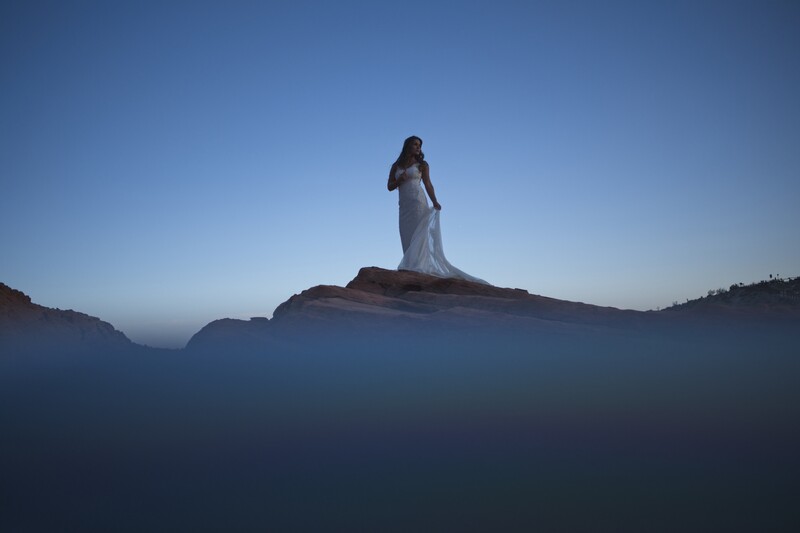
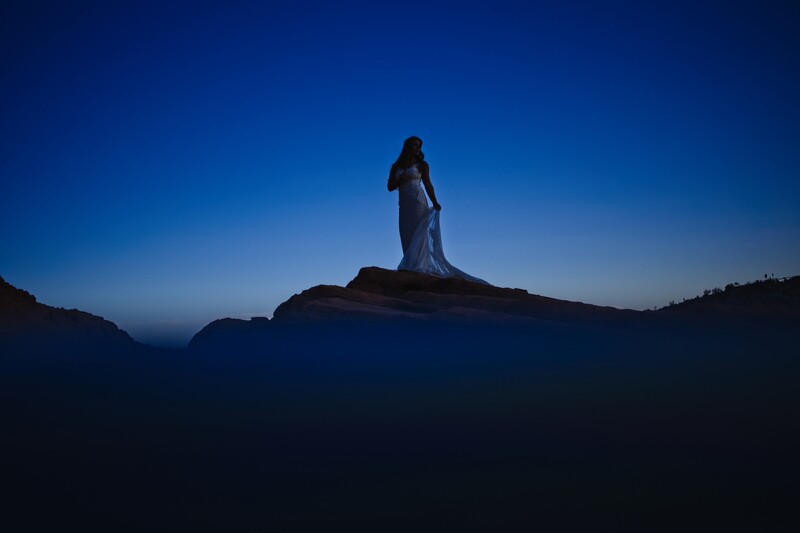
After bringing the image into ON1 Photo RAW, I applied my base preset. From here, I created two different versions of the same image. For one version I dropped my exposure so that I could get the darkness of the sky to where I wanted. For the second version, I bumped up my exposure so that the light was what I wanted on the model. I also warmed up the color temp quite a bit in an effort to mimic the light you would get from a more direct sunset light.
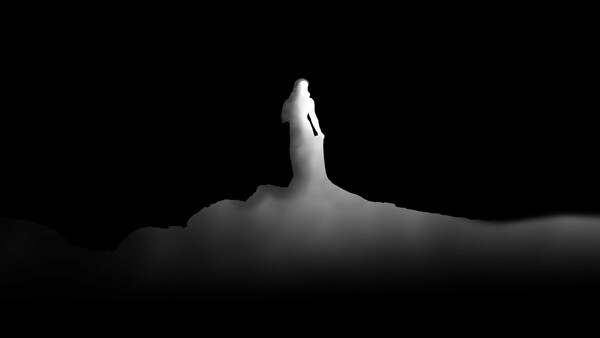
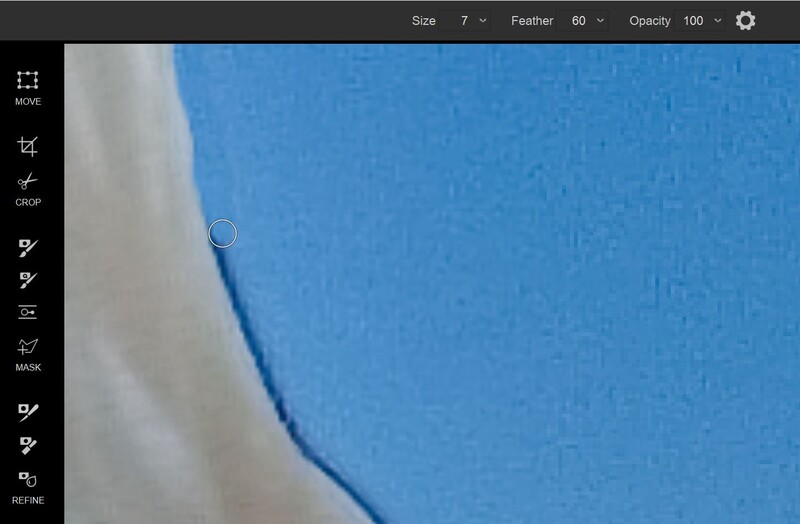
Now that I have the two images I want to work with, I now need to combine them using layer masks. The great thing about ON1 Photo RAW is that I don't need another program to do this. I simply select both files and click into the layers panel. This is where I have access to all the masking tools. The first tool I’m going to use is the masking brush. The important step here is that I’m going to turn on the perfect brush setting. This setting makes it so the brush can distinguish between different colors and edges so that I can quickly mask out a subject.
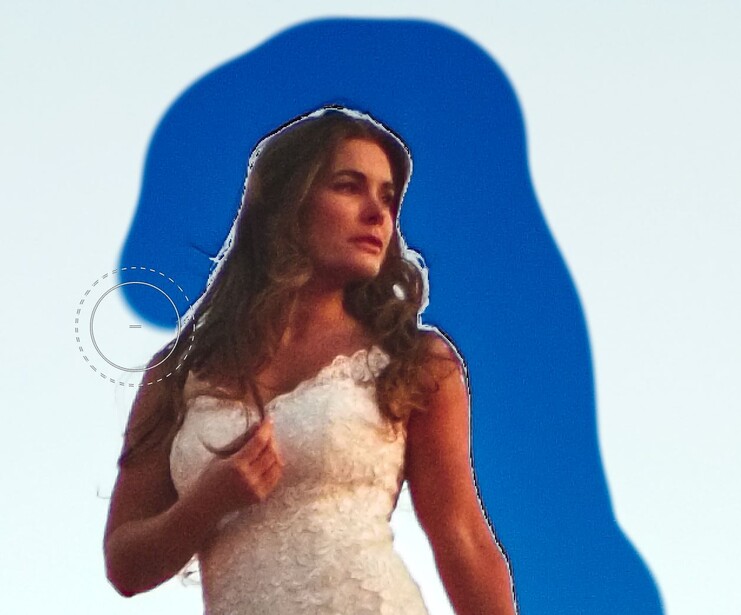
Although the perfect brush can give you perfect results, it’s generally meant to get you most of the way. As you can see above, in this example we are most of the way, but we have some fine tuning to do. The first tool I’ll use to fine tune this is the chisel tool. What this tool does is allows you to brush over the edge of a mask and remove or add to that mask by a defined number of pixels. This makes it so you can quickly and easily adjust the edge of a mask a couple pixels at a time. So as I use the chisel brush over the hair, I can easily remove some of the fringing you see as a white border around her head. There is also a refine edge brush (N) that has a really cool color decontamination option that works really well in certain situations.
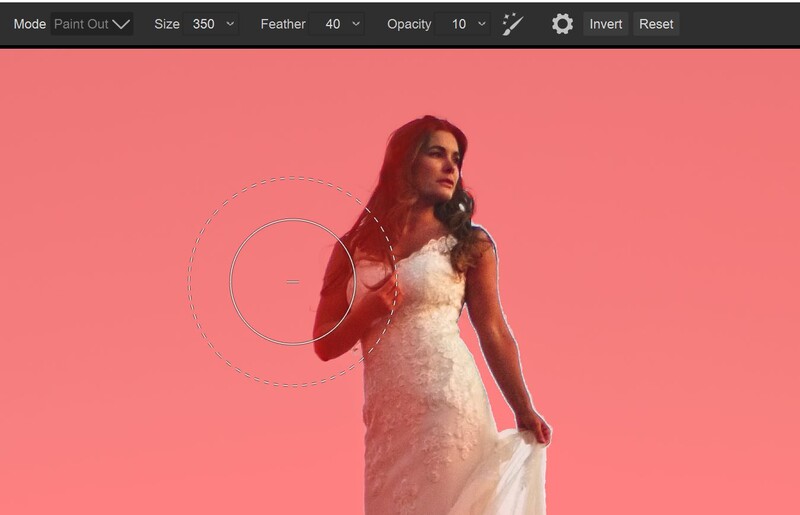
The next step I took was to get rid of the fringing on the left of the model. This part was a bit easier because I want the left of the model to fall a bit darker. So what I did was use the masking brush with the perfect brush option turned off this time. I set the opacity to 10 percent and simply blended the mask into the model. Not only did this get rid of the fringing, but it also gave the light on her a much more dramatic falloff.
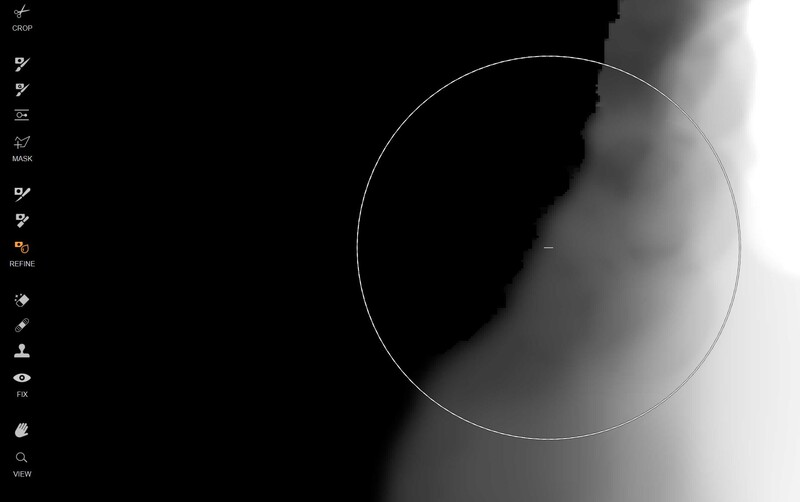
For this step, I had the feather set to 40 so that I didn't have a very hard edge, but it still did have some unevenness because of how I was building up the brush strokes. To fix this I used the refine tool which allows me to blur the parts of the mask that I brush over. This allowed me to make the transition much more even and less spotty. As you can see below where I have already brushed, the gradient is much smoother than the top of the image where I have not brushed yet.
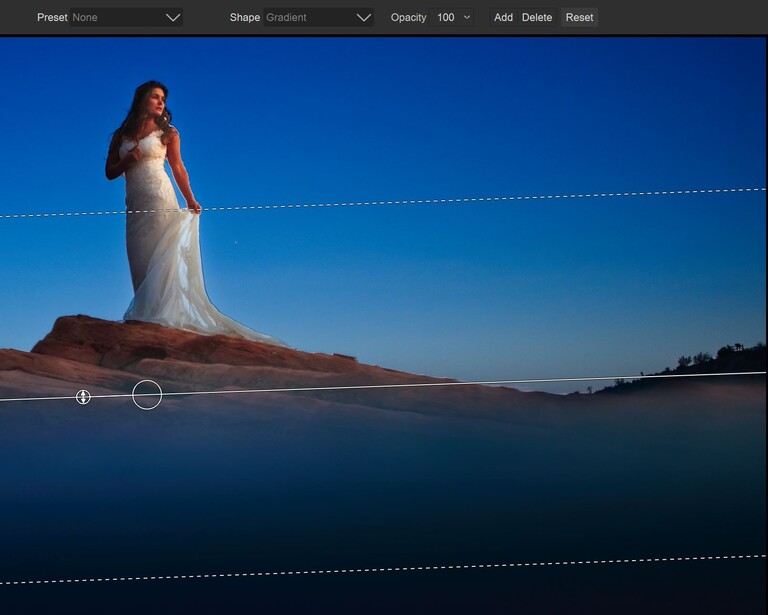
For the bottom of the image, I actually didn't want to rely on a brush tool because I wanted the transition to be a lot smoother then I could paint in manually. So I opted to use the masking bug. This bug lets you apply a gradient mask to the image and then fine tune everything as you see it applied. So I can now rotate, move, adjust the falloff, and opacity as I see its effect on the image. You can also adjust the shape of the bug if you rather use a circular gradient, mirrored gradient, etc.
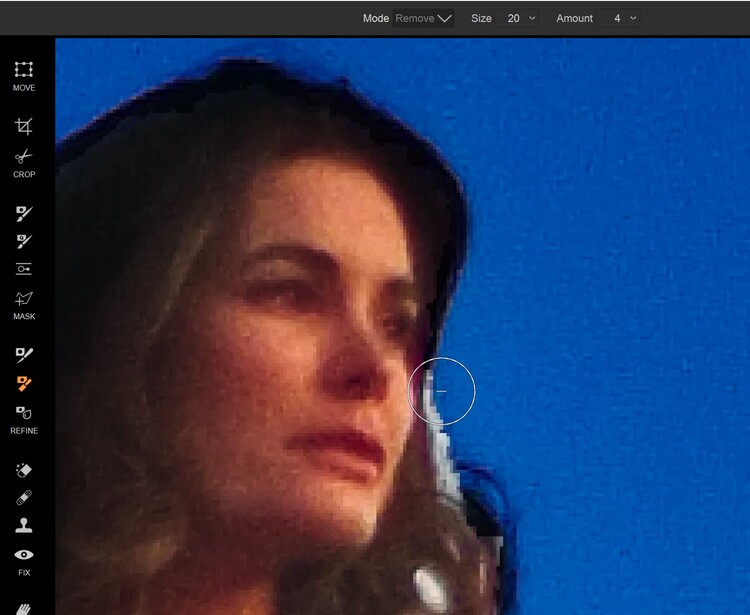
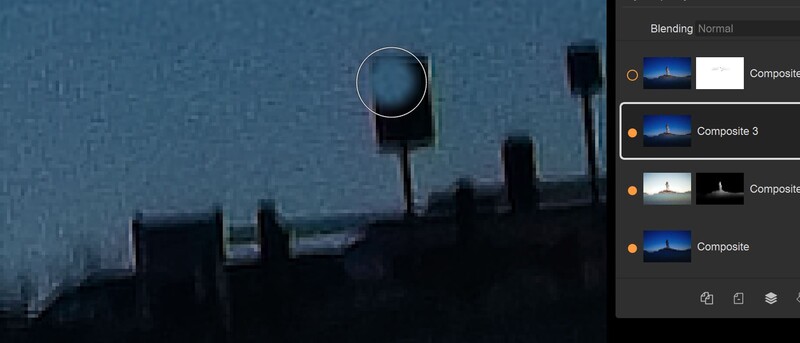
The last step to finalize this image is to attack the fringing on the right side of the model. Due to the nature of combining two identical images with such drastic exposure differences, there is nothing I can do to the mask to fix this section. But thankfully, ON1 Photo RAW also has built-in healing and cloning tools. So to fix this, I simply selected the clone stamp tool, sampled a section right next to the fringing, and painted over it. If I was not combining two identical images and instead was dropping in a new background, I could have used the chisel tool to fix this section. It's during this step that I also removed some of the signs and poles that were visible on the right of the image.
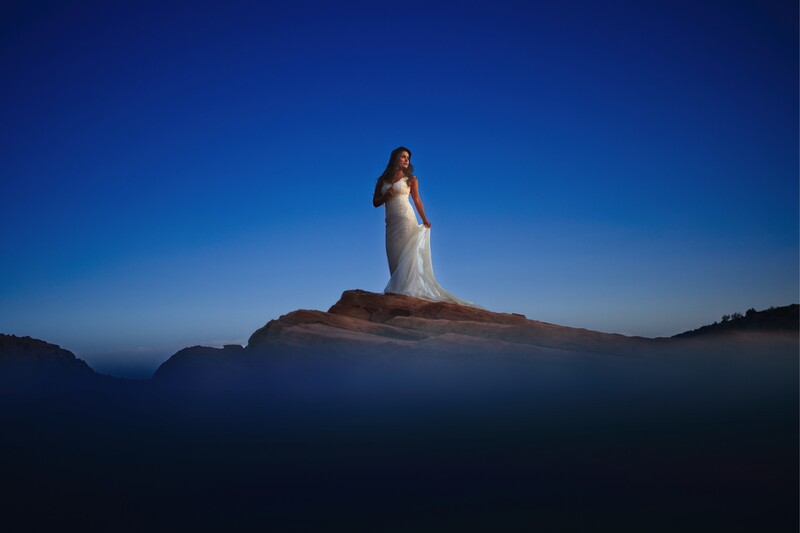
From here the Image image is complete
Conclusion
Just to recap what we did, we started with a base image as seen right out of camera. We then applied a preset and created a darker version and a brighter version. We then combined both images together so that the model was from the brighter image and the background was from the darker one. We did this with four simple tools that allowed us to mask and blend everything very easily. Lastly, we fixed some fringing and cloned out some distracting element. We did all of this from within a single program which saved a ton of time not needing to jump around and wait for files to load and save. Because the masking tools allowed me to work faster and less precisely, I was able to complete the entire edit in less than a few minutes. In addition to the tools mentioned here, ON1 Photo RAW also has a host of other features. From a fast and easy file browser, a raw editor, and even an effects panel that allows you to add filters and effects such as tilt-shift blurs. If you haven't given ON1 a try since their recent update, I definitely recommend checking out their free trial.


23 Comments
When I see people talking about masking and cutting objects out of images using some fast tool or brush and then spending all the time to clean up the horrible jagged edges also using a brush to erase, I realize how much I like the pen tool in Photoshop. Yes it is a long boring process using the pen tool but when they are cut out, they are cut out perfectly. And if you light hair correctly from behind to show contrast, the background eraser tool makes it easy to extract hair without masking and refining. I hope one day someone comes up with a magic way to do it cause I spend the most time cutting people out of pics, but I imagine every image I do will be the size of a movie poster and jagged or erased edges would be noticeable.
great artworks ... you're right about how correct lighting and other consideration when taking a photo helps a lot in post-processing later ... but the subject matter in this article was not shot in a studio, where you can also use a green (or blue or black or whatever) backdrop to help out with the Magic Erase tool in PS later ...
nice work! I use fluid mask to cut my stuff out.. it's not bad
Show me an example with a more complex background and only then will I consider this article relevant.
You can do this faster and better in Photoshop. I don't understand why people buy Photoshop if they don't use the actual features that help them do their work. Sub-tools like refine edge can even fix color fringe.
i don't agree this can be done faster in PS as i do it myself ... but the article's claim that all this was done in only a few minutes in ON1 is false anyway! besides, as i mentioned in my 1st comment here, this is a relatively easy subject because the background is 'clear' and has no intricate detail ... try doing a similar thing with a much more complex background, and ANY program (PS, ON1 etc) would be so painfully 'slow' ... or rather, the program would still be doing its thing in the usual speed with only a little slowdown when handling more detail but the process would be slow as hell anyway!
It is relatively fast with new methods, even complex background with thin hairs. Half a minute on Google/Youtube can show you how, that's why I think this article makes no sense, especially with the headline it has. The problem with your view is that you try to do the same thing in Photoshop, the same thing is slow, that's why they make new methods afterall.
.
sounds like you didn't read my comment well enough and the PS-addict / PS-fanatic you certainly are by the sounds of your comment, then you responded like that ...
"Once a Photoshop-er, you're one for life!" ~ the old saying since the 1990s ...
i didn't defend ON1 vs PS! i did the reverse actually! and PS or other Adobe's overrated / overpriced junks are not my main programs in editing digital imagery (photo/video/graphics etc) anyway although i do use them by default `cause the industry and market forces force me into it!
(and i'm not a PS-CC user btw ... i don't pay for just some fancy 'new' additions to the PS that are mostly cosmetic and i don't really need anyway! i'm more than at home with the good old PS6, even earlier versions that are more than sufficient for at least 80% of my present needs! not a LR user either, NEVER!)
the point is, as i have mentioned already, there are certain tasks NO image editing programs out there can do as fast as any of us would like them to do no matter how good those programs are or how truly speedy a computer system we have!
all and any of them do THIS better than the others but then fail at doing THAT which the competition does better ...
and i guess that's due to 'market shares' and copyright issues, where all of these guys HAVE TO either support each other's sales (often covertly!) or they'll be out of business due to certain monopoly laws restricting their full freedom in doing whatever they like to do ...
`nough said and thanks for your response!
You disagreed it can be done faster in Photoshop, I said it can, not by the same method (because it's a tedious method to begin with), but by many way faster methods. They don't break old methods by changing them as many people depend on them as it's an old program like you say.
But you babble on about politics and market, yet fail to realize it's old people using old methods that lead people to articles that say "You can do X better than Photoshop" even if it's not true. It's because people don't learn the new features but are stuck in their old ways.
I would never hire a photographer that doesn't use Photoshop, simply because it's so far ahead of the competition. If you can't afford to put $10 a month into editing your pictures properly you are not the professional I need.
i NEVER remember when i applied for a photo editing editing job (offered?) from you!?
thanks for the not-so-friendly highly-egotistic reply to whatever i said earlier btw! (and i'm not even going back to read it again as i'm too busy editing clients images the super-futuristic fashion way using a never-to-be-released special image editing software i've made myself that beats ANYTHING from PSCC to CCPS and so on and so forth and blah blooh bleah!) ;-)
good luck with your successful PROFESSIONAL photography career as well ... i'm sure you'll soon be retiring to your private Island you'll be buying down in the South Pacific somewhere ... hurry up though, before it'll be flooded with rising oceans due to global warming! have fun while drowning and keep up wasting your time in Photoshop as i'm sure it's made your quite rich already! :D
I'm not a professional photographer, has no interest for me. I just laugh at people with camera gear worth $10000 that doesn't care to invest time in Photoshop and call this their job. That's sad.
know of many 'nutjob' pro photogs out there, with gear ranging in worth from a few hundred $$$ to even millions of $$$,$$$ and no matter how truly "professional" they are, most of them are Photoshop 'addict' users by the stinking smell of it ... (the kind of people who are also Micro$oft followers and Bill Gates admirers ... the 'retard' bunch i call them ...) but the little crowd you just referred to, sounds so irrelevant i'm not sure even if they're worth mentioning here ... or anywhere for that matter ... whatever ... keep up whatever you're doing and if you're happy doing it, then no one can criticize you for what kind of tools you use to achieve the final results you like! that's what i do ... been doing my entire life in fact ... :-)
With that photo you could have gotten 90% of the job done by hitting the subject select button. Mask and refine edge and you are done.
maybe I missed something - i could do this in photoshop in about 20 seconds. this seems like a lot of extra work
Haha, I'm not sold
I'm eating this hummas with quinoa chips while reading the comments on Fstoppers today and it's been great.
Jason, Thanks for the informative article. Not everyone uses Photoshop as suggested in some of the other comments. I am always looking for ways to improve my workflow and articles like this are exactly the kind of stuff I like to see. Thanks!
Points of view are one thing - "opinions" are another.
Sharing information is one thing - sharing disparaging remarks is another.
Thanks for sharing the information, Jason - and I appreciate your point of view.
Thanks for sharing this tutorial very interesting, I prefer to use Photoshop, I can do the same in a few seconds
Keep in mind that this is a sponsored posting - presumably by ON1.
do this kind of 'editing' almost all the time on similar subjects ... i do it in Photoshop though, wherefrom all these tricks and tools have been copied in ON1 or many other PS clone programs ... (Photoshop itself stole such ideas and tools from older programs on special graphics platforms no one knows about much less to remember!)
results are usually good although at times it'd take much more than "just a few minutes" to achieve when dealing with difficult subjects! this one's relatively easy because the outline between the main subject (model) and the background is almost perfectly 'clear' and straightforward ...
and i don't get the part about why the user didn't have to "use another program" to do this? you do all said here (and i confirmed it as well) in Photoshop only, no need to use any other program!
Well maybe the goal here was just to get some attention for the On1 product. Sponsored content, Plenty links.Mission accomplished