Fourteen years separate two versions of the same photo, and watching one turn into the other is a quick lesson in how editing taste changes over time. Revisiting old work with newer tools shows you exactly how far your eye has traveled, and it surfaces habits you didn't know you had.
The photo in question came from a 2012 shoot inside the abandoned Satsop nuclear plant in Washington, and in the ninth installment of his "Redo Now" series, Brian Matiash rebuilds it from one of the original unedited frames. Matiash shot the structure with a Canon 5D Mark III and a 15mm f/2.8 fisheye lens, pointing the camera straight up to give the concrete a stone-tentacled, octopus-monster feel. The original edit was a tone-mapped HDR built in Photomatix, drenched in split toning from an era before Lightroom had color grading. Matiash is honest about the result, calling it a visual assault that served its purpose but no longer matches how he sees.
The rebuild leans on a stack of features that didn't exist in 2012. Matiash starts by removing distractions with the older content-aware heal rather than generative remove, since flat sky doesn't need AI to fix a jutting tower. He then reaches for Gen Expand inside the crop tool, a Lightroom addition from the last update, to add ground at the bottom of the frame that the extreme upward angle had cut off. He explains the credit structure clearly: Gen Expand costs one credit per generation on the Lightroom or Photography plans and gives three variations each time, while the Creative Cloud Pro plan grants unlimited standard generations. He also flags a small but real trap. When you flatten a Gen Expand result on top of an earlier remove stroke, baking the pixels in prevents the expansion from invalidating the edit underneath.
From there the edit turns into a tour of Lightroom's masking. Matiash uses the Landscape mask to auto-separate sky, architecture, vegetation, and natural ground onto four labeled masks, then treats each one differently: dehaze and negative clarity on the sky, a warm-then-desaturated temperature trick on the structure, warmer exposure on the trees, cooler tones on the ground. He renames every mask, samples specific hues with point color, and pulls the graffiti radioactive sign forward with a targeted object mask so it snaps on like a light switch. He also demonstrates the new masking refinement sliders, Feather and Edge, which let you push a mask boundary inward or outward and soften the transition.
If you shoot anything on a fisheye or another wide, distortion-heavy lens, the color calibration and optics section here is the part to steal. Matiash removes the purple chromatic aberration the fisheye throws along high-contrast edges with a single slider, then makes a deliberate choice to leave the lens correction profile off because flattening the radial distortion kills the tentacle-monster look he wanted. That decision points to a broader shift in how people edit architecture and interiors now. The tools to automatically correct distortion, remove objects, and expand a frame are cheap and instant, which means the real skill has moved from "can you fix it" to "should you." Leaving distortion in on purpose, keeping encroaching trees that a younger version of yourself would have cloned out, choosing content-aware heal over a generative credit when the sky is flat, these are taste calls, and the calibration panel Matiash praises rewards exactly that kind of intentional, restrained grading over a one-click auto pass.
The comparison at the end is the whole point of the exercise. The 2012 version lifts shadows everywhere until the entire structure looks irradiated, while the 2026 version preserves natural falloff, keeps a highlight where the light actually hits, and reserves the creative punch for the radioactive sign and a subtle blue-channel tone-curve grade. Matiash is careful to say neither is objectively better, and that someone watching may genuinely prefer the older, louder rendition.
See both versions side by side and follow every slider move in the video above.
Join the Fstoppers community for free
-
Post comments and join in the discussions
-
Browse the site ad-free
-
Share your work and get featured in the community
-
Compete in the photo contests for fun and prizes
1 Comment
Yes the "OLD Days of Editing" that most today have no idea how difficult editing used to be! Lets start at the main problem for hobbyists and some Pros with shallow pockets, Yes the Boss editor for digital for the 2000 to some where in the future (from then) PS and Lr EACH cost $800+ and for each full update/upgrade that was till Adobe wanted to compete with all the $100 or less programs coming out that makers of Games artist came out with programs like "Photomatix", I used this a lot due to it was the HDR days where most cameras had like 1 or 2EV bracketing on their cameras and "Photomatix" was the best for HDR mostly it could handle ghosting. Few know than in the early days it was the camera makers that has the editing programs but when a new model cam out that editing program for that camera disappeared forcing you to buy the newer camera.
In 2013/14 Sony came out with the A7/R/S Mod 1's and 2's with Capture ONE for $20 and the A7S M 1 and M2 could do 5 at +/- 3EV but still C1 had some problems with the HDR so "Photomatix" was mostly king but a free set of editing programs Nik Collection with Nik HDR Efex was best with Ghosting but with the other programs put Adobe on alert.
The other thing that was not very good was Noise and also lens + camera profiles C1 had plastic squares you put in front of lens to make a profile as well as a denoise tool BUT Topaz was a new kid with a number of programs also but its Denoise was best.
For us pioneers in editing RAW images it was most times difficult like using the FishEye lenses today we have 10mm Full Frame lenses, Yea! But also Lrc has always had LC's with cameras also.as you saw in the video when he did the LC it changed even today PS/Lrc even has LC's for unchipped lenses like the old Film lenses where I used to do bracketing like 1EV to get one image that was good, how the light meter in the Canon Ftb had needle and the aperture needle had a circle and adjusting the aperture needle up, middle and low with the light needle. the cool thing for us old film people today you can digitize the film and process in PS/Lrc to get great depth.
Back to digital back in 2015 and the A7SM1 was the most used for astro Milky Way capture the word was to bracket at +/-1EV but not informed then the in camera noise reduction was turned off, well no matter for also it was told to take multiple like 10 images then merge in a program well a lot of nothing. But I still have those images taken with unchipped lens like the Rokinon's with whole nights wasted with hot and dead pixels and bracketed +/- 1EV and not 10+ images.
Keep your old images for if not good today may be something learned in the future may help make it great!!!!
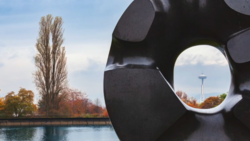
1. Captured with A7SM1 with a Rokinon 12mm f/2.8 unchipped and bracketed 3 at +/- 1ev and processed in Lrc years later.
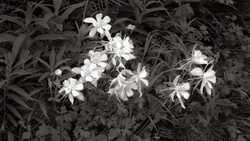
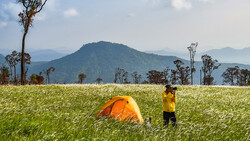
2and 3 captured with Canon T2i using the Promote Control device edited with Nik HDR Efex before and after the merge using with Deghosting a lot of images to merge.
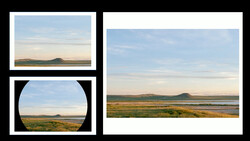
4. captured with Canon T2i using the Promote Control device using "Photomatix"