
Almost a year ago I posted The Ultimate Guide To The Frequency Separation Technique article and soon after that I created our Retouching Academy community group for retouchers and photographers who retouch their own work. We have been seeing a lot of before & after images posted there by artists of all levels from complete beginners to seasoned pros.
And in there we all have been witnessing that one of the most abused and misused techniques by those who work with images of people is Frequency Separation (FS). Mainly by beginners, of course.
I have heard a number of my pro retoucher friends mention that they never use this technique. They fully rely on basic retouching tools, Adjustment layers and Dodge & Burn. But I personally, being a pro photographer (primarily) and a pro retoucher (when I like a retouching job I am offered, as opposed to a full-time pro retoucher) do use Frequency Separation and I love it.
We have had many discussions about whether this technique is valid or harmful for a while in our group. I finally set out to collect all possible FS mistakes that beginners ruin their retouching results with, and asked the Retouching Academy group members to share their observations on this matter.
If you are still working on mastering this technique here’s a long list of everything that you can do wrong when using the Frequency Separation. Read it carefully and see if anything you do is mentioned below.
Thanks so much to the Retouching Academy community members who shared their thoughts and suggestions!
My Personal Approach
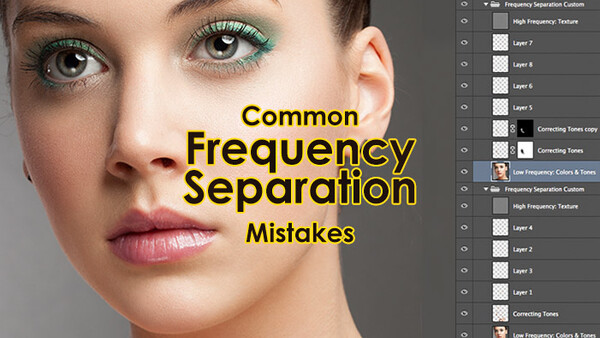
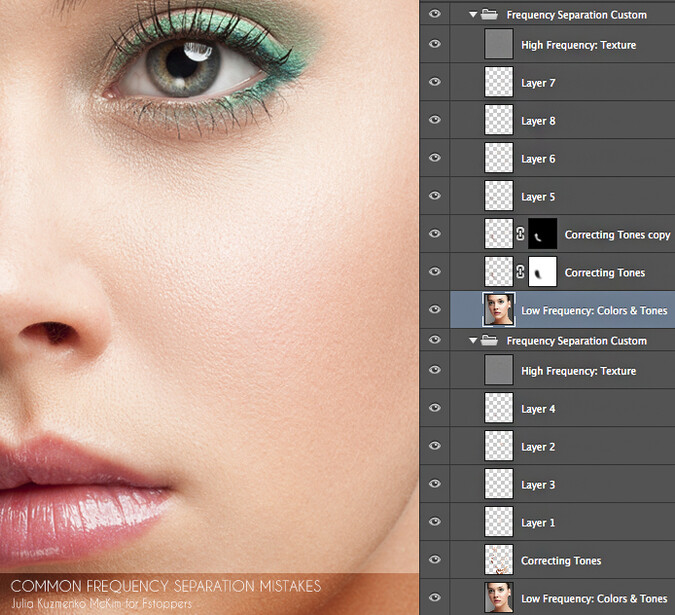
The way I personally set up my Frequency Separation layers is as follows:
- I set the High and Low Frequency layers (see the Guide for the exact steps), then add an empty layer in between them - that is where I even out skin tones and perform all my work under the High Frequency layer.
- I normally use either the Healing Brush tool (smaller size, 0% hardness, sampling set to Current & Below) or just the simple Painting Brush tool with a very soft tip on very low Opacity (5-20% depending on the task at hand) to work on that empty middle layer.
- I never aim to fix all the issues in one same FS set, because I select Pixel Radius that suits the area and problems I am targeting.
- I often duplicate and add many new empty layers between the High and Low Frequency layers to work on different issues. I may adjust their Opacity, change Blending modes and add Layer Masks when I need to.
- Once I am done with the tones, I move up to the High Frequency layer and work on the texture issues with a 90-100% Opacity Clone Stamp (hard-edged brush tip) and sometimes with the Healing Brush tool (hardness 90-100%), both tools must be set to Current Layer sampling.
The main goal here is to fix blemishes and skin problems without blurring or ruining the texture, so the fewer brush strokes I apply here the better it is for the final result. - Sometimes I will not go up to the High Frequency layer within the same FS set - if the Pixel Radius was selected specifically for the problems on the Low Frequency layer, I will set up another FS group specifically for the texture issues. To understand how to correctly select Pixel Radius, please re-visit the Guide and experiment working on the same skin area a few times with various Pixel Radius numbers. Once you see how different settings affect the outcome, you will understand the logic behind this technique and eventually learn to intuitively select appropriate numbers for your High and Low Frequency layers.
Remember to keep your corrections subtle!
Check out these brilliant notes from my friends and colleagues on this topic. I will also add my own comments to expand some points here and there.
Common Technical Frequency Separation Mistakes
- Too high a Flow/Opacity when painting with the Brush tool under the High Frequency layer, stick with 1-2%. ( If you’re unsure what the difference between Flow and Opacity is, check out Michael’s video tutorial: The difference between Opacity & Flow )
- Too large a brush size - it should be smaller the more contours the surface you're working on has. In areas around the mouth, eyes, nose, chin - there are lots of contours in a tight space. Beginners often use too large of a brush here and end up flattening these areas out. One common problem is around the corners of the lips where there is a slight indentation, but people often flatten it all out. Under the lip area tends to get flattened too much as well. Most often the problem is in using too large a brush size in these areas.
- Not respecting the direction of light change: paint along the gradations and not perpendicular to them.
- Not using Color Blending mode for layers between the High and Low Frequency layers when possible.
- Relying on Clone Stamp entirely: some tasks are easier tackled with the help of the Healing Brush tool or even a Paint Brush.
- Doing too much retouching work with just Frequency Separation and forgetting about Dodge & Burn.
- Not sampling often enough when applying corrections on High and Low Frequency layers.
- Not toggling the visibility of the layers with new corrections on and off often enough to see whether or not the corrections are too intense and their Opacity should be lowered.
- Making selections on the Low Frequency layer and blurring them instead of carefully correcting issues with a brush or the Healing Brush tool.
John Paul Zampetti: When working on the High Frequency layer to graft texture from one area to another, not making sure that close attention is paid to how this borrowed texture now appears in its new location. Oftentimes, the appearance of sharpness/softness can vary greatly depending on the information underneath, on the Low Frequency layer (determined by factors such as the lighting, depth of field etc.) and must be adjusted accordingly. The High & Low Frequency layers should always be working in unison.
Siyana Kasabova: I believe the biggest FS mistake related to skin texture is when beginner retouchers use soft healing brush to clean up blemishes on the High Frequency Layer. This smudges the texture and messes it up. Instead, try matching the size of the hard-edged Healing Brush or Clone Stamp tool to the spot or blemish you are aiming to remove.
Philip Sydow: Using an inappropriate radius setting that is either too large (which introduces color and contour into the high layer and makes working close to edges problematic) or too small (which leaves texture on the Low Frequency layer).
Karolina Harz : I think that using Actions while you are just starting working with FS is not a good idea. Beginners tend to use actions (FS, D&B etc.) without understanding the process behind the Action. And that's where much of the problems start.
Julia: I personally have been using Actions for Frequency Separation ever since I’ve learned this techniques, but I agree with Karolina, one must understand the logic behind the technique before they can utilize such Actions properly.
Dwight Smalls : Trying to do the complete process in one pass.
Julia: I personally always go through a number of rounds of Frequency Separation selecting different Pixel Radius for each one depending on what area I am working on with that set of Frequency Separation layers. I also usually have up to 7-10 new empty layers between the High and Low frequency layers.
They may each contain my corrections for different areas and be at different Opacity levels and Blending Modes. I sometimes also add layer masks to these layers if I don’t like some of the corrections I had applied.
Conny Wallström Beginners often don't completely understand what texture actually is. Many believe that texture is just the smallest details on the High Frequency (top) layer - but that’s not entirely correct. You have to be mindful of the middle frequencies that end up on the low/bottom layer as well. If you don't, the image will look blurred as you zoom out even if it looks fine when you’re zoomed in close.
Julia: Check out Conny’s article on the Importance of zooming out when retouching
Common Conceptual Frequency Separation Mistakes
Dennis Dunbar : One of the hardest things for beginners to learn is restraint, keeping the work subtle.
Kate Woodman : Different images call for different techniques and knowing when to use what is something that takes a lot of trial and error to figure out. Regardless of the method I believe a light hand is required when employing Frequency Separation — I think too often beginners rely on this when good old fashioned D&B can accomplish the job in a much more realistic way.
Victoria Behun : Painting the Low Frequency layer is much quicker than evening out colour tones with adjustment layers, or using D&B to sort out shadows and highlights. Being the easier option, it's just too tempting to pass up, especially while you’re a beginner, when everything you do takes hours and hours. However, painting on (or blurring) the Low Frequency layer is destructive - if not used properly, shadows and highlights start to blend together. Your retouch will never look natural, or 'high-end' if you misuse Frequency Separation.
Karolina Harz : Not taking short breaks during retouching; let your eyes rest a bit.
Julia: I cannot stress enough how important it is to take breaks, especially right before you begin to finalize your image for submission to your client.
Dennis Dunbar : FS is just one arrow in a pro retoucher's quiver. There are some tasks where it comes in really handy, like dealing with wrinkles. And there are other tasks, like working on skin, where it's often used as a substitute for getting in there and doing the more time consuming careful work a high end image really demands.
If one uses Frequency Separation for tasks that would be really challenging otherwise, and apply it carefully to make sure the end result is subtle and invisible then it can be effective.
The main problem I've seen the most with this technique is when people use it as a shortcut. For instance, instead of doing the basic skin cleanup by hand. Using it this way usually means it winds up being much more heavy handed than it would be if you just put in the careful work with more traditional techniques.
Many folks just coming up as retouchers spend too much time looking for shortcuts and "tricks" rather than mastering the basics. But if one masters the basics first, they'll have a much easier time using the shortcuts effectively while still producing a high end result.
Danny Meadows : I think the greatest thing holding back beginner retouchers now is that they're basing their work on each other, and not on industry standards.
I have dozens of fashion magazines in my office today, and if you asked who my favourite retoucher was I couldn't name them, it may be 'the unnamed person who worked on that Dior campaign, here let me show you...'
When you're starting out, you're starting in a large pool of beginners and hobbyists, you might engage with them on forums and portfolio sites, but failing to keep one eye on the industry, on your goal, is absolutely disastrous. You can't aspire to the standard of work of a peer without knowing that that peer's work is worth your admiration.
Getting an annual subscription to a top fashion magazine is among the smallest costs of your chosen trade, and no-one who did so would be trying to create that floaty orange-peel texture on a blurry mess produced by FS/IHP. You'd use it more wisely.
I use these techniques myself, I've also used Gaussian Blur on skin in ads for brands you'd recognise. But it's been small, it's been subtle, the noise goes back in and you'd never notice. Learn the foundations before you fight dirty, clone, heal, dodge and burn.
I want to again thank my friends and colleagues for taking the time to share their thoughts with us. I hope these insights and points will help some of you to revise your retouching workflow and get better results using Frequency Separation.
Feel free to share other Frequency Separation mistakes that we might have missed in the comments - the comment section can be just as educational as the article itself.


Join the Fstoppers community for free
-
Post comments and join in the discussions
-
Browse the site ad-free
-
Share your work and get featured in the community
-
Compete in the photo contests for fun and prizes
22 Comments
Fantastic article as usual Julia! Thanks for the great info!
Great article! I had downloaded action and used it until CC came out(doesnt work with it) but found another. Saw I wasnt getting the same results but will check back to this to make sure im approaching it the correct way. Thanks for the article!
Wow, this is extremely useful and valuable information. I can't wait to start working through some of these steps. Thank you so much for taking the time to put together such a informative, timely piece!
excellent article...very useful info
Well though out retouching always trumps tricks. Great article!!
Excellent article! FANTASTIC!!!!!
I have been using FS on some high school kids with really difficult skin and I have been experiencing what Conny Wallstrom discussed. Image looks great at 100% but blurry at lesser size. Great info but how do I fix it :)
Great Julia... agree with everything. Ever since i read about it in MM (which i think where it came from credits to Sean Baker for it and to people who contributed much to that thread) it is the most abused technique in retouching right now.
Great article Julia! You and a number of the other pros mentioned the 2 main mistakes: 1) pro retouching takes time... lots of time and precision; 2) unless you absolutely have an extremely tight deadline, you should consider letting the initial retouch session "rest" awhile. I liken my retouch projects to baking real homemade bread (mix ingredients, let it rise overnight, then bake the next day); rather than that out of a pre-mix box (action-jackson, filter-magic, flatten, deliver). It all comes down to being a connoisseur of taste :)
That's a really good comparison! Poetic :)
Extremely helpful! Awesome article Julia!
Hi Julia, i've been using the FS in some of my retouching, but i often see some issues and i'm not sure i'm doing it right.
I made it step by step, (the FS with Apply image, in this case), created an action where i can alter the Gaussian blur to taste, with the dialog prompting for evcery round of FS.
One of these issues is the softening the FS (in 8 Bit) causes to the image. Although very subtle, i guess after several rounds of FS, the effect may build up and can alter the image substantially, with loss in sharpness and texture, just like if a noise reduction filter is applied.
Your help is highly appreciated!
Below are my settings, .
With these setings i applied FS and merged, made these crops where the affected areas appear.
The first is the original;
The second is the one with apply image method, where se softening happens;
The third is the blur and high pass manually applied (high frequency is 50% opacity and linear light blending mode), where the issue is not present.
I applied some levels to make the issue more evident, it happens in the deep shadows.
From these samples i prefer the rendering that the "blur and high pass manually applied" create. Its that the one you guys use?
Very very very nice article. Very useful. I love all your images.
Your articles have such a high concentration of great information. Makes it very hard to read them just once. Very well done!
Absolutely a great article. I'm starting to learn the techniques about portrait retouch and I'm painstakingly reading all your articles and the others from the great artists you mentioned. A detailed list of must-read articles before the Frequency separation guide will be great and really appreciated ;-)
And sorry for my english :-)
Well all I need to say is that I can see FS and IHP all over the work, if that's what you're going for then it's done well. Remember that you shouldn't be aiming for images to look like retouching, retouching is a process to remove distracting elements and develop colour and tone. Also don't assume the level of retouching that is required, beyond the basic cleanup, the level of retouching should be determined by your client.
Another great one Julia, thanks
Good article, but i've been trying to find a solution to the numerous rounds of frequency separation, how do you have so many groups of this technique and be able to not cancel the effect on the layers above, i am also trying to add a subtle surface blur between the two layers and im not able to do it without canceling the frequency separation layers, anybody help please!
Rubbish