

Every camera ships with default settings designed for the broadest possible audience. Those defaults are tuned for safety, not precision. They prioritize avoiding catastrophic failure over delivering optimal results, which is fine if you're handing the camera to a tourist but actively counterproductive if you're trying to produce professional work.
The good news is that most of these defaults can be changed once and left alone indefinitely. They're not creative decisions you revisit with every shoot. They're infrastructure, the foundational configuration that runs quietly in the background while you focus on composition, light, and the person in front of you. Set them correctly and your camera becomes faster, more predictable, and less likely to make decisions you didn't authorize.
Here are ten settings worth changing today. Most of them take less than a minute. All of them will make your next session smoother than your last one.
1. Auto ISO Limits
Auto ISO is one of the most useful features on a modern camera, and one of the most dangerous if left unconfigured. Out of the box, most cameras set the auto ISO range to something like 100 to 25,600 or even higher, which means the camera is perfectly willing to crank your sensitivity into territory where the noise becomes genuinely destructive, all without asking your permission.
The fix is to set a ceiling. The exact number depends on your body and your tolerance for noise, but a reasonable starting point for most modern cameras is ISO 6,400 for full frame and ISO 3,200 for APS-C. You can push these higher if your camera handles noise well or if you process with noise reduction software like DxO PureRAW, but the point is to draw a line somewhere so the camera doesn't wander into ISO 12,800 during a portrait session because a cloud passed over the sun.
Once configured, auto ISO becomes a genuinely intelligent tool rather than a liability. It responds to changing light in real-time while staying within a range you've defined as acceptable. You get the speed of automation with the guardrails of manual control. It's one of the best compromises in modern photography, but only if you tell it where to stop.
If you're still building confidence with the relationship between ISO, aperture, and shutter speed, Photography 101 covers the exposure fundamentals that make settings like these make sense.
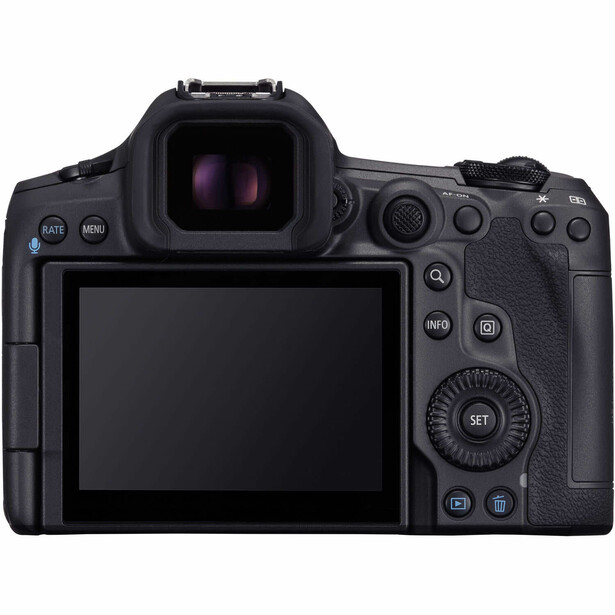
2. Back-Button Focus
This is the single most impactful setting change most photographers will ever make, and it takes about thirty seconds to configure.
By default, your camera's shutter button does two things: it focuses and it fires. This means every time you press the shutter, the camera refocuses, which is fine for casual shooting but a serious problem when you need to lock focus and recompose, hold focus on a stationary subject while waiting for the right expression, or maintain focus on a specific point while firing multiple frames.
Back-button focus separates these two actions. You assign autofocus to a button on the back of the camera (usually the AF-ON button) and remove the focus function from the shutter button entirely. Now the shutter button only fires. Focus happens when and only when you press the back button.
The result is dramatically more control. Press the back button to focus, release it to lock, recompose freely, and fire the shutter without the camera second-guessing your focus point. For continuous autofocus, hold the back button while tracking. For single focus, press and release. One configuration handles both use cases without switching between AF-S and AF-C modes.
It feels awkward for about two sessions. After that, you'll be glad you did it.
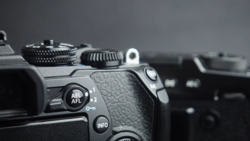
3. Custom Function Buttons
Your camera has buttons you've never pressed. They're sitting on the body right now, assigned to functions you don't use, taking up real estate that could be doing something useful. Most modern cameras allow you to reprogram several of these, and the time you invest in customizing them pays for itself within a single session.
The specifics depend on your camera and your genre, but here are some common reassignments that work well. Map eye-detect AF toggle to a front function button so you can switch it on and off without entering a menu. Assign ISO to a rear dial press so you can adjust sensitivity with one hand. Put white balance on a custom button if you frequently switch between presets. Map your most-used focus area mode to a dedicated button so you can jump between single point and zone tracking without scrolling through a menu.
The goal is to move every frequently used function out of the menu system and onto a physical control you can reach without taking your eye off the viewfinder. Every second you spend navigating menus during a shoot is a second you're not paying attention to your subject, and those seconds accumulate faster than you think.
Spend fifteen minutes with your manual and your camera body. Identify the three functions you access most often during a shoot. Assign them to buttons you can reach with your shooting hand. You'll be faster by the end of the week.
4. Auto Power-Off Timer
The default auto power-off timer on most cameras is set to thirty seconds or one minute. This is designed to preserve battery life, and it does that well. What it also does is shut your camera down in the middle of a portrait session while you're adjusting a pose, having a conversation with the subject, or waiting for the right moment in a candid situation.
You half-press the shutter to wake the camera. It takes a second to boot. The moment is gone. The subject's expression shifted. The light changed. The spontaneous energy you were waiting for evaporated because your camera decided to take a nap.
Extend the timer to five minutes or longer. Yes, this uses more battery. Carry a spare. The tradeoff between a slightly shorter battery life and a camera that's awake when you need it is not even close. A dead battery can be swapped in ten seconds. A lost moment can't be recovered at all.
If battery life is a genuine concern (mirrorless bodies with EVFs are more power-hungry than DSLRs were), keep the timer shorter for travel and personal work and extend it for paid sessions. But for any situation where responsiveness matters, the default timer is working against you.
5. Image Review Duration
After you take a photo, your camera displays it on the LCD for a preset amount of time. The default is usually two to four seconds. This sounds harmless, but it has two consequences that quietly degrade your shooting experience.
First, it encourages chimping. Every frame gets an automatic review whether you wanted one or not, and once the image is on the screen, it's hard not to glance at it. That glance pulls your attention away from the subject, the environment, and the next shot. Over the course of a session, those glances add up to minutes of lost attention.
Second, it drains battery. The rear LCD is one of the biggest power consumers on the camera, and lighting it up after every single frame, including test shots, throwaway exposures, and burst sequences, is a meaningful hit to battery life over a long shoot.
The options are to shorten the review to one second, which gives you a quick confirmation without a lingering distraction, or to turn it off entirely and review images only when you choose to by pressing the playback button. Both approaches are faster and more intentional than the default. Try turning it off for one session and see how it changes your rhythm. Most photographers who make the switch don't go back.
6. AF Area and Point Size Customization
Your camera's default autofocus area mode is usually some version of "wide" or "auto area," which means the camera decides what to focus on. This works surprisingly well in casual situations, but it becomes a liability the moment you need precise control over where focus lands.
Wide-area AF prioritizes whatever's closest to the camera or whatever the algorithm thinks is the subject, and it's right most of the time. But "most of the time" isn't good enough when you need focus on a specific eye in a portrait, a specific player in a sports frame, or a specific element in a layered composition. In those situations, you need to tell the camera exactly where to focus, not ask it to guess.

Switch to single-point or small-zone AF as your default and expand from there only when the situation demands it. For portraits, single point on the near eye is the standard. For action, a small zone or dynamic area gives the AF system enough room to track without letting it wander to irrelevant parts of the frame. For landscapes on a tripod, single point placed at your hyperfocal distance is more reliable than letting the camera decide.
The specific names for these modes vary by manufacturer (Canon calls it "Flexible Zone," Nikon calls it "Dynamic Area," Sony calls it "Zone"), but the principle is the same: tell the camera where to look instead of letting it choose. Your keeper rate will improve immediately.
Precise focus placement matters most in headshot and portrait work, where the difference between a sharp eye and a sharp ear is the difference between a keeper and a delete. If that's your world, Perfecting the Headshot goes deep on the technical and interpersonal skills that make portrait sessions consistently sharp.
7. Highlight and Shadow Clipping Warnings
This feature goes by different names depending on your camera. Canon and Nikon call them "highlight alerts" or "blinkies." Sony and Fujifilm offer zebra stripes. Whatever the name, the function is the same: the camera visually marks areas of the image where highlights are blown or shadows are crushed, so you can see exposure problems in real time rather than discovering them in Lightroom an hour later.
Most cameras ship with this turned off. Turn it on.
Blown highlights are the most common exposure problem in digital photography, and they're the hardest to fix in post because the data is simply gone. A highlight warning that blinks over the brightest areas of your image during playback (or in the EVF on some bodies) gives you an immediate, visual indication that you need to pull exposure back. No histogram reading required. No guessing. Just a flashing area that says "you lost detail here."
The clipping display takes about two seconds to enable in your menu. It adds zero time to your workflow. And it catches exposure problems that the standard LCD preview will miss entirely, especially in bright ambient light where the screen is hard to read accurately.
If you've ever opened a file in Lightroom, dragged the highlight slider to the left, and watched a white sky stay white because there was nothing to recover, this setting would have saved you.
Getting exposure right in camera is half the battle. The other half is knowing what to do with those files once they're on your computer. Mastering Adobe Lightroom covers the import-to-export pipeline, including how to evaluate and correct exposure issues that clipping warnings help you catch in the field.
8. Minimum Shutter Speed in Auto ISO
This setting is auto ISO's quieter, more overlooked sibling. Most photographers set their auto ISO ceiling and consider the job done, but the ceiling only controls how high the ISO goes. The minimum shutter speed control tells the camera the slowest shutter speed you'll accept before it starts raising ISO at all.
Without this configured, auto ISO typically follows a reciprocal rule (roughly 1/focal length as the minimum speed) or uses a camera-determined default that may not match your needs. The problem is that the reciprocal rule doesn't account for subject movement, shooting style, or stabilization. If you're shooting a static landscape on a tripod, 1/60 might be perfectly fine. If you're shooting a toddler at a birthday party, 1/250 is barely fast enough, and the camera's default might happily select 1/80 and give you a blurry child.
Set the minimum shutter speed based on what you're shooting, not what the camera calculates. For general portrait work, 1/200 is a safe floor. For action or kids, 1/400 or faster. For controlled studio work with strobes, you can drop much lower because the flash duration freezes motion.
This setting, combined with a sensible auto ISO ceiling, creates a two-boundary system that keeps both your shutter speed and your ISO within ranges you've predetermined. The camera adjusts within the box you've built. It's auto exposure that actually behaves the way you want it to.
If landscape work is your primary genre and you want to go deeper on the technical and creative decisions that happen before and after the shutter fires, Photographing the World 4: Advanced Landscapes covers the full workflow from field technique to post-processing.
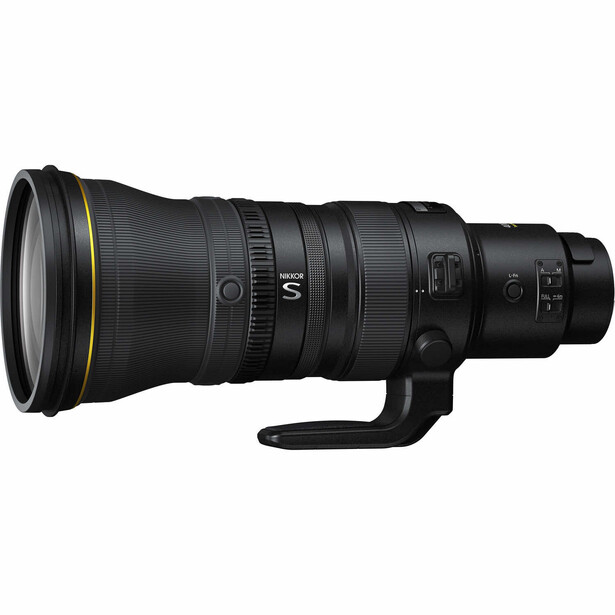
9. Focus Limiter on Telephoto Lenses
This isn't a camera body setting. It's a physical switch on the lens barrel, and it's one of the most overlooked controls on any telephoto or super-telephoto lens.
The focus limiter restricts the distance range the autofocus motor will search. Most telephoto lenses have a switch with two or three positions: full range, a near-to-mid range, and a far-to-infinity range. When set to full range, the lens hunts from its minimum focus distance all the way to infinity every time it loses the subject. On a long telephoto, this can take several seconds of loud, fruitless motor grinding while you watch the moment disappear.
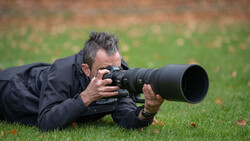
If you're shooting wildlife at distance, set the limiter to the far range. The lens skips the close-focus search entirely and finds the subject faster. If you're shooting sports from a fixed position at a known distance, limit the range to exclude the near field. If you're doing macro work with a telephoto, limit it to the close range so it doesn't hunt to infinity when you're working at two feet.
This is one of those settings that feels insignificant until you're standing in a field, a bird lifts off, your lens racks from three feet to infinity and back twice before locking on, and the bird is gone. Set the limiter before the shoot. Match it to the distance range you're actually working in. Adjust it when the situation changes. It takes one second and it saves the shots that matter most.
10. File Naming Convention
Every camera ships with a default file prefix: IMG_, DSC_, or something similarly generic. These prefixes are meaningless. They tell you nothing about which camera took the image, which job it belongs to, or when it was captured. And they create a specific, avoidable problem the moment you work with more than one camera body or import files from multiple shoots into the same Lightroom catalog.
If both bodies use the default prefix with the same numbering sequence, you will eventually get duplicate file names. Lightroom handles this, but your folder structure might not, and the confusion when two files named DSC_4527.raw exist in the same directory is entirely preventable.
The fix is to change the file prefix on each camera body to something unique. Some photographers use their initials followed by a body identifier (AB1_ for body one, AB2_ for body two). Some use an abbreviation for the camera model. Some use a job code system. The format matters less than the fact that it's distinct, consistent, and different across bodies.
This takes about thirty seconds in the menu, and you'll never need to change it again unless you sell the camera. It's one of those invisible quality-of-life improvements that prevents problems you didn't know you were going to have.
Conclusion
None of these settings are glamorous. None of them will show up in your portfolio or impress clients. But collectively, they form the foundation that lets your camera work with you instead of against you. The photographers who shoot fastest, miss fewest, and deliver most consistently aren't always the ones with the best eye or the most expensive gear. They're often just the ones who spent thirty minutes configuring their camera before they ever pointed it at a subject.


Join the Fstoppers community for free
-
Post comments and join in the discussions
-
Browse the site ad-free
-
Share your work and get featured in the community
-
Compete in the photo contests for fun and prizes
5 Comments
Very well covered for all things to set for your Genre!
Most mirrorless cameras today have the dual ISO steps of zero noise but again check for stills and video but the Sony A7SM3 for stills is 640 then 12800.
The one I think is only on Sony cameras starting with Mod 2's and very few even Sony owners even know about and that is Bright Monitoring hidden in the button selection of items to select from, assign to the trash can for easy to find in the dark. What it does is is sample's at a fast rate and is like night vision giving a very bright image to see in the darkest of places best for framing a capture to see everything and but even is in color so you see foliage even flowers of color but when you face a bright place it will auto shut off and when you do a capture it reverts back to the non Bright Monitoring info for the capture not the Bright Monitoring screen info. I started with the A7SM1 that did not have it and not till I got the A7M3 and found on the section wheel but was the greatest thing for night MW captures. I think it is on all Sony cameras but know one knows about it. I used in Carlsbad Caverns, it is lit and when ever you point to a lit area it turns off so use in very dark places.
Also pay attention to Jpeg only settings that yes affect jpegs only BUT the images on the LCD and EV screens are a Jpeg, kind of like the histogram is yes related to the Jpeg settings and colors you see are of also the settings you select for AWB to Cloudy or bright or using a grey card to get your white balance preset. So if what you see on the LCD is not what your eyes see then there is a need to check your setting. Also another in this area is with Sony is D-Range Optimizer preset to auto.
there is a funny story of a National Geographic photographer who would send his jpegs back to head quarters and later send his RAW's and with instructions to make the RAW's look like the Jpegs. In the end there was no way to do it mainly due to D-Range Optimizer that does a auto on shadows of an image as well as other Jpeg only settings making the image he saw on the LCD not anywhere near the RAW image correctable to. Info you can edit the RAW in the Sony IEDT editor where you can select the different levels in D-Range Optimizer and what you never see in a YouTube editing video is in Lrc main section is the 4 little blocks that have the cameras jpeg camera profiles you can scroll down till you get a good starting point and also some will show the color picker but most not for there is a little to play with the section. Again info I like Astro Milky Way captures and have found portrait selection best for colors of a beach and color s of foliage etc. but also if I use the picker on the galactic center or the white of the surf not only do i get a nice baby blue sky to start with BUT few know of the colors of night sky glow of say oxygen or carbon dioxide where atoms are vibrating making those colors and most astro photographers do not know about and will edit them out. I found that my A7SM1 images had a lot and found a NASA film photographer who explained it all.
https://clarkvision.com/articles/ethics-in-night-photography/
You will see those colors in the night sky and how to capture them, eye opening!!
I was thinking of going back to back button focusing. The only thing is that with OM System high end cameras, C-AF uses phase-detect, while S-AF prioritises contrast-detect for accuracy. I'll have to think about how to work that in.
This was actually a very helpful read. I recently discovered something related to this topic that explained it in a much simpler way and honestly changed my understanding. Glad I found this discussion!카드깡
A more useful and predictable setting for ISO is ISO safety shift. it’s available on Canon. I don’t know if other brands a version or not. This is kind of like auto IsO but allows you to set your Iso like you normally would then if your exposure drops too low it will shift it to cover exposure. or if it’s bright it will do the opposite reduce your ISO.