Megapixel counts dominate camera marketing, and most buying decisions reflect that. But the actual difference between a 24-megapixel sensor and a 50-megapixel one is almost certainly smaller than you've been led to believe.
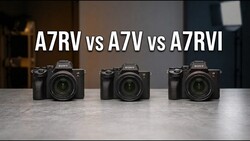
Coming to you from Martin Castein, this practical video cuts through one of the most persistent myths in camera gear discussions. Castein walks through the real pixel dimensions behind the numbers: a 24-megapixel file is 6,000 pixels wide, while a 50-megapixel file is 8,102 pixels wide. Doubling the megapixel count doesn't double your image size, and once you see the actual numbers side by side, the case for upgrading gets a lot harder to make. He's direct about where more megapixels genuinely help: cropping. If you shoot wildlife, birds, or sports where your subject is far away and you need to crop significantly, a higher-megapixel camera like the Sony a7R V gives you a real, meaningful advantage.
Where Castein gets more interesting is in separating resolution from image quality, and most megapixel debates skip this entirely. Resolution is a pixel count. Quality comes from light, lens, technique, and sensor generation, none of which have anything to do with how many megapixels you have. A flat, poorly lit shot on a 50-megapixel camera with a weak lens will lose to a 12-megapixel shot made with good glass and good light. He makes this point plainly: more pixels just give you more of a bad image to look at. He also addresses the print question directly, noting that he's printed 6-foot portrait canvases for paying clients from a Canon EOS 40D, a 10-megapixel camera, and those clients were completely happy with what they got.
The low-light argument is another area Castein addresses and it's worth paying attention to. The common claim is that lower-megapixel cameras perform better in low light because larger pixels capture more light. There's something to it, but when you view images at the same display size, which is how anyone will actually see your photos, the noise difference between a 24-megapixel and a 50-megapixel camera from the same sensor generation is far smaller than the spec-sheet debate suggests. He also touches on AI upscaling tools like Lightroom's Enhance feature and Topaz Gigapixel, which have gotten good enough to meaningfully close the gap between lower and higher resolution files. There's more in the video on how these tools change the calculation, and how Castein thinks about the editing side of the equation. Check out the video above for the full breakdown from Castein.

Join the Fstoppers community for free
-
Post comments and join in the discussions
-
Browse the site ad-free
-
Share your work and get featured in the community
-
Compete in the photo contests for fun and prizes
13 Comments
When it comes to looking at prints, I’ve noticed a difference between photographers and non-photographers. Non-photographers will just enjoy looking at a printed image, while photographers will “examine” a printed image, looking at things like fine detail and noise. So when it comes to megapixels and prints, one factor is who will be looking at your prints, and whether or not you care if people are simply enjoying your prints or are examining them.
...and whether they use a 10x loupe.
You might be correct that scrutinizing details is mostly a photographer's obsession. However, I make no apologies for that. If someone wants to look at a photo on a wall from 20 feet away and simply enjoy the mood and feel, that's fine. The reason I make a print though is to enjoy examining the details of a scene that I would never have noticed or appreciated otherwise. That's what distinguishes photography from all other art forms, and why I own a camera in the first place.
Granted, 24 megapixels is more than enough for my own personal prints, but if I'm putting my name on a 40 x 60 print for someone's wall, I can't get enough good quality resolution. And it's never lost on me how many customers will, indeed, comment on the clarity and detail of a large wall print when delivered, mainly because there is so much printing made from cellphones where clarity and detail do not exist.
As an event shooter, the only reason why I have cameras with more than 33MP is so I can use Crop Mode to get more reach from a prime and still get at least 18MP. I've got 24" prints made from the 16MP RAW file of a Panasonic GX7 Micro Four Thirds camera that are as crisp and detailed as I could want.
Won't you run into issues when sharing or showing others such prints. Likely 99%+ of people will start by looking at the overall image at a small distance to see it all at once, but then they will move much closer and start examining the fine details. E.g., imagine seeing a landscape image, and then noticing a tree in the distance, odds are people will want to see if there is a squirrel in that tree, and if there is, they may want to see if the squirrel was smiling or playing with a toy or something.
"Won't you run into issues when sharing or showing others such prints"
No, I've sold lots of them. If you think 16MP at low ISO isn't enough for a crisp, detailed 24" print, it's probably because you haven't yet learned how to apply proper output sharpening. Makes all the difference in the world.
The biggest debate in cameras! I started in full frame with the Sony A7SM1in 2014 and captured by first Lunar eclipse using a Canon FD telephoto lens with adapter and used it for the next 3 years with no problems with large poster size print.
Today I have both the A7RV and the A7S III and both work great getting useable prints of any size. The only real differences are for me, I like doing Milky Ways, is shutter speeds at night and the A7RV requires a faster SS due in part to sensor pixels. Let me point out that both capture the image the same clarity and sharpness.
If you look at PhotoPills app and the Spot Stars section and comparing SS with the same lens MM and F/# (I use Accurate) say for the 14mm f1.8 the A7SM3 gets 10.47s SS and the A7R5 gets 5.93s SS.
A key point is the faster SS where most all Astro Milky Way Photographers capture the MW Arch and to do that you do it with a panorama rig and the reason for the super ultra wide lens is in portrait view you get more sky above the arch with more pin point stars. With a higher sky when all 9 images are merged you get a wider image not looking like a pano. The faster time of each image and with camera NR on you are able to move to the next click on the pano rigs next degree setting you can do a 200+ degree pano in less than 90s. This allows for 2nd pano from the other direction and if one bad image from either one you can just take one from the other. The other great thing is walking and capturing in different spots or even going to a different place during a long June/July night where things start just after sunset even during the blue hour to the next blue hour and sunrise, I have captured up to 5 different places in one night and most times you are playing with weather and may only get one night that month.
So do you take the 12MP or 61MP, I always take both just for the fun of experimenting and doing that zoom in noise check, you get the same image with both and as big as I ever need is poster size I give as gifts.
The two left images taken with a 10mm on the A7RV but the left is a crop of the right. Most would use the A7SM3 for the low light but The A7RV does it with no problems.
For resolution there is no real limit since just like you can never have too much RAM or storage, you can never have too much resolution. The reason is that everyone likes being able to explore an image. The mockup/ example attached likely represents a tiny fraction of the resolution demands that 99.99999% of people want in an image. Ultimately we will need cameras and lenses that can deliver on multi-gigapixel levels of resolution, and eventually reaching the petapixel level of resolution.
Beyond that for prints, many upper mid range to higher end printers offer a print volume of 17x22 inches and a DPI of around as high as 2400DPI, and ideally you would want a camera and lens that can deliver on that print resolution, though to ensure benefits from printer improvements in the coming years, we need cameras that can offer multiple times the resolution at reasonable print sizes.
DPI is DOTS (of ink) Per Inch on paper (or other physical medium). It is a printer spec, not an image spec. Since many microdots of ink can be mixed to create the exact color of a single image pixel, this number is typically much larger than the 300 (captured) PPI - PIXELS Per Inch - that is near the limit of what the naked human eye can discern. I expect that most people would have a very hard time distinguishing a 61MP image from a 24MP image at 17"x22", even up-close. I've made and sold 18"x24" prints of 16MP captures that are very detailed and crisp.
You are correct. It's not a terribly difficult concept to understand, but a lot of pretty decent photographers misunderstand the relationship between PPI and DPI. Probably because so many photographers don't give much thought to the printing side of photography.
And while 300 PPI is the industry standard for image resolution, I will generally print as low as 200 PPI for a larger print (something such as 24 x 36), rather than up-scaling the original file just to reach 300 PPI for the sake of attaining some magical number.
I, too, print at 200 PPI rather than upscale. On matte and semi-matte papers, I can't see the difference. On canvas, I can go even lower.
For me, I usually worry about the small details, e.g., if I take a picture of someone working at a factory and one of the machines has has a vent and cooling fan in view through the vent grill, and along power cable to the fan is text on the insulation of the wire that lists the wire gauge and other details. If the camera was able to capture that level of detail, even though it is not the subject of the image, then I at least want to ensure that a resulting print can show as much of that detail as possible so that when someone ultimately brings the image as close as their eye can focus, they will be able to see that detail.
Just like how many people will take a digital photo, and zoom into it at 100% and beyond to examine what details were captured, it is good to allow that experience translate to a print as much as the capabilities of the printer and paper would allow.
There is one more point. Downsampling a 50mpx to 24 increases dynamic range. This is the idea behing quad Bayer in smartphones.