

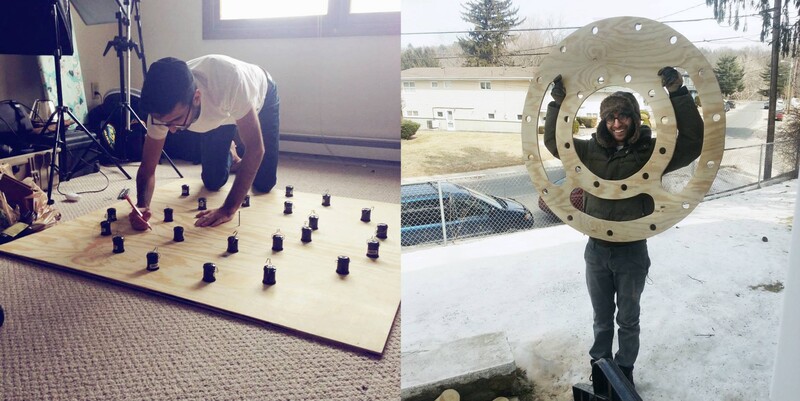
The largest ring light I've ever seen consists of 27 bulbs and is four feet in diameter. Six months ago, I built it. With so many questions left unanswered, I put together a short film that explains how I built it, why it was built, and why it's the most amazing light I've ever used to date.
The strongest asset to the ringlight is continuous lighting. This helps with three things:
- Being able to shoot a shallow DOF without the need of an ND filter.
- No flashing strobes.
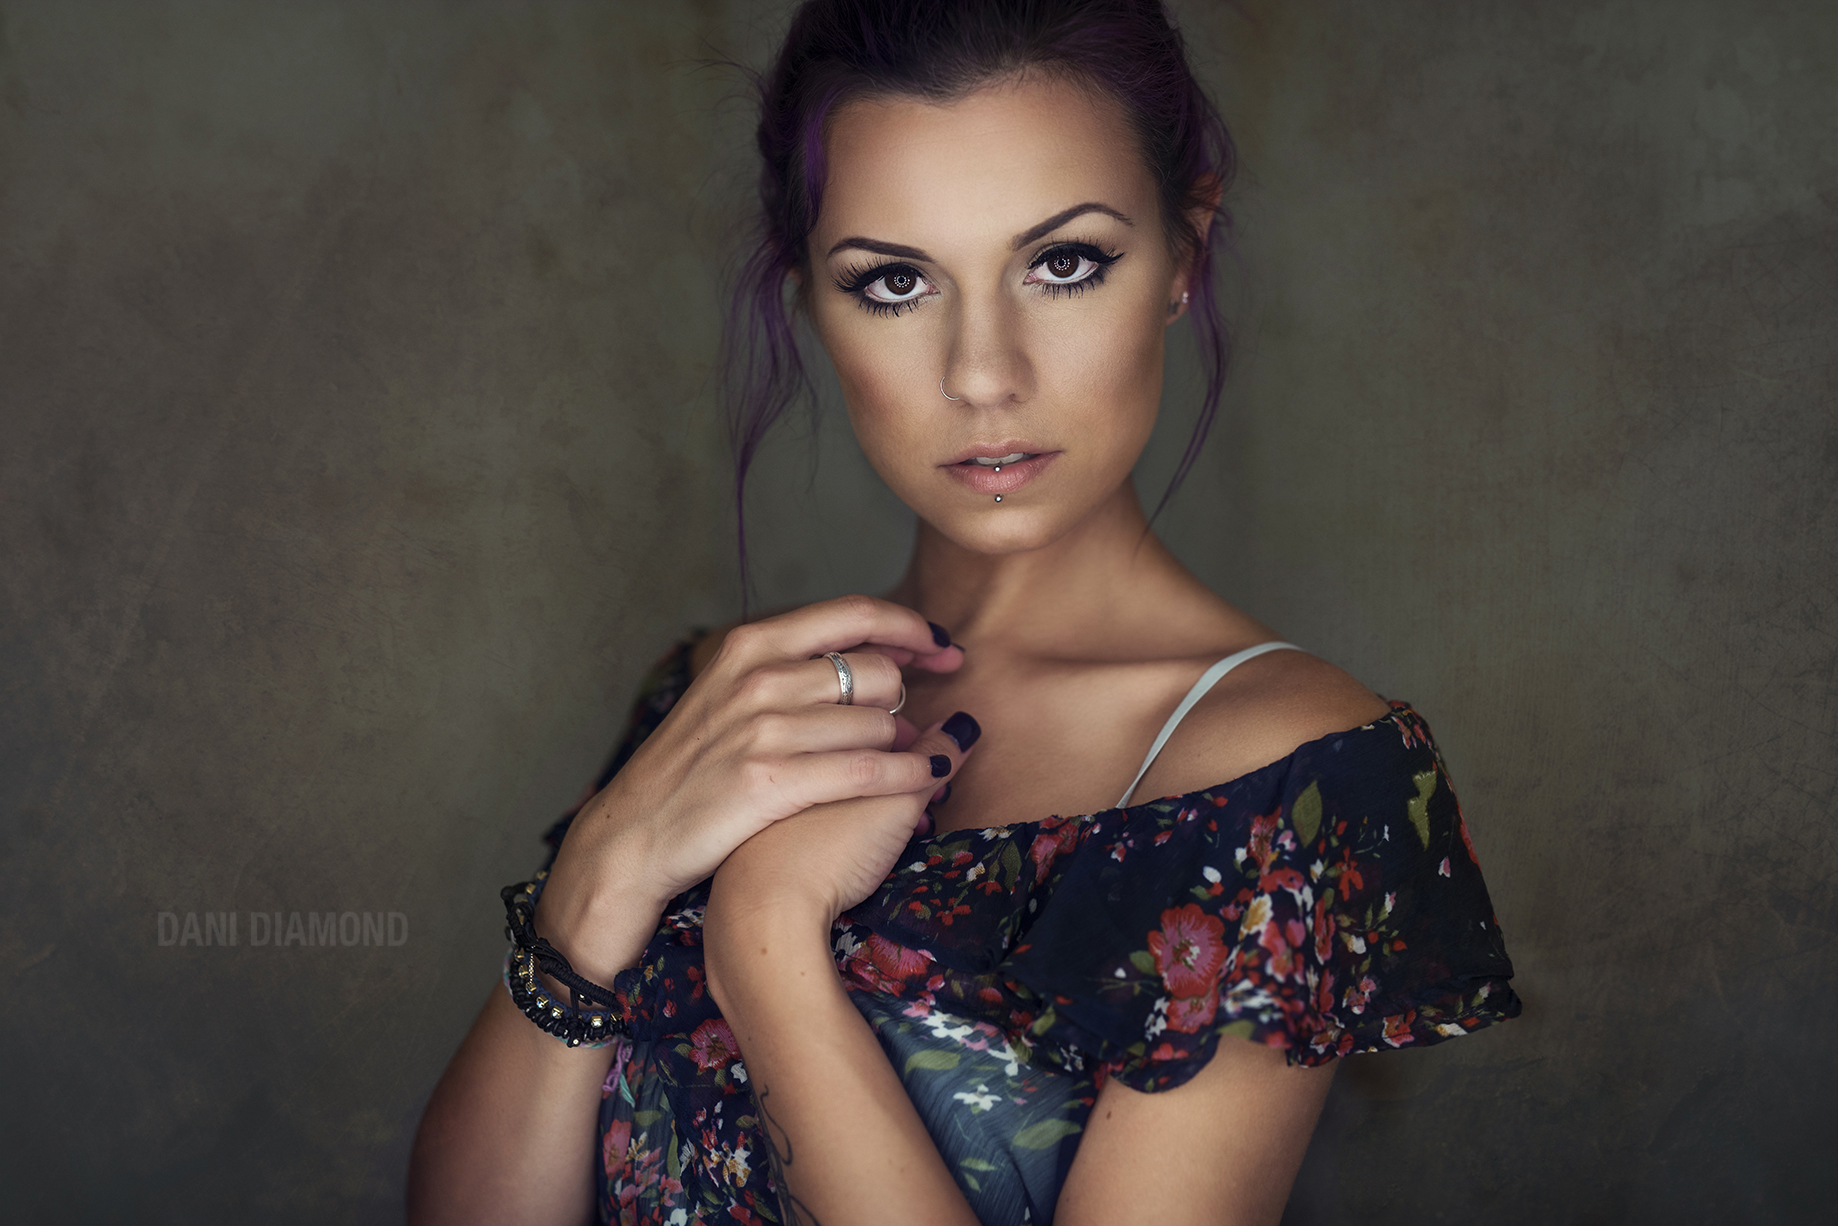
- The pupil in my subjects eyes are very small making the colorful iris stand out. This is due to the fact that a person pupil becomes small when they are looking at something bright (ex: being outside vs a dark room). Modeling lamps are nowhere as bright as this ringlight.


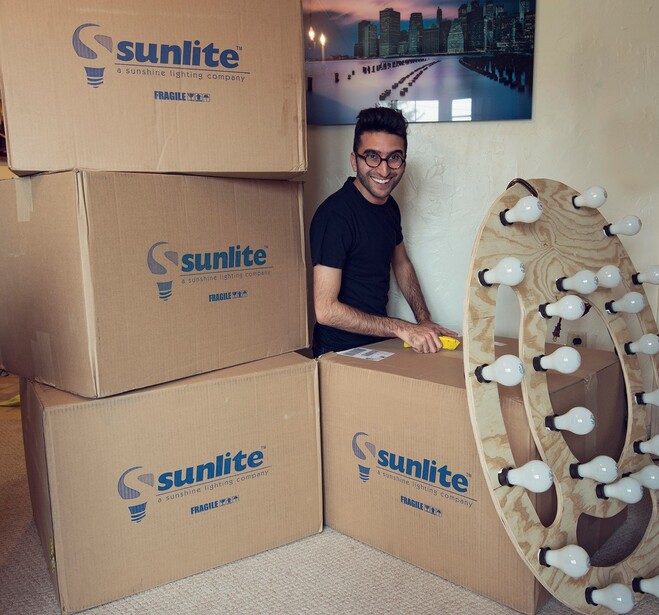
What gave me the idea to build this was a photographer named Jay Russel. His ring light was the product of a two year experimentation. After watching him over a few month, I decided to go out there and build one myself with 3 priorities in mind: clean, cheap and big. With $120 in supplies and two days of work, the ringlight was complete. Within a week I was endorsed by Sunlite - who sent me over a thousand light bulbs to use (The progess of this project can be seen on my personal Facebook by scrolling the images on my wall).
Jay wrote a blog post on 500px worth checking if you're interested in building your own.
The current bulbs I'm using are Sunlite Halogen 42W Soft White Bulbs. They aren't as cheap as incadescent bulbs, but they aren't as warm either. If you are mixing ambient light with the ringlight you may want to go with a CFL daylight bulb. The dimmable ones are quite expesive though. Keep in mind you don't need high wattage bulbs, 27 low wattage bulbs still gives off a LOT of light.

I stepped out of the box and literally into a circle- a ring of light. Over the years I have learned to take risks and chances like this, and have been greatly rewarded. I hope my video is not only informative, but is also inspirational. Take risks of your own on your path to creation- what can you come up with?
Filmed by Moshe Bree


Join the Fstoppers community for free
-
Post comments and join in the discussions
-
Browse the site ad-free
-
Share your work and get featured in the community
-
Compete in the photo contests for fun and prizes
84 Comments
Awesome video, thanks for sharing!
Dude, these are stunning, especially the first shot of the little girl. Brilliant stuff.
Do you have discussed anywhere any insights on your processing? This lighting modifier is awesome, but your processing of course is where the shots truly become killer. Especially the one of the girl with purple hair
thanks for taking the time to put this together dani
i like doing my own thing, like yourself. all the while taking inspiration from those around me.
Great video. thanks for sharing.
That's a great description and plenty easy! A router, jig saw and some electrical and you've got your base! Thanks for sharing!!
I love this thing but had a fun idea. Could you imagine how awesome this would be if you used 30 Phillips Hue bulbs? Except it would bankrupt a small country....
Excellent DIY project. It sure does produce wonderful results.
Dude...the magician reveals the trick! I'll have to watch the video when I get home(blocked here at work) but I knew that there was something much bigger than the average ring-light going on.
Great work as always...your pictures are the proof.
No problem, I just watched the video and it is an awesome DIY setup that is cheap and obviously produces amazing results. I will say this though, I'm enamored with the post processing you have on your portfolio but until I saw this video I didn't quite realize where you were "starting-from" in an OOC shot...this does take just a little of the magic out :)
While they are expensive, have you considered LED lightbulbs? There are consumer based models that are fully dimmable have at least some color temp choices, etc that would help in both reliability(don't burn out as easily) and heat concerns. I switch some bulbs in my apartment for them and will not look back.
In any event, thanks for sharing this...creating some home-made DIY project that makes such spectacular results is such a cool thing. This is WAY more inspiring than the latest camera body review or 1.4 lens.
Wow, what a concept. I haven't seen the video yet because I'm at work but would you mind sharing the exposure info on some of these images? Awesome work my man!
Look at Dani's fstoppers portfolio you can find the exif of his images !
Thanks Julien, I never thought of that. I'm new to Fstoppers and haven't quite figured everything out just yet.
I have build mine last week This was my first try with it !
https://fstoppers.com/photo/27797
My post processing is not as good as Dani's but i feel it. It cost me 150 canadian dollar. I can't watch the video cause i am at work but Dani, have you installed a dimmer switch ? For mine I have installed 2 dimmer switch, one for each ring, (first ring 8 bubls and second 12). I Use 60 W bulb.
He installed 2 dimmers (one for each concentric circles!).
Have you tried around with (costier) but less hot lights? (CFL, led?)
Not yet, I am afraid of flickering with led lights but it look like we will not be able to buy incandescent bulb in Canada at the end of the year. That's what the vendor told me.
Actually they are not allowed to restock with traditional bulbs but can sell the remainder of their stocks... It's CFL and LED from now on!
Yeah you're right! Sorry!
Not yet, I am afraid of flickering with led lights but it look like we will not be able to buy incandescent bulb in Canada at the end of the year. That's what the vendor told me.
Nice! I can see the similarities in the look now....it's very unique and seemingly different from other ring-lights such as AlienBees or Orbis(which I own).
I love the effect it leaves in the eyes , great video thanx for sharing man :D
Hey Dani! Great stuff, But I was wondering what type of Bulb Socket are you using?
great video.... I have heard of flicker before.... do these lights flicker? If yes, how do you manage shutter speed?
thanks... I needed this information
I tried once in 2011 with an attachable ringlight built from a fluorescent circular light mounted on a wood plate that attaches to the camera and a plastic white cake plate cut up to hold the light. But gave up because nowadays you can get a big ringlight by less than $120, my gf got a cover on Popular Photography last year using one those (Walimex). I have used the Walimex with strobes and underwater lighting magic for this shot https://fstoppers.com/photo/24689 . Then again, it is super fun to play around witht he build and maybe get zapped while doing the wiring :D
If I electrocute myself building this you guys can split up all my gear.
Looks great everywhere except the eye reflection - I find the multiple lights very distracting form the image... otherwise great pics.
This is brilliant! I want one so bad!
fantastic Dani ! I was hoping for a video like this - I just built my very own ringlight, and was curious to see your wiring, aswell as how close to position it !
VERY cool! I think I might try it!
Few suggestion though:
1) Wirering your lights "in series" makes for a PAIN when one goes out. Parrallele connections would cost more wire (not much...) and make a bit more mess of the back, but would make it MUCH more easy when one bulb goes out.
2) I KNOW cfls aren't that popular since they can fliker in color, but they would make the set up less hot and MUCH more comfortable for the model. You could look up for LED spots too. The main advantage of led is that they consume so much less power, you could plug this rig into a PCB Vagabond mini lithium and get a decent battery life! (42 incadescent lights equates to 2W in led lighting!!)
I'm wondering if the snap in connectors he used do not have the a parallel mechanism in them already. Part of me things they do because he can clearly remove one light from the outside ring and the whole circuit still works.
Dani, what types of bulbs did they send you and were LEDs part of the tests you did? LEDs would cost a lot less to run, they would be way cooler, the bulbs would last longer, and as you said you could run them off battery power. Maybe the LED lights didn't perform as well as the incandescents though.
I doubt this snap connector makes it parallel. He mentioned using extension cords and splitting them to connect the light fixtures. I've never seen an extension cords allowing for parallel connection while being split and hacked in.
I'd love to here from him about that AND Julien Kauffman too on how he did his parallel connections!
How do you explain the system working with a bulb missing then? I think all the bulb connectors are doing is they are probably just puncturing the extension cord and "tapping" into the wire. Obviously I have no idea but I don't think he cut the wire and then redirected the circuit but rather just added the light bulbs to the circuit so they were connected much like the steps of a ladder are connected to the outside rails.
he is on parralel. He has the exact same wiring as mine. I also use a power cord. Actually the first bulb is link to the second with 2 wire, the second to the third with to wire. etc . at the last bulb, you have 2 wire, white and black. Then you have a dimmer with a minimum of 3 wires and your power cord with 3 wire. You connect one wire of your power cord to the dimer. the green from the dimer to to the green from your power cord and the last wire of yoru dimer to the last wire from your bulb. BUT for everyone who would like to try it ! if you are not sure, check with an electrician !
It works !! :D
https://fbcdn-sphotos-b-a.akamaihd.net/hphotos-ak-xap1/t1.0-9/10584073_…
Parallel : http://en.wikipedia.org/wiki/Series_and_parallel_circuits (it's better explained here). Do you think it coulb be possible to craft something with this ring light to have something similar as a broncolor para ?