
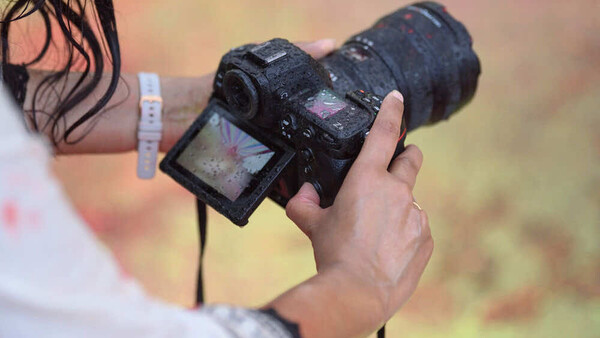
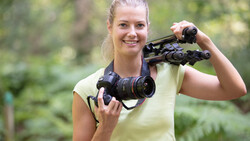
A new camera presents you with hundreds of settings, and the manuals that explain them are written as if you already understand the vocabulary. You do not need to learn all of it. You need to understand about ten settings well, because those ten control almost everything about how your photographs turn out. Here is what each one does, in plain language, without the jargon that makes photography sound harder than it is.
1. ISO
ISO controls how much your camera brightens the light it captures. A low ISO (100 or 200) applies little or no amplification, which produces the cleanest possible image but requires plenty of light. A high ISO (6,400, 12,800, or higher) amplifies the signal from the sensor, which lets you shoot in dim conditions but introduces grain, called noise, that makes the image look speckled and less detailed.
A quick note on a common misconception: people often say ISO makes the sensor "more sensitive" to light, but that is a holdover from the film era. A digital sensor's actual sensitivity is fixed. What ISO really does is amplify the signal the sensor already captured, the way turning up the volume on a quiet recording also raises the background hiss. That is why higher ISO brightens the image and adds noise at the same time.
Think of ISO as the setting you raise only when you have run out of other ways to get enough light. In bright daylight, keep it at 100. Indoors or at dusk, raise it as needed. The tradeoff is always the same: higher ISO buys you the ability to shoot in less light, and it costs you image quality. Modern cameras handle high ISO far better than older ones, so a little noise is usually preferable to a photo that is too dark or blurry.
2. Aperture
Aperture is the size of the opening in the lens that lets light through. It does two things at once: it controls how much light reaches the sensor, and it controls how much of your photo is in sharp focus, which photographers call depth of field.
Aperture is measured in f-stops, written as f/1.8, f/5.6, f/11, and so on. The confusing part is that the numbers work backward: a small number like f/1.8 means a large opening, and a large number like f/16 means a small opening. A large opening (f/1.8) lets in a lot of light and produces a shallow depth of field, where your subject is sharp and the background melts into a soft blur. A small opening (f/16) lets in less light and keeps more of the scene sharp from front to back, which is what you want for landscapes.
If you have seen a portrait where the person is crisp and the background is creamy and out of focus, that look comes from a wide aperture like f/1.8 or f/2.8.
3. Shutter Speed
Shutter speed is how long the camera's sensor is exposed to light, measured in fractions of a second. A fast shutter speed like 1/1,000 s freezes motion, so a bird in flight or a splashing wave appears sharp and frozen. A slow shutter speed like 1/4 s lets motion blur, so a waterfall turns silky and smooth or a moving car becomes a streak of light.
Shutter speed also affects how much light reaches the sensor: a longer exposure lets in more light, which is useful in dim conditions but risks blur from both subject motion and your own hand shake. As a rough rule, handholding the camera below about 1/100 s starts to risk blur from your hands unless your lens or camera has image stabilization.
The creative decision is whether you want motion frozen or flowing. The technical decision is whether you have enough light to use the shutter speed you want.
4. Exposure Compensation
Exposure compensation is the single most useful setting most beginners never touch. When your camera is in any automatic or semi-automatic mode, it decides how bright the photo should be. Sometimes it gets that decision wrong: snow comes out gray, or a backlit subject comes out too dark.
Exposure compensation lets you override that decision without leaving the convenience of automatic mode. It is usually a dial or button marked with a plus and minus symbol. Dial it toward plus to make the image brighter, toward minus to make it darker. If your photos consistently look too dark or too bright, this is the fastest fix, and it works in aperture priority, shutter priority, and program modes.
5. White Balance
White balance tells the camera what color the light in your scene is, so it can render colors accurately. Different light sources have different colors: daylight is fairly neutral, household tungsten bulbs are warm and orange, shade is cool and blue. Your eyes adjust to these shifts so well that you barely notice them, which is why a white wall looks white to you under almost any light. The camera has to make that adjustment deliberately, and while auto white balance handles it automatically most of the time, it can still get the color wrong, which is why indoor photos often come out with an unpleasant orange cast.
Auto white balance handles most situations well, but it can be fooled. If your indoor photos look too orange or your shade photos look too blue, switching from auto to a specific preset (tungsten, daylight, shade, cloudy) tells the camera exactly what kind of light it is dealing with and corrects the color. If you shoot in raw (see setting 10), you can also adjust white balance freely after the fact in editing, with far more flexibility than a JPEG allows, though even raw cannot always rescue tricky mixed-lighting situations perfectly.
6. Metering Mode
Metering mode is how your camera measures the light in a scene to decide on exposure. There are usually three options. Evaluative or matrix metering reads the entire frame and balances it, which works well for most situations and is the right default. Center-weighted metering prioritizes the middle of the frame. Spot metering reads only a tiny area, which is useful when your subject is much brighter or darker than the background, such as a face lit by a spotlight against a dark stage.
For most photography, leave it on evaluative and forget about it. The setting becomes useful when you have a high-contrast scene and want to tell the camera exactly which part to expose for.
7. Focus Mode
Focus mode determines how your camera's autofocus behaves. There are two modes that matter. Single autofocus (called AF-S on Nikon and Sony, or One-Shot on Canon) locks focus once when you half-press the shutter and holds it there, which is perfect for subjects that are not moving: portraits, landscapes, still life. Continuous autofocus (called AF-C, or AI Servo on Canon) keeps adjusting focus as long as you hold the shutter halfway, which is what you need for moving subjects: children, pets, sports, wildlife.
Choosing the right mode is one of the most common sources of out-of-focus photos. If you use single autofocus on a moving subject, the camera locks focus where the subject was, not where it is now, and your shot comes out soft.
8. AF Area Mode
AF area mode controls which part of the frame the camera uses to focus. Single-point lets you place one small focus point exactly where you want it, which gives you precise control and is ideal for portraits where you want to focus on the eye. Zone or group modes use a cluster of points, which is easier to keep on a moving subject. Wide or auto-area lets the camera choose, often with subject detection that finds and tracks faces, eyes, or animals automatically.
For deliberate, careful shooting, single-point gives you the most control. For action, a wider area or subject tracking keeps the focus on a moving target better than you could by hand.
9. Drive Mode
Drive mode controls what how the camera behaves when you press the shutter. Single shooting takes one photo per press, which is the default for most situations. Continuous or burst shooting takes a rapid sequence of photos as long as you hold the button, which is essential for action and for catching the exact peak of a moment, like a jump or an expression. The self-timer delays the shot by a few seconds after you press, which is useful for getting yourself into the photo or for eliminating the tiny vibration your finger causes when pressing the shutter on a tripod.

Most beginners leave this on single and only discover continuous mode when they miss a fast moment. If you photograph anything that moves, learn where this setting lives.
10. Image Quality (Raw vs. JPEG)
This setting determines what kind of file your camera saves. JPEG is a finished, processed file: the camera applies its own color, contrast, and sharpening, compresses the file to a smaller size, and discards the data it does not need. It is ready to share immediately but offers limited flexibility for editing. Raw is the minimally processed data from the sensor. It is not literally untouched (the camera still performs basic steps like converting the signal to digital and masking defective pixels, and some cameras apply light noise reduction or compression), but it skips the heavy color, contrast, and sharpening that the camera bakes into a JPEG. Raw files are large and look flat straight out of the camera, requiring editing, but they preserve far more of the information the sensor captured, which gives you much more latitude to pull back bright highlights that still hold detail, lift shadows, and correct white balance after the fact. (Highlights that are fully blown out, with no detail recorded at all, cannot be recovered in any format, but raw rescues far more near-overexposed detail than a JPEG can.)
If you plan to edit your photos, shoot raw, or shoot raw and JPEG together so you have both (which fills a memory card faster, so keep a spare on hand). If you want files ready to use straight out of the camera and do not plan to edit, JPEG is fine. The one regret you cannot undo is shooting an irreplaceable moment in JPEG and later wishing you had the editing flexibility of raw.
Where to Go From Here
These ten settings cover the vast majority of the decisions you will make as a photographer. You do not need to master all of them at once. Start with the three that control exposure (ISO, aperture, shutter speed), add exposure compensation when your photos come out too bright or dark, and learn the focus settings when you start photographing things that move. The rest will fall into place as you shoot.
If you want a structured path through these fundamentals with hands-on examples, the Fstoppers Photography 101 tutorial walks through exposure, composition, and camera operation from the ground up, and it is built for exactly the photographer who just learned what these settings mean and wants to put them to use. And once you start shooting raw and want to make the most of that editing flexibility, Mastering Adobe Lightroom covers the white balance, highlight, and shadow adjustments this article touches on. If you would rather learn by watching how these settings get used across different kinds of photography, The Well-Rounded Photographer follows eight instructors through eight genres, each applying these same fundamentals to a different style of shooting.


Join the Fstoppers community for free
-
Post comments and join in the discussions
-
Browse the site ad-free
-
Share your work and get featured in the community
-
Compete in the photo contests for fun and prizes
7 Comments
An excellent primer for all including those of us who have been into photography for so long these matters have become automatic however we need to be reminded of the mechanics of the processes.
Well written - complete and concise. Very nice, Alex.
This is the best summary of the basics I've ever read. Comprehensive but compact.
I miss analog radio. It was always a great example of ISO, if you are a bit off on the tuning, turning up the volume doesn't make it better, it increases distracting noise.
It's really good, Alex. Thank you. I teach photography here and kind of explain most of it. How you've done it as well but it would be good to share this link. I might even be able to print it off somehow thank you mate.
Very good, thanks Alex
11. Keep camera dry.