Blend modes decide what stays, what goes, and what glows in your edits. Learn them well and you can drop elements into scenes, add believable light, and color grade with intention without wrestling a dozen masks.
Coming to you from Aaron Nace with Phlearn, this practical video breaks blend modes into the groups that actually matter. You see the “darken” family make light areas vanish so shadows stay, and the “lighten” family do the opposite on command. Nace shows the quick way to cycle modes while you work: press V for the Move tool, then hold Shift and tap plus or minus to flip through options until the image clicks. That small habit speeds decisions and keeps you away from menu-diving.
The demo starts with a clean composite trick. You’ve got birds on a light background and a picture frame that needs something inside. Switch that bird layer to Multiply so the light backdrop drops out while the birds remain visible. If a tinted cast sneaks through, hit Levels and set a proper white point on the background to make it truly white, which Multiply treats as invisible. You place and transform the layer to taste, and because Multiply also deepens existing shadows, the frame’s shading picks up the birds naturally without fussy masking.
Next, flip the logic. Add a light leak that sits on a dark background and choose Screen so the black disappears and the glow remains. If a navy edge shows, run Levels again and sample the black point to crush it to true black. Duplicate, flip, and scale those leaks to build shape around the subject rather than across it. When the color feels off, open Hue/Saturation on the leak and slide until the tone fits, keeping the structure while changing the vibe.
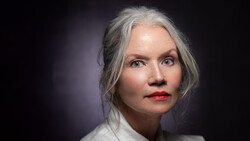
The video then moves beyond simple overlays into using photos as color and light engines. Take a colorful image, blur it heavily with Gaussian Blur to remove detail, then set it to Soft Light or Overlay over your portrait. Now, you’re not pasting a windmill into a face. You’re borrowing its color palette and light distribution to steer attention and unify tones. Move and scale the blurred layer until the bright area frames eyes or cheekbones. If it feels strong, pull opacity down rather than abandoning the effect.
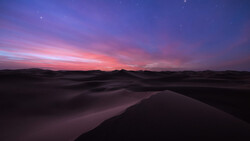
You can repeat the move with a second scene, this time brightening it slightly with Levels before the blur so Soft Light has something to work with. Now the portrait inherits subtle city glow while keeping skin and texture intact. When green turns moodier than intended, nudge the Hue slider and lock in the right color without rethinking the structure. To harmonize the whole stack, Nace tosses on a Gradient Map at low opacity, reverses it if needed, and clicks through presets until the mix settles into a cohesive grade. It’s fast, it’s editable, and it rewards experimentation more than perfectionism. Check out the video above for the full rundown from Nace.


Join the Fstoppers community for free
-
Post comments and join in the discussions
-
Browse the site ad-free
-
Share your work and get featured in the community
-
Compete in the photo contests for fun and prizes
No comments yet