Articles written by Quentin Decaillet
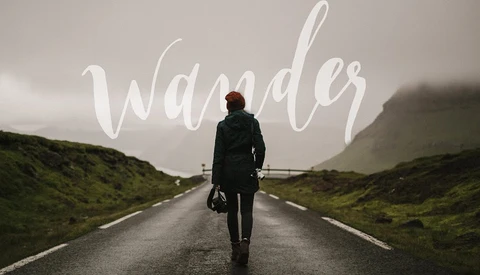
Instagram Stories have been around for quite a while now, and we have actually already shared a few articles regarding how you can make better use of them to build engagement on your account. In this new write-up, I wanted to share with you a couple of techniques that aren’t too tedious to use on a regular basis to help you build higher quality stories. The goal is to create stories that people will want to follow on a daily basis and thus start to engage more with you. Content may not be king on social networks anymore, but it’s still the only thing that retains followers.
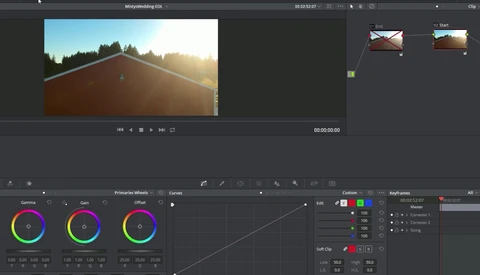
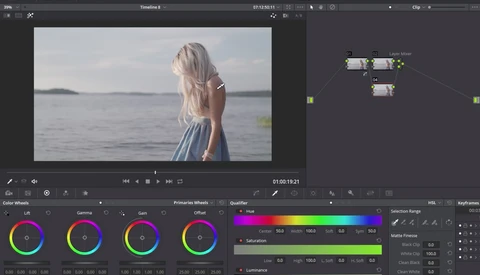
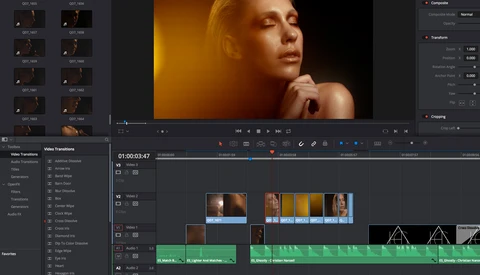
When grading videos, it’s not rare that we have to transition grades between different sequences or within one single shot. Using DaVinci Resolve 14, it’s quite easy to achieve a perfect transition from one grade to another. In this three-minute long tutorial, Casey Faris shows us just how to do this.
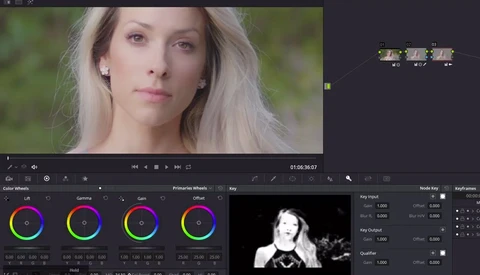
When you get in the video world, you soon realize that editing can go pretty far, but it’s not as easy as Photoshop. It tends to take more time to get to a decent result, and a tremendous patience to achieve perfection. In this short tutorial, Steve from MiesnerMedia shows us how to smooth out skin in our videos using DaVinci Resolve 14.
Each and every photographer has their own unique way of working with models, cameras, and light. It’s something that clearly shows through in the series Jessica Kobeissi has developed in which different photographers shoot the same model. In the most recent episode, she brought Dani Diamond and Brandon Woelfel back for a new shoot, but this time they added a few obstacles to make the challenge more fun.
Phase One announced a couple of new medium-format digital backs this year, the Trichromatic and the Achromatic. The latter is available for a whopping $63,000 in a kit with the XF body, and for that price it only shoots in black and white. At least that’s the way many seem to consider it. However, it’s much more than that. It captures black and white images like no other camera, and for the photographers that like black and white shooting film, this gorgeous beast offers a very similar workflow. See how it works and performs in this video.
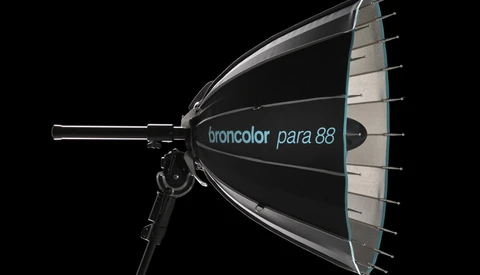
Broncolor is recognized in the photography industry as one of the most high-end flash brands available on the market. They are best known for their very reliable power pack systems and their extensive range of light shapers. Amongst the latter, there is one in particular that makes any photographer's eyes light up, and it’s the Para. It’s such a gorgeous piece of gear that some people even use it to decorate TV shows. But don’t think for a second it means it can’t perform just because it’s beautifully designed. It’s quite the opposite as you’ll discover through this Broncolor Para 88 kit review.
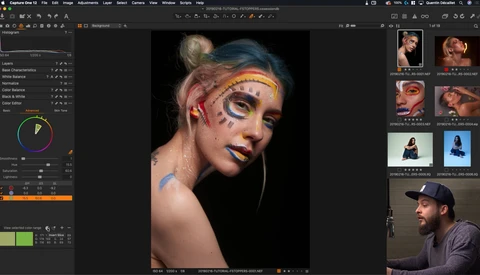
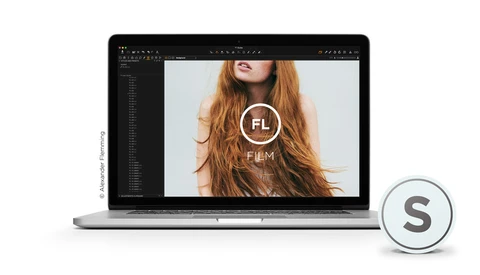
Phase One has already released multiple Styles Pack since the beginning of the summer. Today, they announced their brand new Film Styles Pack and I had the chance to play around for a few days before it was officially announced. Rather than offering you a simple release article, I thought a review would be more useful. After four weddings and a couple of portrait sessions edited with it, here are my thoughts and why this might just be the perfect pack for VSCO lovers who rely on Capture One for their professional photo editing work.
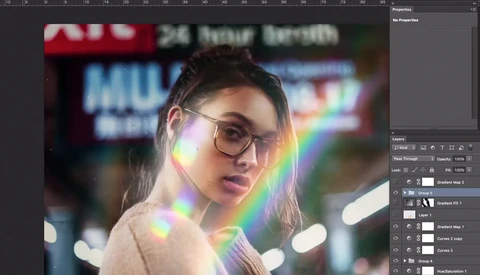
Adding a rainbow to your images can be done in many different ways. However, not every technique is easily put into practice or can offer a remarkably consistent result. For example, the prism method is very efficient to get the effect on your files straight out of camera, but it can make focusing and composition a bit difficult. In this tutorial, Jessica Kobeissi will show you a couple of simple techniques using only Photoshop.
The current trend for color grading videos is the orange and teal look. It’s not rocket science to understand why it works so well and why everyone uses it. Complementary colors are an easy choice when it comes to color grading and using orange for brighter tones allows keeping the skin tones look quite natural. In this nine-minute-long tutorial, Theo from MiesnerMedia shows us how we can achieve that trendy look using DaVinci Resolve 14.
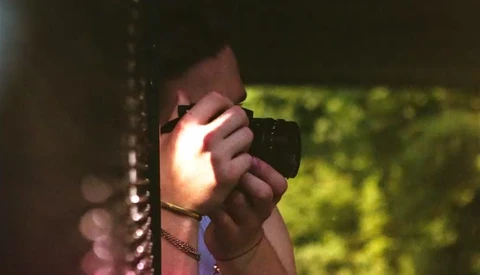
Since Stories have been added to Instagram, every social influence has tried to differentiate himself from the crowd. From filming with a camera like a vlog to editing images in Photoshop before adding them to a story, I’ve seen just about everything. The trend lately has been to integrate text on pictures to make it more attractive. Matti Haapoja from TravelFeels has come with an app to go one step further and tracked text to his content.
We have all been guilty of watching someone’s Instagram account and wonder how the hell the pictures are edited. Sebastian from TechGenie has recently been creating videos to demonstrate how to mimic some famous Instagramers editing style. The latest one on the list is named Sam Kolder and his desatured teal and orange look.
The Clone Stamp tool is without the shadow of a doubt one tool that everyone who works with Photoshop uses on a regular basis. It’s quite an incredible tool, and it can help save some tiny mistakes without too much work. Despite being easy to use, there are times where it doesn’t do exactly what we’d like it to. For example, in the case of recreating a pattern or texture that needs perspective correction, the tool won’t match your image vanishing point to the T. At least that’s what we are usually taught when learning Photoshop. However, there is a way to make the clone stamp tool smarter and correct the perspective for us.
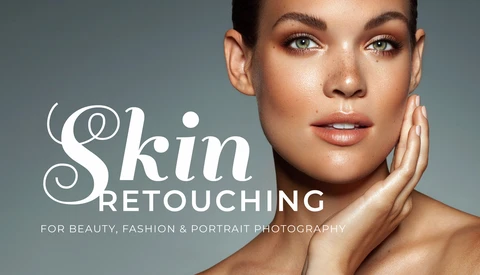
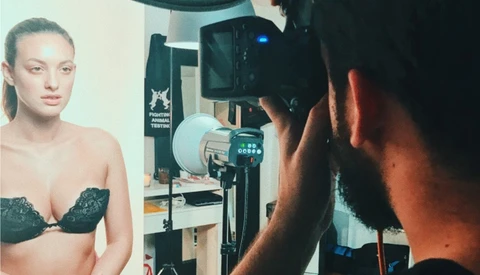
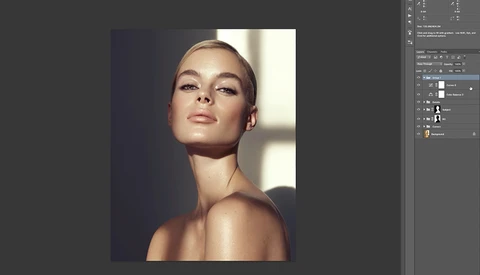
High-end retouching is all about keeping details and texture intact in an image so that it looks as natural as possible. Making sure the picture looks unretouched but polished is a matter of patience and wise choices in retouching techniques. In this video, watch retoucher Pratik Naik editing a photo shot by Andrea Belluso.
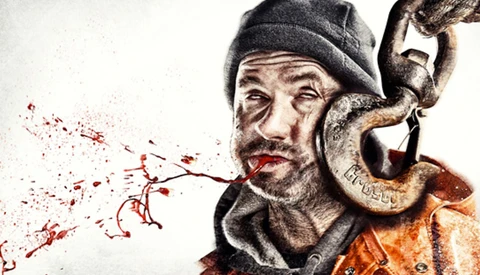
Commercial shoots and photography can be quite demanding and even taxing on the body. But when I started out this art, I would have never thought it could go as far as taking out four of teeth out to create an advertising image. Well, that’s what Blair Bunting was willing to do for a campaign he shot for Discovery’s Deadliest Catch.
Artificial lighting is one of the best tools a photographer can learn to implement in his work. It’s not something we have to use and rely on all the time, but knowing it’s there and not being afraid of it is always best. When working in a studio for portrait and beauty photography, it can become a necessity depending on the natural light you have and the looks you shoot. In this short behind the scenes, Rossella Vanon shows how she created six different lighting setups that keep a consistent feeling. Take this opportunity to learn new lighting setups and understand her thought process when building a set.
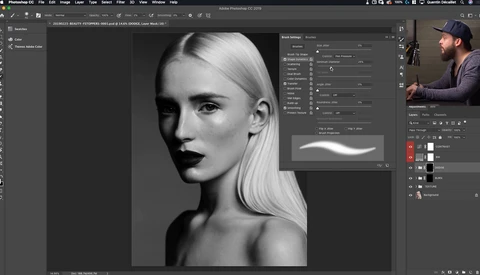
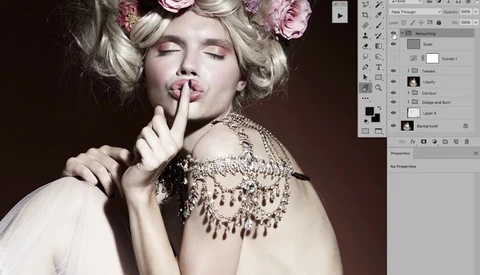
The healing brush in Photoshop is a potent tool to clean things up. It can be used in numerous scenarios and works well most of the time. However, if there's one scenario where it doesn’t perform like we would like it to, it’s in the case of edges. For example, when you need to alter the edge of a face on a portrait or the border of a building when shooting architectural images, it tends to mess things up and create some sort of blurry areas instead of clean lines. In this tutorial, Joseph Parry shows us how to make the healing brush work the way we want it in those situations.
When shooting fast-paced action or a scene with tons of movements, it can be interesting to add more drama by using speed ramping. The technique consists in having a scene that’s played at different speeds depending on what’s happening. It may not make sense for now, but if you want to make your videos more attractive or just add a new tool to your belt, be sure to watch this tutorial.
It’s been quite trendy in the past few months to see handwritten text composited onto images on Instagram. Perhaps you’ve been wondering how it’s done or maybe you’ve just been looking for a way to make your writing even more personalized. No matter the reason why you’re reading this article, if you want to give a more personal dimension to your images with handwritten text, be sure to watch this tutorial.
Until a few months ago, you could know who was following you, or not, as well as tons of other useful information on your following base for all stalkers and communication gurus out there by simply using apps such as InsTrack. However, as Instagram is trying to have third-party apps comply with their rules, such apps are slowly disappearing or being reduced to more basic specs. Instead of leaving those tools alone, the photo-sharing app is now bringing a feature of their own called "Follows you" that let you know if someone is indeed following you or not.
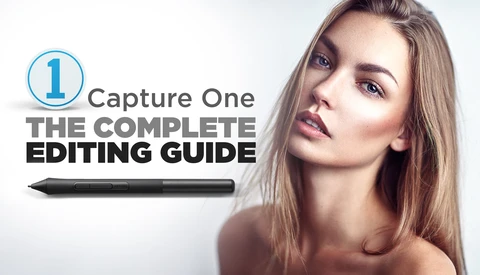
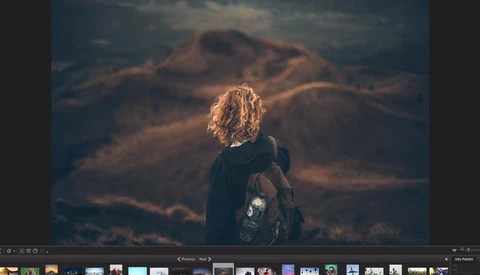
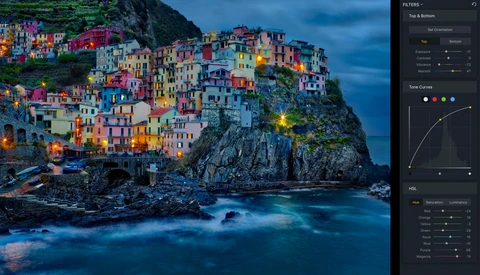
Color grading is amongst the most important step of retouching. Along with lighting, it sets the mood of your image and can also help tie together the different elements of your composition. Learning all the different ways of altering colors in a picture is probably as important if not more important than knowing how to retouch skin or remove objects. In this 20-minute long tutorial, Michael Woloszynowicz explains everything there is to know about the color balance layer adjustment and how to use it to color balance your images in the best way possible.
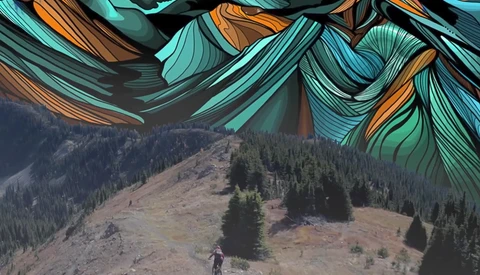
In many artistic disciplines and sports, people are told they should concentrate on one thing and one thing only. Being specialized seems to be the trend and what most industry leaders appear to believe in. However, there are exceptions to this. First, those industry leaders themselves that are more often than not great educators as well. But then, there are those people that truly shine in different domains such as Micayla Gatto. Watching her recent video where she rides her bike on mountains and her drawings is just an amazing experience, one you should see with your own eyes to believe it.
Earlier this year I reviewed ACDSee Ultimate 10. However, ACDSee just released the 2018 version of their flagship photo editing software and thus it’s time for an update. The brand new iteration promises to offer a more efficient workflow, layered editing for advanced retouching, vastly improved performances, and new tools for photographers to edit their pictures better than ever. Let’s see how this translates in the real world!
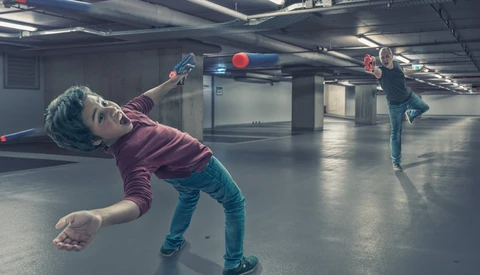
We have featured Adrian Sommeling quite a few times over the summer and with reason. His composite photography work, or digital art if you prefer, is stunning and his videos give tons of inside tips to improve our very own work. In his latest creation, he Photoshopped his son and himself playing with foam guns replaying the famous bullet time Matrix scene. Learn all about the creation of this masterpiece in Sommeling’s video.
Since Adobe adopted a subscription-based licensing system, many users have started looking at other alternatives. While ACDSee had attractive solutions until now, their latest creation, ACDSee Photo Studio Ultimate 2018, seems to be a serious contender to Photoshop CC and Lightroom. Even better yet, you can process your raw files and then edit them within the very same software, no need for round trips.
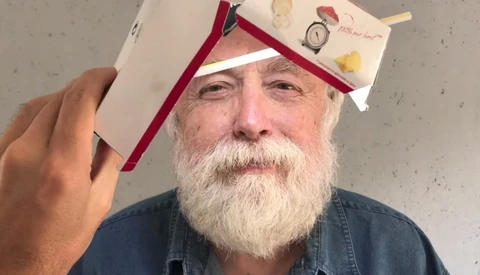
Being a commercial photographer means being able to deliver no matter what the conditions are and pushing the boundaries for the client. In this video, as you’ll see, French photographer Philippe Echaroux was given the challenge to go even further and create stunning portraits using only an iPhone, a flashlight, and a Big Mac box. Yes, you read that last item correctly! If you’re wondering how he did it, be sure to watch the full video.
Vincent Munier is a Nikon ambassador, but more importantly, he’s probably one of the best animal and wildlife photographers. He’s photographed quite a few subjects in his career, but shooting the snow leopard in its environment was an exceptional project. It's one that Nikon supported and we now can enjoy through this beautiful video.
A few weeks ago, Adrian Sommeling showed how he Photoshopped his son and himself driving an Aston Martin in Iceland. He’s back with yet another video, and this time it’s a shattered iPhone 8 composite. This one is particularly interesting as it includes glass and thus reflections which are both amongst the most difficult things to keep natural looking when working on composites.
While photography and videography are different, they share many common aspects. Starting with one, and then also learning the other is an excellent idea to improve your craft and potentially open doors for more jobs by becoming more versatile. In a recent video Matti Haapoja released on TravelFeels, he explains to us why he believes shooting stills is crucial for videographers.
Sean Tucker started his career as a food photographer and had the chance to work alongside with some of the best food stylists in the industry. Thanks to this experience, he’s learned quite a few secrets one needs to know in order to capture the most stunning food pictures possible. Through this 15-minute long tutorial, Tucker shares some of the fundamental knowledge every photographer and foodies should acquire. So if you’d like to improve or get started with this genre, be sure to check the full video and take notes.
DaVinci Resolve is a fantastic tool and has everything most videographers need to create perfect looking videos. However, the playback can be a bit slow and thus make the whole workflow a pain. But there is a one-click solution that will make your life much better. When I found out about it, my editing process became much faster.
It’s already the fourth time Jessica Kobeissi got together with three other photographers to challenge themselves on a shoot. Each artist is given the opportunity to choose the outfit and location for one set, and then everyone has to come up with something in their own style. For this episode, the photographers were Joey L, Brandon Woelfel, Dani Diamond, and Jessica Kobeissi. Each having a very different photographic style, the video is quite entertaining.
Rising photographers born into a family of considerable means and influence have received quite a bit of hate from social media, and often times without reason. No one truly knows what someone such as Brooklyn Beckham has gone through to get where he is. Perhaps his way up was just as complicated as anyone. Perhaps it was not, and he’s lucky to have the background and family he does. It doesn’t change the fact that his work is far from terrible and, as the follower video shows, that is just like all of us, a passionate photographer.
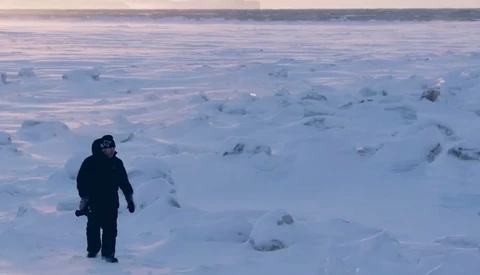
Photographing wild animals in their natural environment is very rewarding and one of the most beautiful experiences that a nature photographer can live. Actually, that most photographers could live. Being face to face with a polar bear with nothing but a camera in between is both extraordinarily breathtaking and scary. Wild nature photographer Joshua Holko, filmmaker Abraham Joffe, and cinematographer Dom West went to the Arctic and documented this experience so that we could try to relive it with them.
Amongst the drones available on the market in 2017, the DJI Spark is surely not amongst the top ones in terms of files quality. The sequences it creates are quite difficult to color grade in postproduction and thus it makes it hard for videographers to mix the clips with footage from another camera. However, there are ways to improve what you can get out of Spark’s videos. Casey Faris gives us one of the tricks he uses to maximize the dynamic range of the images.
When Picktorial 3 was released, it promised a solid support of Fuji RAF files. Today, it’s getting even better by offering film simulation color profiles. The profiles are available as an add-on specifically designed for Picktorial 3 and Fujifilm X-Trans sensor cameras. Using the Fujifilm Film-Simulation look this way will allow you to retain all the details and data of your X-Trans Sensor output to take the most out of your raw files.
The DJI Spark is one of the most attractive options out there for people who want to get into aerial photography and videography. However, when getting into this whole new world, it may be overwhelming to learn everything about the genre. Casey Faris created a short five minute long tutorial to help you out making your Spark’s footage look better.
Since the arrival of digital photography almost 20 years ago now, the photographer’s workflow and its equipment have changed quite significantly. While investing in a solid camera, tack sharp lenses, and reliable storage equipment is a very good idea, one piece is often misunderstood or underrated: the monitor. Having a poor monitor is kind of like looking at your work while being color blind. I know that for a fact because I have been relying on poor screens for a long time. Recently, I’ve been given the opportunity to try the ViewSonic VP2768 for you, and I think it’s an amazing screen. Here’s why I think you should consider it if you don’t already own a great monitor.
HDR is a beautiful but rather complicated editing process, or at least that was the case until Aurora HDR was designed by Macphun and photographer Trey Ratcliff. It’s now become an effortless and unintimidating retouching technique to bring the most out of your architectural and landscape images. Today, the California-based developer announced the release of Aurora HDR 2018 and it promises to make HDR photography even easier and more fun!
Sharing your content is probably one of the best and fastest way to grow a community and a base of potential customers. Instagram, Facebook, Pinterest, and other social media platforms are some of the most common places to start pushing out pictures to the largest amount of people possible. However, when you get into video, you soon realize that sometimes things get a bit trickier. One of the issues I recently encountered was when sharing a YouTube video on Facebook, the thumbnail simply wouldn’t appear. In this article, I’ll show you how to solve this problem and what to do to avoid it in the future.
ACDSee Video Studio 2 is a software specially designed for those looking either for a simple video editing tool or a way to record their screen and create content out of it. In my recent review, I mentioned a couple of times how effortless the process is. However, I thought it only be wise to show you through an example how it works and how simple the app truly is. People just getting started in the video world or those of you looking for a way to record and edit educational content, be sure to read the full article.