In one of my recent articles, I showed you how to create dynamic luminosity masks manually. In my opinion, it’s the best way to create masks based on brightness levels and confirming this idea is the introduction of a similar feature in Greg Benz’s panel, Lumenzia. The recent update of the luminosity masking panel added a couple of new features, including a "blend if" method for masking layers.
Masking plays a crucial role in the quality of your retouching. There are so many tools available to create and refine masks, that’s often times we forget the most basics and useful ones. One of them is a bit hidden and it seems like many don’t even know it exists! However, it’s probably amongst the most useful options to refine a mask and make your adjustment shine through in a more natural and convincing way. It’s the feather option and I’m going to show you how you can use it with a real-world example.
Bots have been used on social networks for as long as I can remember. They are a way of growing one’s community without much effort and getting more attention than by doing everything manually. However, it’s not organic, and thus social media companies have tried to shut them down for a while. Instagram recently launched a witch hunt and managed to get Instagress to close down. Yesterday, another big bot service, Mass Planner, was taken down. Is it the end of the bot era?
After updating their Cintiq line with the Cintiq Pro 13 and 16 inch in the previous month, Wacom announces two new products coming for the beginning of 2018. Both products will complete the Cintiq Pro range and come with brilliant 4K displays. One will be 24 inches and the second 32 inches, offering a solution for everyone.
When working with a ton of footage, culling them down and selecting just the part of them that you need can take quite a while. There a few methods to make it faster and easier, and one of them is called Pancake timelines. In this video, Justin Odisho explains to us how it works. If you are video editor with working tight deadlines or one looking for a way to speed things up, this tutorial is definitely made for you.
Being a commercial photographer means being able to deliver no matter what the conditions are and pushing the boundaries for the client. In this video, as you’ll see, French photographer Philippe Echaroux was given the challenge to go even further and create stunning portraits using only an iPhone, a flashlight, and a Big Mac box. Yes, you read that last item correctly! If you’re wondering how he did it, be sure to watch the full video.
The current trend for color grading videos is the orange and teal look. It’s not rocket science to understand why it works so well and why everyone uses it. Complementary colors are an easy choice when it comes to color grading and using orange for brighter tones allows keeping the skin tones look quite natural. In this nine-minute-long tutorial, Theo from MiesnerMedia shows us how we can achieve that trendy look using DaVinci Resolve 14.
Since TTL and other fancy features have been introduced to strobes, flash manufacturers have had to develop a different remote for each camera brand. Profoto and others have tried their best to offer as much choice as possible, but the Fujifilm compatibility was lagging behind. A few days ago, Broncolor announced their RFS 2.2 for Fuji would arrive before the end of the month, and today its Profoto turns to introduce its Air Remote TTL-F.
Most tutorials available for free on YouTube explaining how to color grade your footage are just ways to sell LUTs, presets, or to show you how to add teal and orange to your clips. Nate from Tutvid decided to make a more comprehensive video to help you get started with Adobe Premiere Lumetri tool so you can grade any of your videos the way you want.
Baber Afzal is well known for his dramatic looking fine art cityscape and landscape pictures. In this 12-minute long tutorial, he’ll show you how to achieve the same look on your pictures by taking you through one of his edits in Capture One and giving precious tips along the way.
If you wonder how people who keep only two complementary colors in their images do it, then look no further. You may not know what the Technicolor Two-Strip technique or Process 2 is, but mimicking it in post-production is what you’ve been looking for to achieve this distinctive look.
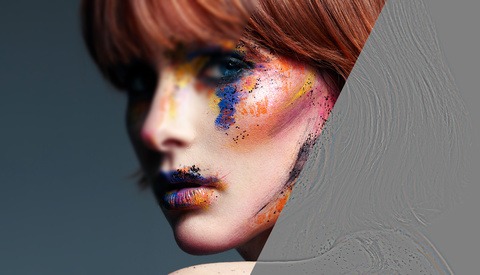
Frequency separation has been all the rage in the retouching industry in the past couple of years. Hated, loved, criticized, acclaimed, it has seen it all. But do you really know how it works, what it can do, and more?
Canon, Nikon, Sony, Fujifilm, Olympus, or Panasonic, it doesn’t matter what system you use with Elinchrom anymore. All of these are finally or extremely close to being compatible with TTL, HSS, and Hi-Sync.
When switching from Lightroom to Capture One, I hear many users complain about not being able to bring their presets into their new photo editing software of choice. Well, thanks to Picture Instruments, it's now possible!
When working on location, softboxes are not always the best choice as they can be quite cumbersome to assemble. Umbrellas tend to be a lot faster to set up. Thanks to Elinchrom and its Snaplux range, you won't have to choose between the light quality of a softbox and the ease of use an umbrella.